

 User Notice
 Forum Links


Thread Information
Creator
10-13-12 12:47 AM
Post
10-13-12 10:12 PM
9.2
Today: 0
Users: 0 unique
Thread Actions
Legend of Zelda (NES) Walkthrough
10-13-12 12:47 AM
ICantThinkOfName is Offline
| ID: 671853 | 2619 Words

POSTS: 61/76
POST EXP: 3146
LVL EXP: 43995
CP: 148.7
VIZ: 10326

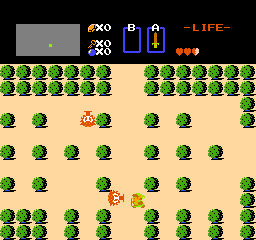
I've beaten this game 3 times on my old NES a friend gave me about 2 years ago, so since I'm so familiar with this game, I decided to make a walkthrough. Controls D-pad (Arrow keys/WASD): Move A (X): Use Sword B (Z): Use Secondary Item Start (Enter): Start/Pause Game Select (R. Shift): Navigate Save Screen/Pause Game Map The image is too large to upload, so click here to view it (I suggest saving it and zooming in).  Chapter 1: The Gathering Chapter 1: The Gathering  1.1: La Bomba 1.1: La Bomba The game begins by tossing Link in the overworld. On the
Walk right a screen and you'll find the first enemy in the
You'll now reach an area that has a coastline and you'll
Keep killing the creatures until you reach the eastern
 1.2: A little heart-to-heart 1.2: A little heart-to-heart Now, we'll need to use the bombs to get some new items.
Now, head up one screen you'll find another new enemy, the
Head back left a screen and head up one screen. There's some
Again, head up a screen. Place a bomb against the wall at
 1.3: A New Sword 1.3: A New Sword Now we can snag a new Sword, but first, there are a few
Now, head back down and head left a screen. Head up the
Go and head down a screen, then left a screen, fighting off
After obtaining the Blue Candle head down a screen. From
Leave the cave and head down the stairs. Start heading left and you'll find some falling rocks. They will just fall right down the screen and if they hit you, you'll be hurt. They're rocks, so it's impossible to kill them. Dodge the rocks for three screens, and then head down once and right once. Using your new Blue Candle, burn the far right bush on the bottom to reveal a cave with thirty rupees inside. Grab them and leave. Head down two screens and burn the bush at the top right corner of the screen to reveal another secret rupee cave. Enter it for another thirty rupees. Exit the cave and head left. Burn the fifth bush from the right and enter it for another heart container. Exit the cave. Head left again and burn the bush in the corner. Enter the cave and purchase the Magical Shield. This shield lets us block some more projectiles, such as the Zola's beam.  1.5: Arrows and Practicing Medicine 1.5: Arrows and Practicing Medicine  Exit the cave and head down a screen and burn the bottom bush on the far left. Enter the cave for another 10 extra rupees. Grab them and leave. Now, to get the arrows. Head right three screens, up one screen, and right a screen, killing or avoiding the various octoroks and tektites on your way. Enter the cave and purchase the Arrows. You should have plenty of rupees if you've been following along. Exit the cave and head right a screen, then down a screen. Burn the far bottom-left bush. Enter the staircase and grab the 10 rupees. After leaving, head down and burn the bottom bush in the center. Enter the staircase and grab the 100 rupees. Leave the cave. Head left four screens and place a bomb at the top of the wall here. Enter it for some more secret rupees. This time there's 30 for us to grab. Leave the cave and continue heading left for three screens. Enter the cave here and use the letter we got earlier. The old woman will show you some potions for you to buy. They will fully restore your health, and the red potion can be used twice. Buy the red one, if you'd like, and leave.  1.6: Cast it in the fire, Frodo 1.6: Cast it in the fire, Frodo Leave the cave and head to the left one screen, down one screen, and left two. There are plenty of Moblins on this path, so be careful. Here, place a bomb to the right of the little 'crack' in the wall to reveal another hidden rupee location. Enter it for thirty rupees and leave. Head up a screen and here, you'll find the Lost Woods. You can only leave if you go right or follow the secret pattern. Just head right for now. Here, there's a large chunk of trees. Burn the third bush from the top for 100 more rupees. Head up one screen, then left one screen and burn the bush in the bottom right corner to find a secret rupee cave with 10 rupees inside. Leave the cave and head right three screens, then up two. Tap the center Armos on the top row here to reveal a cave. The armos will hurt you if you move it from the bottom, so only move it from the top or from the sides. Enter it and purchase the Blue Ring. The Blue Ring is a very useful item, as it cuts the damage you take in half. _________________ Items  Wooden Sword Wooden Sword The very first sword in the game. It's reliable and will work just fine for our needs. However, it lacks power, so it should be replaced early. Bombs Used to blow stuff up (surprise, surprise) and act as a weapon. We'll use this to discover some overworld secrets. They're sold in many shops across Hyrule, and sometimes, enemies may drop them.  Old Man's Letter Old Man's Letter This letter is used to let us purchase potions from the Old Woman. There's no use for it now, but it'll be very important later on. Let's just keep it with us for now.  Blue Candle Blue Candle The Blue Candle can be used to burn down some trees and also as a very effective long-lasting weapon. Sadly, it can only be used once per screen, but we'll get an upgraded one later. White Sword The second of three swords. It has double the power of the wooden sword and is twice as useful. Your journey should be much easier with this by your side.  Magical Shield Magical Shield The Magic Shield is quite an upgrade over the Wooden Shield. It is larger and will deflect more projectiles including beams from Zolas. It is very useful, but it may be eaten by Like-Likes, so watch out for them. Arrows This item is incredibly potent against some enemies. We can't use it yet, but once you can, it'll come in handy against the variety of enemies we'll face in the upcoming dungeons.  Medicine Medicine The Medicine comes in two forms, Red and Blue. They both heal you to the fullest, but the red one turns into a blue one when you use it, making it have two uses. It's a very useful potion, so only use it in an emergency. Blue Ring The Blue Ring is a very useful item. It cuts all damage dealt to you in half. Now, Octoroks need to hit you twice for it to have an effect! _________ Enemies:   Octorock Octorock Threat ||| | Attacks  Contact Rock Contact Rock Octoroks are enemies that spit rocks at you. They are annoying, but commonly leave rupees behind for you to grab. The red variant has less defense and'll take one hit with the wooden sword, while the blue variant'll take two. The blue variant may also leave bombs behind.   Tektite Tektite Threat |||||| | Attacks ContactTektites are annoying enemies that can be difficult for new players. They like to jump around a lot and it can get annoying. They take only one hit with any sword to bring down, and the blue one doesn't jump as far as the red one.   Leever Leever Threat |||||| | Attacks ContactLeevers can get annoying and are a lot more difficult than the past two enemies. They hide in the ground and will occasionally pop up near you to attack. The red and blue one have quite a big difference. The blue variant, when hit, won't hide in the ground, but the red one, once hit, will hide in the ground briefly and reappear in another location. The red one also has less health than the blue one. It takes two hits with the wooden sword to kill a red Leever, and four to kill a blue Leever.  Zola Zola Threat |||||||| | Attacks BeamZolas are common enemies that are nearly impossible for us to kill at the moment. They live in the lakes and oceans of Hyrule and shoot a beam at you. The most you can do right now is dodge their beams They take two hits with the wooden sword to kill and there is only one variant of the Zola.   Moblin Moblin Threat |||||||| | Attacks Contact Arrow Moblins are a mix of bulldogs and pigs. They carry Bows and will shoot you on sight. They're weak, but have high health. The Orange variant takes two hits to kill while the Blue variant takes four.  Armos Armos Threat |||||| | Attacks ContactArmos Statues are the bodies of fallen Hylian soldiers. When touched, they will unfreeze and run around the screen. They also walk at two different speeds, but it's impossible to tell when they're going to use which speed. They take three hits to kill with your wooden sword. However, they take only one to kill with the bombs, but it's difficult to hurt them with it.  Peahat Peahat Threat |||||||||| | Attacks ContactPeahats are the spirits of dead flowers that fly around trying to hit you. They are too high for you to reach with your sword, so wait until they've landed to attack them before they fly off again. No matter how annoying they are, they only take one hit to kill, so be quick about getting them.   Lynel Lynel Threat |||||||||||||| | Attacks Contact Sword BeamLynels resemble Centaurs closely. They are Horse-men and wield swords and shields. They shoot out a magical beam from their sword, similar to Link when he has full power. They are very strong, so it'll be a good idea to avoid them. The Blue Lynels take six hits with the wooden sword to kill, while the red ones only take three.  Boulder Boulder Threat |||||||| | Attacks ContactBoulders are chunks of Death Mountain that fall during the eruption. They cannot be killed and will just fall down the screen. Dodging them is the only thing you can do. ______________________ Check back soon for part 2!
I've beaten this game 3 times on my old NES a friend gave me about 2 years ago, so since I'm so familiar with this game, I decided to make a walkthrough. Controls D-pad (Arrow keys/WASD): Move A (X): Use Sword B (Z): Use Secondary Item Start (Enter): Start/Pause Game Select (R. Shift): Navigate Save Screen/Pause Game Map The image is too large to upload, so click here to view it (I suggest saving it and zooming in). Chapter 1: The Gathering 1.1: La Bomba The game begins by tossing Link in the overworld. On the
Walk right a screen and you'll find the first enemy in the
You'll now reach an area that has a coastline and you'll
Keep killing the creatures until you reach the eastern
1.2: A little heart-to-heart Now, we'll need to use the bombs to get some new items.
Now, head up one screen you'll find another new enemy, the
Head back left a screen and head up one screen. There's some
Again, head up a screen. Place a bomb against the wall at
1.3: A New Sword Now we can snag a new Sword, but first, there are a few
Now, head back down and head left a screen. Head up the
Go and head down a screen, then left a screen, fighting off
After obtaining the Blue Candle head down a screen. From
Leave the cave and head down the stairs. Start heading left and you'll find some falling rocks. They will just fall right down the screen and if they hit you, you'll be hurt. They're rocks, so it's impossible to kill them. Dodge the rocks for three screens, and then head down once and right once. Using your new Blue Candle, burn the far right bush on the bottom to reveal a cave with thirty rupees inside. Grab them and leave. Head down two screens and burn the bush at the top right corner of the screen to reveal another secret rupee cave. Enter it for another thirty rupees. Exit the cave and head left. Burn the fifth bush from the right and enter it for another heart container. Exit the cave. Head left again and burn the bush in the corner. Enter the cave and purchase the Magical Shield. This shield lets us block some more projectiles, such as the Zola's beam. 1.5: Arrows and Practicing Medicine Exit the cave and head down a screen and burn the bottom bush on the far left. Enter the cave for another 10 extra rupees. Grab them and leave. Now, to get the arrows. Head right three screens, up one screen, and right a screen, killing or avoiding the various octoroks and tektites on your way. Enter the cave and purchase the Arrows. You should have plenty of rupees if you've been following along. Exit the cave and head right a screen, then down a screen. Burn the far bottom-left bush. Enter the staircase and grab the 10 rupees. After leaving, head down and burn the bottom bush in the center. Enter the staircase and grab the 100 rupees. Leave the cave. Head left four screens and place a bomb at the top of the wall here. Enter it for some more secret rupees. This time there's 30 for us to grab. Leave the cave and continue heading left for three screens. Enter the cave here and use the letter we got earlier. The old woman will show you some potions for you to buy. They will fully restore your health, and the red potion can be used twice. Buy the red one, if you'd like, and leave. 1.6: Cast it in the fire, Frodo Leave the cave and head to the left one screen, down one screen, and left two. There are plenty of Moblins on this path, so be careful. Here, place a bomb to the right of the little 'crack' in the wall to reveal another hidden rupee location. Enter it for thirty rupees and leave. Head up a screen and here, you'll find the Lost Woods. You can only leave if you go right or follow the secret pattern. Just head right for now. Here, there's a large chunk of trees. Burn the third bush from the top for 100 more rupees. Head up one screen, then left one screen and burn the bush in the bottom right corner to find a secret rupee cave with 10 rupees inside. Leave the cave and head right three screens, then up two. Tap the center Armos on the top row here to reveal a cave. The armos will hurt you if you move it from the bottom, so only move it from the top or from the sides. Enter it and purchase the Blue Ring. The Blue Ring is a very useful item, as it cuts the damage you take in half. _________________ Items Wooden Sword The very first sword in the game. It's reliable and will work just fine for our needs. However, it lacks power, so it should be replaced early. Bombs Used to blow stuff up (surprise, surprise) and act as a weapon. We'll use this to discover some overworld secrets. They're sold in many shops across Hyrule, and sometimes, enemies may drop them. Old Man's Letter This letter is used to let us purchase potions from the Old Woman. There's no use for it now, but it'll be very important later on. Let's just keep it with us for now. Blue Candle The Blue Candle can be used to burn down some trees and also as a very effective long-lasting weapon. Sadly, it can only be used once per screen, but we'll get an upgraded one later. White Sword The second of three swords. It has double the power of the wooden sword and is twice as useful. Your journey should be much easier with this by your side. Magical Shield The Magic Shield is quite an upgrade over the Wooden Shield. It is larger and will deflect more projectiles including beams from Zolas. It is very useful, but it may be eaten by Like-Likes, so watch out for them. Arrows This item is incredibly potent against some enemies. We can't use it yet, but once you can, it'll come in handy against the variety of enemies we'll face in the upcoming dungeons. Medicine The Medicine comes in two forms, Red and Blue. They both heal you to the fullest, but the red one turns into a blue one when you use it, making it have two uses. It's a very useful potion, so only use it in an emergency. Blue Ring The Blue Ring is a very useful item. It cuts all damage dealt to you in half. Now, Octoroks need to hit you twice for it to have an effect! _________ Enemies: Octorock Threat ||| | Attacks Contact Rock Octoroks are enemies that spit rocks at you. They are annoying, but commonly leave rupees behind for you to grab. The red variant has less defense and'll take one hit with the wooden sword, while the blue variant'll take two. The blue variant may also leave bombs behind. Tektite Threat |||||| | Attacks ContactTektites are annoying enemies that can be difficult for new players. They like to jump around a lot and it can get annoying. They take only one hit with any sword to bring down, and the blue one doesn't jump as far as the red one. Leever Threat |||||| | Attacks ContactLeevers can get annoying and are a lot more difficult than the past two enemies. They hide in the ground and will occasionally pop up near you to attack. The red and blue one have quite a big difference. The blue variant, when hit, won't hide in the ground, but the red one, once hit, will hide in the ground briefly and reappear in another location. The red one also has less health than the blue one. It takes two hits with the wooden sword to kill a red Leever, and four to kill a blue Leever. Zola Threat |||||||| | Attacks BeamZolas are common enemies that are nearly impossible for us to kill at the moment. They live in the lakes and oceans of Hyrule and shoot a beam at you. The most you can do right now is dodge their beams They take two hits with the wooden sword to kill and there is only one variant of the Zola. Moblin Threat |||||||| | Attacks Contact Arrow Moblins are a mix of bulldogs and pigs. They carry Bows and will shoot you on sight. They're weak, but have high health. The Orange variant takes two hits to kill while the Blue variant takes four. Armos Threat |||||| | Attacks ContactArmos Statues are the bodies of fallen Hylian soldiers. When touched, they will unfreeze and run around the screen. They also walk at two different speeds, but it's impossible to tell when they're going to use which speed. They take three hits to kill with your wooden sword. However, they take only one to kill with the bombs, but it's difficult to hurt them with it. Peahat Threat |||||||||| | Attacks ContactPeahats are the spirits of dead flowers that fly around trying to hit you. They are too high for you to reach with your sword, so wait until they've landed to attack them before they fly off again. No matter how annoying they are, they only take one hit to kill, so be quick about getting them. Lynel Threat |||||||||||||| | Attacks Contact Sword BeamLynels resemble Centaurs closely. They are Horse-men and wield swords and shields. They shoot out a magical beam from their sword, similar to Link when he has full power. They are very strong, so it'll be a good idea to avoid them. The Blue Lynels take six hits with the wooden sword to kill, while the red ones only take three. Boulder Threat |||||||| | Attacks ContactBoulders are chunks of Death Mountain that fall during the eruption. They cannot be killed and will just fall down the screen. Dodging them is the only thing you can do. ______________________ Check back soon for part 2!
|
| Johto League Conqueror |
Affected by 'Laziness Syndrome'
Registered: 04-29-12
Location: Marioposa, CA
Last Post: 4008 days
Last Active: 2842 days
10-13-12 01:16 AM
 iSPY! is Offline
| ID: 671864 | 27 Words
iSPY! is Offline
| ID: 671864 | 27 Words
 iSPY! is Offline

POSTS: 268/274
POST EXP: 14378
LVL EXP: 295747
CP: 36.6
VIZ: 13189
Local Mods : I think this is a copy paste .. Look at this this site : http://www.zeldadungeon.net/Zelda01-the-legend-of-zelda-walkthrough-01.php But if not , sorry for the wrong information . http://www.zeldadungeon.net/Zelda01-the-legend-of-zelda-walkthrough-01.php But if not , sorry for the wrong information . |
| Another " Regular Show " Fan |
Affected by 'Laziness Syndrome'
Registered: 10-04-12
Location: Our House
Last Post: 4242 days
Last Active: 4241 days
10-13-12 07:34 AM
 Singelli is Offline
| ID: 671911 | 7 Words
Singelli is Offline
| ID: 671911 | 7 Words
 Singelli is Offline

POSTS: 853/8698
POST EXP: 1189395
LVL EXP: 53240873
CP: 67335.2
VIZ: 3148028
It is. It's plagiarized from this site. |
| Singelli |
Affected by 'Laziness Syndrome'
Registered: 08-09-12
Location: Alabama
Last Post: 2557 days
Last Active: 2533 days
10-13-12 04:20 PM
 megamanmaniac is Offline
| ID: 672049 | 21 Words
megamanmaniac is Offline
| ID: 672049 | 21 Words
 megamanmaniac is Offline

POSTS: 1016/4966
POST EXP: 452698
LVL EXP: 23283169
CP: 17207.9
VIZ: 151142
If its plagiarized then it's probably best to contact a global moderator. YourMajestyKen: According to what I see this is plagiarized material. YourMajestyKen: According to what I see this is plagiarized material. |
| Triple M |
Affected by 'Laziness Syndrome'
Registered: 04-12-12
Location: Access withheld from you
Last Post: 2555 days
Last Active: 2551 days
10-13-12 04:32 PM
 Mother3fan5 is Offline
| ID: 672053 | 19 Words
Mother3fan5 is Offline
| ID: 672053 | 19 Words
 Mother3fan5 is Offline

POSTS: 750/1599
POST EXP: 65090
LVL EXP: 4229823
CP: 1056.8
VIZ: 44071
megamanmaniac : need some help since you summon failed? EDIT- Gonna try this again, since megamanmanic told me to. EDIT- Gonna try this again, since megamanmanic told me to. |
| the mothcan |
Affected by 'Laziness Syndrome'
Registered: 06-02-12
Last Post: 3170 days
Last Active: 2966 days
10-13-12 04:34 PM
megamanmaniac is Offline
| ID: 672056 | 40 Words
megamanmaniac is Offline
POSTS: 1017/4966
POST EXP: 452698
LVL EXP: 23283169
CP: 17207.9
VIZ: 151142
Mother3fan5 : I intentionally summoned YourMajestyKen so that I don't summon the mods again. also, it isn't a good idea to summon both the Local Mods and the global Mods. It could cause confusion and is a waste of notifications for them. |
| Triple M |
Affected by 'Laziness Syndrome'
Registered: 04-12-12
Location: Access withheld from you
Last Post: 2555 days
Last Active: 2551 days
10-13-12 04:38 PM
Mother3fan5 is Offline
| ID: 672059 | 14 Words
Mother3fan5 is Offline
POSTS: 751/1599
POST EXP: 65090
LVL EXP: 4229823
CP: 1056.8
VIZ: 44071
megamanmaniac : Ok, I'll try this again. YourMajestyKen : This is plagiarized like everyone else said. YourMajestyKen : This is plagiarized like everyone else said. |
| the mothcan |
Affected by 'Laziness Syndrome'
Registered: 06-02-12
Last Post: 3170 days
Last Active: 2966 days
10-13-12 04:40 PM
megamanmaniac is Offline
| ID: 672060 | 33 Words
megamanmaniac is Offline
POSTS: 1018/4966
POST EXP: 452698
LVL EXP: 23283169
CP: 17207.9
VIZ: 151142
Mother3fan5 : That time there was no need to summon him because I already did two posts ago. Just wait until they get online to handle the situation. no need to keep summoning them. |
| Triple M |
Affected by 'Laziness Syndrome'
Registered: 04-12-12
Location: Access withheld from you
Last Post: 2555 days
Last Active: 2551 days
10-13-12 09:44 PM
 james44028 is Offline
| ID: 672115 | 14 Words
james44028 is Offline
| ID: 672115 | 14 Words
 james44028 is Offline

POSTS: 266/583
POST EXP: 19425
LVL EXP: 924450
CP: 896.3
VIZ: 39021
Mother3fan5 : am i right? |
 ???? Keldeo ???? Keldeo |
Affected by 'Laziness Syndrome'
Registered: 08-04-12
Location: destiny islands
Last Post: 1567 days
Last Active: 1083 days
10-13-12 09:50 PM
Mother3fan5 is Offline
| ID: 672119 | 21 Words
Mother3fan5 is Offline
POSTS: 752/1599
POST EXP: 65090
LVL EXP: 4229823
CP: 1056.8
VIZ: 44071
james44028 : Correct. megamanmaniac : The reason I did that was from my computer I saw that your summon failed and mine worked. megamanmaniac : The reason I did that was from my computer I saw that your summon failed and mine worked. |
| the mothcan |
Affected by 'Laziness Syndrome'
Registered: 06-02-12
Last Post: 3170 days
Last Active: 2966 days
10-13-12 10:12 PM
 Seishiro Leonhart is Offline
| ID: 672147 | 54 Words
Seishiro Leonhart is Offline
| ID: 672147 | 54 Words
 Seishiro Leonhart is Offline

POSTS: 1320/2710
POST EXP: 195483
LVL EXP: 9750027
CP: 8437.7
VIZ: 35875
iSPY! : Singelli : megamanmaniac : Mother3fan5 : james44028 : Would you mind if I ask you to stop posting in this thread? The Locals had already been summoned, so all of you please stop posting in this thread. legacyme3 : Local Mods : Plagiarised content, please ignore his word posts, close, trash this thread and note the unnecessary posts above. Singelli : megamanmaniac : Mother3fan5 : james44028 : Would you mind if I ask you to stop posting in this thread? The Locals had already been summoned, so all of you please stop posting in this thread. legacyme3 : Local Mods : Plagiarised content, please ignore his word posts, close, trash this thread and note the unnecessary posts above. |
Affected by 'Laziness Syndrome'
Registered: 04-28-11
Last Post: 1346 days
Last Active: 1332 days
Links

Page Comments
This page has no comments