Forum Links
Thread Information
Thread Actions


Walkthrough Shadowgate Classic
09-28-12 09:33 AM
Laian is Offline
| ID: 659306 | 2454 Words

POSTS: 1443/2232
POST EXP: 457173
LVL EXP: 7152876
CP: 23726.2
VIZ: 3569925

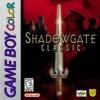
Hello everyone. It's your host Laian with a new walkthrough. This one, how to say, is probably the one which gave me lot of troubles, that's why it took me so long to publish it. Shadowgate Classic is the GBC remake of Shadowgate released on NES at that time so this walkthrough will probably work with the original game, which means there's probably no need to do a walkthrough of Shadowgate (unless there's a few things different but I think it's not the case). Compared to the other walkthroughs I made, this one is really short. Ok, it's short but that doesn't mean it's easy like ABC. This game is full of puzzles and you can die easily or stuck for a while (and probably forever, who knows...) if you don't solve them like the developers planned. Most of the puzzles are logic but sometimes it's somewhat strange due to the functions availables. That's why I'll use the functions in this walkthrough, just because it will make the task easier for you if you want to beat this game. So, please, don't mind me if I use some awkward words or if that doesn't make any sense, it's not my fault Well, I think it's time to start the quest, don't you think? Are you ready for this new adventure? Well use that if you are stuck, bla bla bla and follow me... if you dare...
 
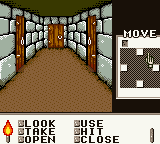
Go back where you found the broom, use the hammer on the middle mirror (yeah, seven years of bad luck!    Take the torch then go in the first room to the left. Take the skull on the bookshelf, the map and the book. Try to read it: you can’t. Open the drawer of the desk and take the scrolls, the key and the glasses. Read the two scrolls to learn the spells “illumina” and “terrakk”, use the glasses on yourself and read the book. With the glasses, you can easily read the content of the book and learn the spell “motari”. Use the red gem on the hole and go in the secret passageway. Take the cup, the bellows and the poker. Light the fireplace with a lit torch, cast the spell “terrakk” and open the globe to get a key and a bottle. Go in the next room to the left, take the bottles and the test tube on the shelves, the horseshoe and notice the suspicious tile on the floor (5). Use the function “use” on it and take the water then go to the next room. Try to take the flute: you can’t because the water is acid. Use the gauntlet on yourself and take the flute now. Use it to open a secret hole in the tree, revealing a ring. Take it, go back and open the last door to the north. Welcome to the banquet hall. Take the mirror and the crest, use a lit torch to burn the carpet and find a key, use the key 5 to open the door to the right and go in the room. You’ll face the sphinx and if you know the legend of this mystic creature, you will have to answer its riddle to carry on. The riddle is randomly generated but there is a total of six. The only way to answer the riddle is use the correct item on him. If you are right, you may pass otherwise his magic powers will teleport you somewhere in Shadowgate and you will have to do all the way back to its lair. Here are the riddles you may have to answer and the item to show him: “It has towns, but no houses, forest, but no trees, rivers, but no fish.” Answer: the map “I’m a fire’s friend, my body swells with wind. With my nose, I blow, how the embers glow.” Answer: the bellows “I’ve no eyes, but once did see, thoughts had I, but now I’m white, and empty.” Answer: the skull “Long neck, no hands, 100 legs, cannot stand. Born of forest nest, against a wall I rest.” Answer: the broom “You look at me, I look back, your right hand raises, I my left. You speak, I in vain.” Answer: the mirror “First burnt and beaten, drowned and pierced with nails. Then stepped on by long-faced animals” Answer: the horseshoe Once you answered correctly the riddle, note the markings carved on the stairs (it’s a hint for a next riddle later in this adventure) and go upstairs. This is the observatory. Take the scroll on the table and the star on the star map. Read the scroll, “open” the star map and take the rod (6). Climb up the ladder, don’t be fooled by the beauty of the innocent woman and use the arrow on her. Yeah, it was a wolf keeping the blade to the right. Take the blade, go back to the banquet hall and unlock the door upstairs with the key 6. Try to take the horn: a hellbound appears. Use the water on it and take the horn. Go up and face a wyvern. Use the star on the creature to kill it, take the talisman and go back to the banquet hall. Open the last door with the key 4, take the torches and go to the left. Use the rod on the hole, take the wand and go to the left. Open the bag, take the gold coins and the big coin. Don’t open or take the golden box, it’s a trap for greedy and careless people. Go back where the two bridges are, use a bottle 2 on yourself and cross the used bridge. Use the wand on the snake and take the staff. Go back to the banquet hall now. You’ll have to face the troll one more time. Don’t be nice ad give some gold coins to him: he will not let you pass and you’ll die. Use the spell “humana” instead and reach the banquet hall. Now go back to the room downstairs and go to the right this time. This is the throne room with the dead king sit on his throne for the eternity. Something is missing in his hand. Use the scepter on him, then the ring in the hole magically appeared. You find a secret passageway. Go down, take the torches, go to the north, then to the right, cast the spell “motari” to lower the statue and cross the bridge. Don’t check the hole to the left, curious and careless people, it’s at your own risk. See the levers to the right? Remember the markings carved on the stairs in the room with the sphinx? Repeat the same thing with this mechanism: right, middle and right. Collect the orb and go back where the gargoyles are. Cast the spell “illumine” to blind the gargoyles and go to the left. Use the lever to open the well cover, use the big coin on the well and go down using this well. Ring the gong to call the ferryman, give a gold coin to him and go on the raft to cross the river. This is the last riddle to solve before the final showdown against the evil wizard. Use the talisman on the hole to the left, use the horn to open the door and prepare yourself for the great battle of all the time. Say hello to the evil wizard and… the behemoth! Two on one… not a big deal if you have collected the orb, the staff and the blade. First, use the blade with the staff, then use the orb with the staff and finally use the staff of ages on the behemoth. Hurray! You beat the behemoth AND the wizard (7). Enjoy the finale of the game and the gratitude of the king because you saved the world and beat Shadowgate Classic (8).  That's all for this walkthrough. As you can see, this game is short but you may be stuck more than once if you don't think like the developers sometimes. By the look of this walkthrough, well it's probably a piece of cake but when you first play this game, it's not so obvious and easy (unless I'm a moron and I should eat more fish
Hello everyone. It's your host Laian with a new walkthrough. This one, how to say, is probably the one which gave me lot of troubles, that's why it took me so long to publish it. Shadowgate Classic is the GBC remake of Shadowgate released on NES at that time so this walkthrough will probably work with the original game, which means there's probably no need to do a walkthrough of Shadowgate (unless there's a few things different but I think it's not the case). Compared to the other walkthroughs I made, this one is really short. Ok, it's short but that doesn't mean it's easy like ABC. This game is full of puzzles and you can die easily or stuck for a while (and probably forever, who knows...) if you don't solve them like the developers planned. Most of the puzzles are logic but sometimes it's somewhat strange due to the functions availables. That's why I'll use the functions in this walkthrough, just because it will make the task easier for you if you want to beat this game. So, please, don't mind me if I use some awkward words or if that doesn't make any sense, it's not my fault Well, I think it's time to start the quest, don't you think? Are you ready for this new adventure? Well use that if you are stuck, bla bla bla and follow me... if you dare...
 
Go back where you found the broom, use the hammer on the middle mirror (yeah, seven years of bad luck!    Take the torch then go in the first room to the left. Take the skull on the bookshelf, the map and the book. Try to read it: you can’t. Open the drawer of the desk and take the scrolls, the key and the glasses. Read the two scrolls to learn the spells “illumina” and “terrakk”, use the glasses on yourself and read the book. With the glasses, you can easily read the content of the book and learn the spell “motari”. Use the red gem on the hole and go in the secret passageway. Take the cup, the bellows and the poker. Light the fireplace with a lit torch, cast the spell “terrakk” and open the globe to get a key and a bottle. Go in the next room to the left, take the bottles and the test tube on the shelves, the horseshoe and notice the suspicious tile on the floor (5). Use the function “use” on it and take the water then go to the next room. Try to take the flute: you can’t because the water is acid. Use the gauntlet on yourself and take the flute now. Use it to open a secret hole in the tree, revealing a ring. Take it, go back and open the last door to the north. Welcome to the banquet hall. Take the mirror and the crest, use a lit torch to burn the carpet and find a key, use the key 5 to open the door to the right and go in the room. You’ll face the sphinx and if you know the legend of this mystic creature, you will have to answer its riddle to carry on. The riddle is randomly generated but there is a total of six. The only way to answer the riddle is use the correct item on him. If you are right, you may pass otherwise his magic powers will teleport you somewhere in Shadowgate and you will have to do all the way back to its lair. Here are the riddles you may have to answer and the item to show him: “It has towns, but no houses, forest, but no trees, rivers, but no fish.” Answer: the map “I’m a fire’s friend, my body swells with wind. With my nose, I blow, how the embers glow.” Answer: the bellows “I’ve no eyes, but once did see, thoughts had I, but now I’m white, and empty.” Answer: the skull “Long neck, no hands, 100 legs, cannot stand. Born of forest nest, against a wall I rest.” Answer: the broom “You look at me, I look back, your right hand raises, I my left. You speak, I in vain.” Answer: the mirror “First burnt and beaten, drowned and pierced with nails. Then stepped on by long-faced animals” Answer: the horseshoe Once you answered correctly the riddle, note the markings carved on the stairs (it’s a hint for a next riddle later in this adventure) and go upstairs. This is the observatory. Take the scroll on the table and the star on the star map. Read the scroll, “open” the star map and take the rod (6). Climb up the ladder, don’t be fooled by the beauty of the innocent woman and use the arrow on her. Yeah, it was a wolf keeping the blade to the right. Take the blade, go back to the banquet hall and unlock the door upstairs with the key 6. Try to take the horn: a hellbound appears. Use the water on it and take the horn. Go up and face a wyvern. Use the star on the creature to kill it, take the talisman and go back to the banquet hall. Open the last door with the key 4, take the torches and go to the left. Use the rod on the hole, take the wand and go to the left. Open the bag, take the gold coins and the big coin. Don’t open or take the golden box, it’s a trap for greedy and careless people. Go back where the two bridges are, use a bottle 2 on yourself and cross the used bridge. Use the wand on the snake and take the staff. Go back to the banquet hall now. You’ll have to face the troll one more time. Don’t be nice ad give some gold coins to him: he will not let you pass and you’ll die. Use the spell “humana” instead and reach the banquet hall. Now go back to the room downstairs and go to the right this time. This is the throne room with the dead king sit on his throne for the eternity. Something is missing in his hand. Use the scepter on him, then the ring in the hole magically appeared. You find a secret passageway. Go down, take the torches, go to the north, then to the right, cast the spell “motari” to lower the statue and cross the bridge. Don’t check the hole to the left, curious and careless people, it’s at your own risk. See the levers to the right? Remember the markings carved on the stairs in the room with the sphinx? Repeat the same thing with this mechanism: right, middle and right. Collect the orb and go back where the gargoyles are. Cast the spell “illumine” to blind the gargoyles and go to the left. Use the lever to open the well cover, use the big coin on the well and go down using this well. Ring the gong to call the ferryman, give a gold coin to him and go on the raft to cross the river. This is the last riddle to solve before the final showdown against the evil wizard. Use the talisman on the hole to the left, use the horn to open the door and prepare yourself for the great battle of all the time. Say hello to the evil wizard and… the behemoth! Two on one… not a big deal if you have collected the orb, the staff and the blade. First, use the blade with the staff, then use the orb with the staff and finally use the staff of ages on the behemoth. Hurray! You beat the behemoth AND the wizard (7). Enjoy the finale of the game and the gratitude of the king because you saved the world and beat Shadowgate Classic (8).  That's all for this walkthrough. As you can see, this game is short but you may be stuck more than once if you don't think like the developers sometimes. By the look of this walkthrough, well it's probably a piece of cake but when you first play this game, it's not so obvious and easy (unless I'm a moron and I should eat more fish
|
| Games have secrets, I have my eagle gaze. |
Affected by 'Laziness Syndrome'
Registered: 10-21-11
Location: France
Last Post: 1873 days
Last Active: 1046 days
Links
Page Comments
This page has no comments


 User Notice


