

 User Notice
 Forum Links
Thread Information
Thread Actions


Shining in the Darkness Guide
02-20-16 06:08 PM
janus is Offline
| ID: 1246738 | 3075 Words
SecureYourCodeDavid
POSTS: 4207/4808
POST EXP: 565097
LVL EXP: 21583285
CP: 62726.4
VIZ: 469383

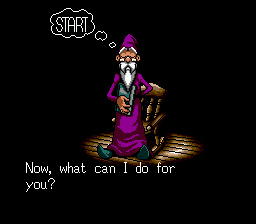
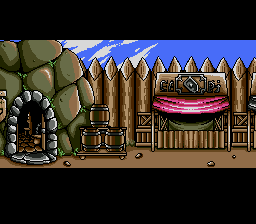
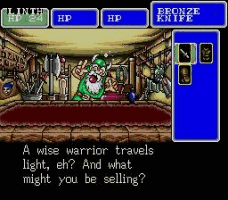
Shining in the Darkness Guide Hello gamers and welcome to another of my guides. This one is going to be much different since the action is in a labyrinth, therefore the direction is VERY precise. So to avoid long, tedious sequences of directions, I will map the road. However, to avoid pixel overload (and because space is limited) I will only give map fragments, i.e. of the specific places you need to go for the specific part I am describing. Also, maps are not to scale. There is only so much a man without any drawing talents can do with Microsoft Paint. Finally, I put in bold the treasures you absolutely need (or, as with the “light” equipment, that will make your life much easier). Part 1: Looking for Princess Jessa After the intro briefing, return to the castle to see Dark Sol bring his threat to the King. Go to the village, equip yourself as needed and go explore the labyrinth (note that you can quickly exit the village by pressing B). Labyrinth: First Floor
Your goal is to go to 8 to fight the Kaiser Crab (you start at the bottom of the screen) 1 = Herb 2 = 50 Gold 3 = Bronze Knife 4 = Herb 5 = large corridor (it will look darker than usual when you see it). Stick to the right-hand wall to 6 = Herb 7 = 100 Gold Boss fight: Kaiser Krab He is fierce and can do critical hits. Make sure your health stays above 20 since the crab is VERY quick. If you’re at level 6 with a shield and head gear, you should pummel it in no time. After defeating it, you will get Royal Tiara. After the fight warp back to the castle and talk only with the King and Minister; otherwise they will take the tiara and give you only 250 gold, whereas you can sell the tiara for 750. Now go to the village, enter the Tavern and Church to recruit Pyra and Milo and go back to the castle. Talk with Theos, the Minister and exit the castle to begin the trials. Part 2: The Trial of the Ancients Note that, from now on, a Kaiser Krab may lurk at every corner. Fortunately, you can escape if you are lucky. Part 2.1: Cave of Strength Labyrinth: First Floor You start in the lower-left corner Red line: you will need to use the Dwarf Key 1 = Depoison 2 = Herb 3 = Wisdom Seed 4 = entrance to the Cave of Strength Labyrinth: Cave of Strength
Your goal is to reach 13 (you start in the lower-right corner) 1, 2, 9 = Boss Fight: Chestbeak You will be able to put it to 3, 5, 12 = Wisdom Seed 4 = Depoison 6 = Smelling Salts 7 = 100 Gold 8 = Herb 10 = Woven Robe 11 = short sword A = Large corridor (at least 2 tiles wide) B = Dead end D = Goes downstairs. There, simply go up, right and left to get Healer Fruit Blue line = Boss fight: Killer Wave (probable, can escape) Another very strong monster. It can attack twice, but seems weak towards freeze. Being around level 10 should do. Purple line = Meet Gila, the mercenary Pyra slowed. Not that as long as you don’t rest at the inn, he will keep popping at random in the battle. 2.2: Cave of Courage Labyrinth: First Floor
The starting point is the entrance of the Cave of Strength Gray = Wall with torches (just for bearings) Green = slime (- 1 mp per step, including when you turn) 1 = Smelling salts 2 = Morning Star 3 = entrance of Cave of Courage. Labyrinth: Cave of Courage Note that, at any moment, you run the change of meeting… Boss fight: Cyblock (can escape) They fall off the ceiling to annoying you. You can cast slow to lower their defense. Be at least at level 13.
You need to reach 15. However you absolutely need the Orb of Truth in order to progress. 0 = Dead end 1 = woven hood 2, 14 = wisdom seed 3 = healer fruit 4, 7 = smelling salts 5 = bronze shield 6 = depoison 8 = 100 gold 9 = Morningstar 10 = Chestbeak 11 = woven robe 12 = angel feather 13 = 50 gold 15 = goal Red = use Dwarf Key Gray = torches on the wall D = Goes downstairs. When there follow the path and take a right at the first intersection to go back upstairs. From there, up, left, left, right at your first intersection and walk towards the giant “egg” for a fight. Boss fight: Tortolyde It can cast quick on itself; fortunately you can cast slow. You will get the Orb of Truth after the fight. 2.3: Cave of Truth Labyrinth: First Level
To proceed to the Cave of Truth, you need to use the Orb of Truth at GM. Boss fight: Grim Wall Even though it has a high-pitch shout, it’s VERY fierce. You might be able to put it to 1 = 100 gold 2 = Cave of Truth 3 = Level 2 (once you complete the trials) 4 = Cave of Wisdom A = large corridor B = A shortcut with slime C = No interest Yellow = Use Rune Key Labyrinth: Cave of Truth
You need to reach 16 1 = wisdom seed 2 = 50 gold 3 = wood staff 4 = Healer fruit 5 = Depoison 6, 9, 12 = Boss fight: Ghost Another very fierce monster; it can cast desoul. Fortunately, a level-16 Pyra can put them to 7 = Angel feather 8 = False Idol 10 = smelling salts 11 = chain mail 13, 14 = Boss fight: Doppler Pray that it “flexes its muscles” otherwise you will be massacred. After the fight get the rune key in the chest. 15 = battle axe 16 = real ending Blue line: you run the risk of meeting Boss fight: Sea Stallion (can run away) Another fierce monster; it can attack twice per round. Fortunately it’s susceptible to Orange line: fake ending. Use Orb of Truth Red line: put False Idol Green line = slime A = walls will fall before you if you “deviate” from the route. D = dead end/ route that’s not important for the moment. R: Rotating platforms. They make you rotate 270 degrees clockwise. So your destination changes whether you are moving forward or backing up. 2.4: Cave of Wisdom At any moment (especially in long corridors), you run the risk of encountering… Boss battle: Krusher (can escape) The first of the “bowling ball” enemies. Like other such monsters it’s vicious and strong. Fortunately you can slow it. Be around level 20 and you should be able to dispose of it.
You need to reach 11. A = Approximate place of a trap. Use savestates to be sure D1: Fall into that trap (after the area shown in Map 1). Follow the path on the right to get a fire sword, then come back and keep left to go back upstairs to D1 (in the upper-left section of the map). You can’t open cell doors yet so it’s your only chance to get chest #4. D2: Fall into that trap (the very last hole in the area shown on Map 2). Once down, go to your left, go right, follow the path, turn left and go upstairs. 1 = Map 1. Use it to see the traps in that area 2 = battle axe 3 = smelling salts 4 = map 2. Use it to navigate through the area south of chest #6 5 = flail (attacks twice; may be stronger than axes) 6 = Boss fight: ghost 7 = steel saber 8 = Dark block 9 = herb water 10 = mithril ore 11 = goal Red line: doors that open only when going down Yellow line: recruit Dai (weaker than Gila) Purple: nothing of interest; just for bearings. Blue: run at risk of meeting Sea Stallion Pink: torches on the wall. Part 3: the Upper Labyrinth Part 3.1: Level 2 Labyrinth: Level 2 At any moment, you run the risk of running into… Boss fight: Brikeye (can escape) Like Cyblock, but comes in 3. Make sure Pyra has at least blaze 3 to make your job easier. They are quick and strong, but being around level 20 should do. Boss fight: Kromerball (can escape; encounter especially in long corridors) Another bowling ball. Fortunately you can put it to
You need to reach 14. 0 = starting point 1 = mithril ore 2 = 500 gold 3 = depoison 4 = Boss fight: Sentinel Another fierce monster you have to face. Fortunately it’s susceptible to 5 = great axe 6 = magic hood 7 = angel feather 8 = fire staff 9 = smelling salts 10 = healer fruit 11 = sun armor 12 = worn robe 13 = 300 gold 14 = goal (not connected to H4) H1: Follow the path to a great flail (attacks twice) H2: Boss fight: Grim Wall, storm sword A = large corridor Purple = of no interest (at least for now) Blue = water pond Green = slime Yellow-green: watch a short animation (both lines are connected) Red = Can only go through by walking up Orange = can only go through by walking down Pink = torches on the wall Gray: golden fountain. Put a piece of medallion to warp back there (from anywhere, including the labyrinth). Make sure you take it back in order to use the others ones! What medallion you say? Well, once you reach the stairs to level 3, warp back to the castle and talk with Xern the wizard, who will give it to you. And while you’re away from the labyrinth, go to the village and enter the trader’s tent (left of the pub; he appears once you set foot on level 2). You will be able to buy strong weapons, repair magic weapons you have used too much or even make new ones. To do that, you either need a mithril ore or a dark block. As you may have guessed, the latter one produces cursed weaponry; nevertheless, it’s worth giving Pyra such a weapon (hex whip) for it attacks a group. However there is a chance she will get stuck in it. If you want to abuse savestates, then you can make an armor for Pyra (dark robe), which Milo can also use. However you run the risk that the wearer casts heal 1 on enemies. Otherwise, make a helmet for Pyra (mithril hood) and Milo (mithril helm), a shield for both of them and a weapon for Milo (mithril axe). Anyway, back to the adventure… Part 3.2: Level 3 Labyrinth: Level 3 At any corner, you run the risk of encountering… Boss fight: Scizzar (can escape) You can put it to Towards the end of the level, you may encounter… Boss fight: Blackbone (can escape) Boost is really your only chance of getting it; it’s VERY strong and can resist magic. You can get it at level 25 with A LOT of luck.
You need to reach 8. 0 = start 1 = Boss Fight: Shell Beast You can’t escape this new “turtle.” Fortunately it can fall a 2 = 500 gold 3 = mystic rope (can enter any hole, up or down) 4 = Healer fruit 5 = herb water GM6 = Boss fight: Grim Wall, ice staff 7 (on the purple and black line, black side) = light helm 8 = to level 4 A = large corridor B = VERY long corridor, despite having no slime H1 = Boss fight: Head Hunter It’s very strong and can attack twice. But if Milo is equipped with the flail, it should be OK (around level 25). Follow the path to… Boss fight: Guardian A stronger sentinel. Fortunately luck can put it to H2 = lead to Enduro Staff (straight forward path) H3 = Follow the path (you can’t get lost). Take the second right to get holy water, and take the stairs you skipped to get mithril ore. H4 = Just follow the straightforward path Pink line: torches on the wall Blue: water pond Red: can only walk to the right Orange: can only walk to the left Gray = golden fountain Part 3.3: Level 4 Labyrinth: Level 4 At any corner, you run the risk of encountering a mechanical crab.
You need to reach 9. 0 = starting point 1 = healer fruit 2 = herb water 3 = heal ring 4, 5 = Boss fight: Hand eater Yes, there are trapped chest in the upper levels. And like Blackbones, your only hope to pummel it is to cast boost. It can cast the equivalent of freeze 3. Be around level 30 to stand a chance. 6 = frost armor GM 7 = Boss fight: Grim wall, light blade 8 = Cell key H = follow the very long path (and almost straight-forward) to a mithril ore. Green line = slime Pink = torches on the wall Yellow-green = short animation; both ends are connected Orange: Princess Jessa. Need cell key to free her Red: Boss fight: Dark Knight Like any good knight, you have to fight your father who turned evil. Be sure to cast quick and boost (on attackers) to increase your resistance. It can attack twice and critically, so make sure Pyra can heal (Milo, if it’s too critical). He loses his helmet when you’re more than halfway done. Just stay healthy, and if you’re around level 30 (with luck) you can defeat him. Make sure you use the golden fountain before warping back to the castle with Jessa. You can also bring her to the village to see people’s reaction… Anyway the King will give you a magic ring to thank you (recover mp). Now that you have all the necessary accessories, it’s time to revisit the lower levels. Remember the Cave of Strength when you freed Gila? Continue to walk on that corridor to get forbidden box. If you use savestates, it will guarantee you to kill any regular (non-boss) monster with its various traps. If not, it might make them stronger or make you escape from the fight, so beware. You can also go back where you got chest #8 and use the rope to avoid the hole. Keep going right to use the rope again and get a mithril ore. In the cave of courage, go back to chest #3 and walk to the very end of the corridor. Follow the ensuing path (you will get some slime) to get demon staff. In the cave of truth, go down the D corridor near chest #9 to get magic ring for your other magician. On level 2, go to the purple corridor after H1 to get barrier ring. On level 3, take the purple corridor going up after the blue corridor (left of H1). You may encounter… Boss Fight: Bildblok Even though it’s on level 3 it’s pretty strong. Make sure you boost the hero and stay healthy. Be around level 30 to win. After the fight keep walking to get light shield. Part 3.4: the end Labyrinth: Level 5
0 = starting point 1 = 1000 gold 2 = magic robe 3, 5, 7 = Boss fight: Hand eater (you need to walk around #5 to avoid a trap) 4 = magic ring 6 = Boss fight: guardian 8 = dark scimitar 9 = dark block 10, 11 = 2000 gold 12 = light armor Once you get the light armor, warp back to the castle. Talk with the King, Jessa and Theos to obtain vial of tears. Use it in the rainbow fountain to awaken your gear’s full potential. It also becomes an instant healing spot. R = rotating platform. Note that landing below it (towards chest #9) will make you fall into a trap. Blue line = run the risk of encountering… Boss fight: Syren (can escape) It can cast muddle 1 and a paralyzing white mist. It can also attack twice. Fortunately you can slow it down. Purple: dead end/ lead to Guardian. Gray: fall into that hole. Take the second right to get miracle herbs, and come back to the first right to go back upstairs (to the other gray line). Orange: leads to a chest with miracle herb Yellow: rainbow Fountain. Use Vial of Tears to awaken ligh spirit Yellow-green: Final battle: Darksol Like any such fight, it goes in stages. For the first part, just cast quick and boost in order not to waste your magic. Of course, heal if you need although his demon breath is weaker at this stage. After a while he will go down. He will return with a vengeance after he sells his soul to Darkness. Now it’s for real. Cast supporting spells again and make sure you stay healthy. The first part (with his arms up) is weaker magically but the physical attack has some punch – and he can attack twice in a row. When he has his arms down, he can cast a more powerful demon breath, and sometimes twice in a row. Keep your health over 80 hp, and at level 50 you should dispose of him easily. After the fight talk with the villagers, and then go to the castle to see the ending credits. Shining in the Darkness Guide Hello gamers and welcome to another of my guides. This one is going to be much different since the action is in a labyrinth, therefore the direction is VERY precise. So to avoid long, tedious sequences of directions, I will map the road. However, to avoid pixel overload (and because space is limited) I will only give map fragments, i.e. of the specific places you need to go for the specific part I am describing. Also, maps are not to scale. There is only so much a man without any drawing talents can do with Microsoft Paint. Finally, I put in bold the treasures you absolutely need (or, as with the “light” equipment, that will make your life much easier). Part 1: Looking for Princess Jessa After the intro briefing, return to the castle to see Dark Sol bring his threat to the King. Go to the village, equip yourself as needed and go explore the labyrinth (note that you can quickly exit the village by pressing B). Labyrinth: First Floor
Your goal is to go to 8 to fight the Kaiser Crab (you start at the bottom of the screen) 1 = Herb 2 = 50 Gold 3 = Bronze Knife 4 = Herb 5 = large corridor (it will look darker than usual when you see it). Stick to the right-hand wall to 6 = Herb 7 = 100 Gold Boss fight: Kaiser Krab He is fierce and can do critical hits. Make sure your health stays above 20 since the crab is VERY quick. If you’re at level 6 with a shield and head gear, you should pummel it in no time. After defeating it, you will get Royal Tiara. After the fight warp back to the castle and talk only with the King and Minister; otherwise they will take the tiara and give you only 250 gold, whereas you can sell the tiara for 750. Now go to the village, enter the Tavern and Church to recruit Pyra and Milo and go back to the castle. Talk with Theos, the Minister and exit the castle to begin the trials. Part 2: The Trial of the Ancients Note that, from now on, a Kaiser Krab may lurk at every corner. Fortunately, you can escape if you are lucky. Part 2.1: Cave of Strength Labyrinth: First Floor You start in the lower-left corner Red line: you will need to use the Dwarf Key 1 = Depoison 2 = Herb 3 = Wisdom Seed 4 = entrance to the Cave of Strength Labyrinth: Cave of Strength
Your goal is to reach 13 (you start in the lower-right corner) 1, 2, 9 = Boss Fight: Chestbeak You will be able to put it to 3, 5, 12 = Wisdom Seed 4 = Depoison 6 = Smelling Salts 7 = 100 Gold 8 = Herb 10 = Woven Robe 11 = short sword A = Large corridor (at least 2 tiles wide) B = Dead end D = Goes downstairs. There, simply go up, right and left to get Healer Fruit Blue line = Boss fight: Killer Wave (probable, can escape) Another very strong monster. It can attack twice, but seems weak towards freeze. Being around level 10 should do. Purple line = Meet Gila, the mercenary Pyra slowed. Not that as long as you don’t rest at the inn, he will keep popping at random in the battle. 2.2: Cave of Courage Labyrinth: First Floor
The starting point is the entrance of the Cave of Strength Gray = Wall with torches (just for bearings) Green = slime (- 1 mp per step, including when you turn) 1 = Smelling salts 2 = Morning Star 3 = entrance of Cave of Courage. Labyrinth: Cave of Courage Note that, at any moment, you run the change of meeting… Boss fight: Cyblock (can escape) They fall off the ceiling to annoying you. You can cast slow to lower their defense. Be at least at level 13.
You need to reach 15. However you absolutely need the Orb of Truth in order to progress. 0 = Dead end 1 = woven hood 2, 14 = wisdom seed 3 = healer fruit 4, 7 = smelling salts 5 = bronze shield 6 = depoison 8 = 100 gold 9 = Morningstar 10 = Chestbeak 11 = woven robe 12 = angel feather 13 = 50 gold 15 = goal Red = use Dwarf Key Gray = torches on the wall D = Goes downstairs. When there follow the path and take a right at the first intersection to go back upstairs. From there, up, left, left, right at your first intersection and walk towards the giant “egg” for a fight. Boss fight: Tortolyde It can cast quick on itself; fortunately you can cast slow. You will get the Orb of Truth after the fight. 2.3: Cave of Truth Labyrinth: First Level
To proceed to the Cave of Truth, you need to use the Orb of Truth at GM. Boss fight: Grim Wall Even though it has a high-pitch shout, it’s VERY fierce. You might be able to put it to 1 = 100 gold 2 = Cave of Truth 3 = Level 2 (once you complete the trials) 4 = Cave of Wisdom A = large corridor B = A shortcut with slime C = No interest Yellow = Use Rune Key Labyrinth: Cave of Truth
You need to reach 16 1 = wisdom seed 2 = 50 gold 3 = wood staff 4 = Healer fruit 5 = Depoison 6, 9, 12 = Boss fight: Ghost Another very fierce monster; it can cast desoul. Fortunately, a level-16 Pyra can put them to 7 = Angel feather 8 = False Idol 10 = smelling salts 11 = chain mail 13, 14 = Boss fight: Doppler Pray that it “flexes its muscles” otherwise you will be massacred. After the fight get the rune key in the chest. 15 = battle axe 16 = real ending Blue line: you run the risk of meeting Boss fight: Sea Stallion (can run away) Another fierce monster; it can attack twice per round. Fortunately it’s susceptible to Orange line: fake ending. Use Orb of Truth Red line: put False Idol Green line = slime A = walls will fall before you if you “deviate” from the route. D = dead end/ route that’s not important for the moment. R: Rotating platforms. They make you rotate 270 degrees clockwise. So your destination changes whether you are moving forward or backing up. 2.4: Cave of Wisdom At any moment (especially in long corridors), you run the risk of encountering… Boss battle: Krusher (can escape) The first of the “bowling ball” enemies. Like other such monsters it’s vicious and strong. Fortunately you can slow it. Be around level 20 and you should be able to dispose of it.
You need to reach 11. A = Approximate place of a trap. Use savestates to be sure D1: Fall into that trap (after the area shown in Map 1). Follow the path on the right to get a fire sword, then come back and keep left to go back upstairs to D1 (in the upper-left section of the map). You can’t open cell doors yet so it’s your only chance to get chest #4. D2: Fall into that trap (the very last hole in the area shown on Map 2). Once down, go to your left, go right, follow the path, turn left and go upstairs. 1 = Map 1. Use it to see the traps in that area 2 = battle axe 3 = smelling salts 4 = map 2. Use it to navigate through the area south of chest #6 5 = flail (attacks twice; may be stronger than axes) 6 = Boss fight: ghost 7 = steel saber 8 = Dark block 9 = herb water 10 = mithril ore 11 = goal Red line: doors that open only when going down Yellow line: recruit Dai (weaker than Gila) Purple: nothing of interest; just for bearings. Blue: run at risk of meeting Sea Stallion Pink: torches on the wall. Part 3: the Upper Labyrinth Part 3.1: Level 2 Labyrinth: Level 2 At any moment, you run the risk of running into… Boss fight: Brikeye (can escape) Like Cyblock, but comes in 3. Make sure Pyra has at least blaze 3 to make your job easier. They are quick and strong, but being around level 20 should do. Boss fight: Kromerball (can escape; encounter especially in long corridors) Another bowling ball. Fortunately you can put it to
You need to reach 14. 0 = starting point 1 = mithril ore 2 = 500 gold 3 = depoison 4 = Boss fight: Sentinel Another fierce monster you have to face. Fortunately it’s susceptible to 5 = great axe 6 = magic hood 7 = angel feather 8 = fire staff 9 = smelling salts 10 = healer fruit 11 = sun armor 12 = worn robe 13 = 300 gold 14 = goal (not connected to H4) H1: Follow the path to a great flail (attacks twice) H2: Boss fight: Grim Wall, storm sword A = large corridor Purple = of no interest (at least for now) Blue = water pond Green = slime Yellow-green: watch a short animation (both lines are connected) Red = Can only go through by walking up Orange = can only go through by walking down Pink = torches on the wall Gray: golden fountain. Put a piece of medallion to warp back there (from anywhere, including the labyrinth). Make sure you take it back in order to use the others ones! What medallion you say? Well, once you reach the stairs to level 3, warp back to the castle and talk with Xern the wizard, who will give it to you. And while you’re away from the labyrinth, go to the village and enter the trader’s tent (left of the pub; he appears once you set foot on level 2). You will be able to buy strong weapons, repair magic weapons you have used too much or even make new ones. To do that, you either need a mithril ore or a dark block. As you may have guessed, the latter one produces cursed weaponry; nevertheless, it’s worth giving Pyra such a weapon (hex whip) for it attacks a group. However there is a chance she will get stuck in it. If you want to abuse savestates, then you can make an armor for Pyra (dark robe), which Milo can also use. However you run the risk that the wearer casts heal 1 on enemies. Otherwise, make a helmet for Pyra (mithril hood) and Milo (mithril helm), a shield for both of them and a weapon for Milo (mithril axe). Anyway, back to the adventure… Part 3.2: Level 3 Labyrinth: Level 3 At any corner, you run the risk of encountering… Boss fight: Scizzar (can escape) You can put it to Towards the end of the level, you may encounter… Boss fight: Blackbone (can escape) Boost is really your only chance of getting it; it’s VERY strong and can resist magic. You can get it at level 25 with A LOT of luck.
You need to reach 8. 0 = start 1 = Boss Fight: Shell Beast You can’t escape this new “turtle.” Fortunately it can fall a 2 = 500 gold 3 = mystic rope (can enter any hole, up or down) 4 = Healer fruit 5 = herb water GM6 = Boss fight: Grim Wall, ice staff 7 (on the purple and black line, black side) = light helm 8 = to level 4 A = large corridor B = VERY long corridor, despite having no slime H1 = Boss fight: Head Hunter It’s very strong and can attack twice. But if Milo is equipped with the flail, it should be OK (around level 25). Follow the path to… Boss fight: Guardian A stronger sentinel. Fortunately luck can put it to H2 = lead to Enduro Staff (straight forward path) H3 = Follow the path (you can’t get lost). Take the second right to get holy water, and take the stairs you skipped to get mithril ore. H4 = Just follow the straightforward path Pink line: torches on the wall Blue: water pond Red: can only walk to the right Orange: can only walk to the left Gray = golden fountain Part 3.3: Level 4 Labyrinth: Level 4 At any corner, you run the risk of encountering a mechanical crab.
You need to reach 9. 0 = starting point 1 = healer fruit 2 = herb water 3 = heal ring 4, 5 = Boss fight: Hand eater Yes, there are trapped chest in the upper levels. And like Blackbones, your only hope to pummel it is to cast boost. It can cast the equivalent of freeze 3. Be around level 30 to stand a chance. 6 = frost armor GM 7 = Boss fight: Grim wall, light blade 8 = Cell key H = follow the very long path (and almost straight-forward) to a mithril ore. Green line = slime Pink = torches on the wall Yellow-green = short animation; both ends are connected Orange: Princess Jessa. Need cell key to free her Red: Boss fight: Dark Knight Like any good knight, you have to fight your father who turned evil. Be sure to cast quick and boost (on attackers) to increase your resistance. It can attack twice and critically, so make sure Pyra can heal (Milo, if it’s too critical). He loses his helmet when you’re more than halfway done. Just stay healthy, and if you’re around level 30 (with luck) you can defeat him. Make sure you use the golden fountain before warping back to the castle with Jessa. You can also bring her to the village to see people’s reaction… Anyway the King will give you a magic ring to thank you (recover mp). Now that you have all the necessary accessories, it’s time to revisit the lower levels. Remember the Cave of Strength when you freed Gila? Continue to walk on that corridor to get forbidden box. If you use savestates, it will guarantee you to kill any regular (non-boss) monster with its various traps. If not, it might make them stronger or make you escape from the fight, so beware. You can also go back where you got chest #8 and use the rope to avoid the hole. Keep going right to use the rope again and get a mithril ore. In the cave of courage, go back to chest #3 and walk to the very end of the corridor. Follow the ensuing path (you will get some slime) to get demon staff. In the cave of truth, go down the D corridor near chest #9 to get magic ring for your other magician. On level 2, go to the purple corridor after H1 to get barrier ring. On level 3, take the purple corridor going up after the blue corridor (left of H1). You may encounter… Boss Fight: Bildblok Even though it’s on level 3 it’s pretty strong. Make sure you boost the hero and stay healthy. Be around level 30 to win. After the fight keep walking to get light shield. Part 3.4: the end Labyrinth: Level 5
0 = starting point 1 = 1000 gold 2 = magic robe 3, 5, 7 = Boss fight: Hand eater (you need to walk around #5 to avoid a trap) 4 = magic ring 6 = Boss fight: guardian 8 = dark scimitar 9 = dark block 10, 11 = 2000 gold 12 = light armor Once you get the light armor, warp back to the castle. Talk with the King, Jessa and Theos to obtain vial of tears. Use it in the rainbow fountain to awaken your gear’s full potential. It also becomes an instant healing spot. R = rotating platform. Note that landing below it (towards chest #9) will make you fall into a trap. Blue line = run the risk of encountering… Boss fight: Syren (can escape) It can cast muddle 1 and a paralyzing white mist. It can also attack twice. Fortunately you can slow it down. Purple: dead end/ lead to Guardian. Gray: fall into that hole. Take the second right to get miracle herbs, and come back to the first right to go back upstairs (to the other gray line). Orange: leads to a chest with miracle herb Yellow: rainbow Fountain. Use Vial of Tears to awaken ligh spirit Yellow-green: Final battle: Darksol Like any such fight, it goes in stages. For the first part, just cast quick and boost in order not to waste your magic. Of course, heal if you need although his demon breath is weaker at this stage. After a while he will go down. He will return with a vengeance after he sells his soul to Darkness. Now it’s for real. Cast supporting spells again and make sure you stay healthy. The first part (with his arms up) is weaker magically but the physical attack has some punch – and he can attack twice in a row. When he has his arms down, he can cast a more powerful demon breath, and sometimes twice in a row. Keep your health over 80 hp, and at level 50 you should dispose of him easily. After the fight talk with the villagers, and then go to the castle to see the ending credits. |


YouTube Video Editor
| the unknown |
Affected by 'Laziness Syndrome'
Registered: 12-14-12
Location: Murica
Last Post: 112 days
Last Active: 9 hours
