

 User Notice
 Forum Links
Play Tails Adventures Online

Thread Information
Thread Actions


Order
Tails Adventure Walkthrough
Game's Ratings
Overall
Graphics
Sound
Addictiveness
Depth
Story
Difficulty
Average User Score
8.3
9
7.2
7.8
8
6
7.2
08-23-15 06:53 PM
 ZeroTails is Offline
| ID: 1197757 | 7934 Words
ZeroTails is Offline
| ID: 1197757 | 7934 Words
 ZeroTails is Offline
| ID: 1197757 | 7934 Words
ZeroTails
Cool Davideo7
Cool Davideo7
Level: 90


POSTS: 781/2465
POST EXP: 215125
LVL EXP: 7181235
CP: 18922.4
VIZ: 400242

POSTS: 781/2465
POST EXP: 215125
LVL EXP: 7181235
CP: 18922.4
VIZ: 400242
Likes: 9 Dislikes: 0
Introduction:
This was a guide that I partly finished in February. And now I’m gonna finish it fully this time Characters/Story (at the beginning of the game): After Sonic 2, Tails was bored. He took a vacation on Coco Island. Unfortunately, these bird people wanted to make his life miserable. So Tails fought back, without the help of Sonic. Yep, that’s the story in a nutshell. Controls: The 1 button is the “use” button. You can use the item you have The Actual Walkthrough: You start off on a map, highlighting your house. Go to that cave area you can go to on the map. You will be in the first area of the game, Poloy Forest. Important: The house is the only place that you can change the items you are holding (max of 4 at a time). Go to Equip to do this. You can also go to “Cont.” to see what password will let you go to the same spot you left at. “Dock” isn’t important in this stage of the game, but it will later. Also, going to your house refills your health. Poloy Forest: This is the first area of the game. Go left, and you will see a bird enemy that is flying. That bird is part of the Battle Kukku, the birds that interrupted your vacation. Use the bomb, and it should die. Now there is a bird on land. Same technique. Okay, now there will be spikes, and another bird guy. The spikes won’t insta-kill you like Mega Man, but they take away 4 rings… owch. Now you are walking right, with another bird guy, and rocks! Whatever shall we do? Well, blow them up with your bombs, of course! 
There will be more rocks below you, but there will also be another, different rock. It’s brown, so that’s how you know it’s different. You can push it! (you have to push it to advance) You can get rid of the rocks below you by pressing down and the 1 button. You will throw the bomb downwards. Ignore that weird looking wall to the left of the little hole. You can’t break that yet. Go right, (there’s no point in going left yet) then go up and left. Keep on going right, and get rid of the birds in your way. Go up when there are platforms leading up, and go right. Don’t go left, because it’s pointless. You will fall down a vertical hallway. Again, going left is pointless. Go right, and push that spring with you. Push that spring until it’s aligned with that hole in the ground, then jump on it. If you go down, the spring will reset to its original location, so don’t go back down. You will waste time (there is no time limit, though, so don’t freak out if the spring happens to reset) Go right. You will be in the next screen. Go right, bomb the bird, and go right again. See that slightly darkened floor? That means the floor will break if you walk on it. Press right until you are on normal colored ground again, or fly over it. 
See that hole in the ground? To pass it, just jump. You can’t fly over because wind will push you back. There’s no point going down the hole yet. When you go right, you will eventually see an item below you. Ignore it, you can’t get it yet. Keep on going right, bombing the birds, until you are going down some steps. Go on the first platform you can fly to on the right, then jump across until you encounter those rocks again. Bomb them, then get the item. You now have a Red Chaos Emerald! Your health will increase by 10 rings, and you can fly longer. Sorry, no super Tails :/. 
Bomb the rocks below the chaos emerald, then go down that passageway. Go right after you drop down; there’s nothing to gain by going left. On the next screen, you will hear a new soundtrack! Boss time! Well, not yet. When you go into the tree, jump on the platforms. Go right, and you should encounter the boss, the Kukku Walker. Boss Fight: Kukku Walker: This boss is easy. It does one of two things: walk, or shoot fire. You can jump or fly to avoid the fire. It may seem like the bombs aren’t doing anything, but it is. It just takes a lot of bombs to destroy the boss. Go right after the boss is defeated, then pick up the item on the tree stump, Remote Robot. 
This item allows you to get some previously inaccessible items in Poloy Forest. So, go back to Poloy Forest! You’ll have access to Volcanic Tunnel, but don’t go there yet. Note: You can exit levels quickly by going to the left of the screen when you start the level. Item collection #1: Go to Poloy Forest. Go through the level until you reach that hole in the ground where you can’t fly over it. Go down the hole. Go left while you are flying so that you don’t fall in the spikes. To the left, you will see a tree stump with a tiny hole in it. Use the Remote Robot to go through the hole and get the Speed Boots when you go to the end of the passageway. 
Note: You can press the 1 button to have the Remote Robot go to Tails immediately. The Speed Boots allow you to run very quickly. You can’t attack, though, so beware! Now go up and right until you see another small hole. Use the Remote Robot to go through that hole. 
In this passageway, there are spikes. Don’t worry, the Remote Robot is INVINCIBLE (to almost everything)! You will get a… Radio. The Radio allows you to change the music that is playing, so if you’re tired of the music in a level, you can change it! Even better, the music doesn’t change, even if you switch to a different item! That’s all that you can get in Poloy Forest, so let’s go to Volcanic Tunnel! Volcanic Tunnel: Welcome to the cave level! Go left, and break the rocks you will encounter. You will see a little mousy. It will drop tiny bombs. Bomb it. Now bomb the floor below you. Don’t go down it yet, instead go right. Bomb the three bats, and the mousy you will see. Now collect the item that’s surrounded by lava. You will get the Hammer! The hammer is like a… hammer. 
Now go back to the hole in the ground. You should try to drop through the middle of the floor, since there is lava below, and they take 4 rings. Owch. Now go left. Bomb the mousy, and then bomb the wall to the left. I find that flying to the platform avoids the spiked ceiling. You can bomb the walls in this passageway if you need health. Now go up and right, to bomb this wall. Now fall down. Congratulations, you just wasted 1 minute of your life! Now go right. Bomb the wall to the right, then go right again. See that bat near the slanted floor? Bomb the bats. Now go right. See that red streak? Fireballs come out from it, so beware! 
Now go right. See that platform with the fire sprout? Yea… fly up and over to avoid it. Now go over the lava pit, and bomb the mousy. Fall down the passageway to the right. Bomb the bats, and go right. When you see a small passageway, use the Remote Robot to go through it. Ignore the mousies - the Remote Robot is INVINCIBLE, remember? You will get the Remote Bomb from the item at the end. The Remote Bomb is a… remote bomb. It will crawl on the floor, and you can denote it whenever. 
Now exit the level by going to the beginning of the level. Go to Tails house, and equip the Remote Bomb. Warning: you need to have the regular bomb and the Remote Robot as well! Now go back to Volcanic Tunnel, and go back to the area that you were at last. Go on to the area to the left, and go up it. 
Now use the Remote Bomb to destroy the floor on the other side of the wall by putting it through the little hole. Denotate it when it gets close to the floor, and vola! Not go back down the passageway, and go through the hole the bomb created. Go left, bombing the mousy, and you should be at the next screen. The next screen has a lot of fire sprouts. Avoid them the best you can. Go left until you see spikes. Now, don’t go down: There is nothing you can do yet. Instead, fly over to the other side (jumping on the platforms is annoying). Not fly up to the ledge and… drill! A bomb should take care of Mr. Drill Guy. Fly over the hole with the fire sprouts, and use the Remote bomb to break the rocks. Remember to break all of them! Now go down the hole with the fire sprouts. Try to drop down the middle to avoid the fire sprouts. Jump over the lava pit, and bomb the mousy. Fly up, avoiding the fire sprouts, and go through the hole you made. There will be a bat up there who just hates you, and so you will get hit. You will most likely fall down because of the bat. Uggggg (can you tell that I hate this part?). Anyways, next you bomb the rocks, mousys, and yea. After more mousys will be a lot of rocks. Try to bomb the rocks to the right because… lava. 
Fly over the lava pit with the spiked ceiling. Now, the floor will break here, so run! Now, the reward for your troubles happen to be a GREEN CHAOS EMERALD! 2 out of 6! Yea… Now bomb the blocks up and to the left of you. Bomb the bats, and bomb the other rocks that are… up and left of you. Now go up, taking care of the bats, and go right. There’s that drill guy again. Go right, walking across the breaking floor, and use the Remote Bomb for the floor (again). You can go down the hole the breaking floor made, to get to the hole faster. Go left, and you will be finished with Volcanic Tunnel! Next up is Polly Mt. 1? What does the “Mt” stand for? More importantly, who is Polly? The mysteries of this game. Regardless, let’s go. Polly Mt. 1: Okay… you start off underground. Go right, and you will see these bird dudes throwing bombs. You can take them out with one bomb of your own. Get on the platform, and it will start going up. Get off the platform when you get to the next floor. Don’t hit the spiked ceiling! On the other side of the spike pit will be a running bird dude. It will jump, run into a wall, rinse and repeat. Bomb it. Fly over the spike pit. Look, another spike pit and the runner dude! Do the same thing you did last time. Now go left, flying or jumping across the spike pits, and jump on the floating platforms you will see. There will be a bird throwing eggs. Bomb it. Go right, get on the moving platform, yada yada yada. See that item in the wall to the right? You can’t break the walls yet. So, get off the moving platform at the next level. Note: There is a spiked wall above you. Just walk towards the area. Tails will grab the ledge and pull himself up. Go left, grabbing the ledges as you go. Oh look, a hole! If you drop down it, a current of wind will bring you up. When you get up, bomb the floor below you. You will be in a cave-like area. You can exit the screen here, but naw. Let’s get back up. 
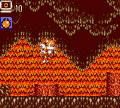
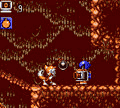
Go right, bombing the egg-throwers. See that hole in the wall? You guessed it - we’re going to use the Remote Robot! Go up the passageway to find a Helmet! Yay? Okay, now fly next to the egg throwing bird (when it’s not throwing eggs, of course), go right, and bomb the runner dudes. Fly between the spikes, the immediately go right. The wind will bring you up, and spikes are on the ceiling, so… yea, you don’t want to hit them. Now go into this little cave area… IN THE CEILING. *gasp* Go right, and fall down this vertical hallway. Next part, there is a large vertical column with egg throwers. Try to avoid the eggs, and bomb their heads. Now, there will be spiked floors. Board the moving platform. Jump off, and go to the floating platform. Go left, and jump on the other floating platform. Go right, and board the other moving platform over the spikes. Okay, now comes the hard part (not). Fly over the spike pit without hitting the ceiling of spikes. It’s easier than it sounds. Okay, here’s the next screen. Fly to the top of the screen, then go right. Bomb the egg thrower. See that item? You can’t get it because TROLLOLOLOL! Actually… go down, and break the breakable blocks below you. Now go right, walking across the breaking floor. If you go down, you will be greeted by spikes. Owch. Oh, and if you fall down the other one, you are taken back to the beginning of Polly Mt 1. Fall down the third one. Okay, if you fall down the pit after the third “pit”, wind will pull you up! Go left. Bomb the egg throwers, and go up and left. Bomb the block, and you should be able to access the item. You got… Knuckles. Hooray, it’s the knucklehead! Actually, it’s just a punch attack. Stick to your bombs for now. Okay, now go left. See the breakable wall? Break it. Now fall down. You will be sent to the map screen. There’s a reason for this, I swear! Okay, go back in to Polly Mt 1. Now go to that cave area around the beginning of the level. Go right, to the next screen. Here’s a picture, just in case you forgot what it looked like. 
Non-important Note/Comment: You know, you’d think the cave would be a special area. WRONG. Now you will be in a huge vertical hallway. Go and bomb the egg throwers from above. Also, wind 
Now go left. Break those rocks (that’s the only way to get back up), and now go to that area just after the spikes on the floor. Now jump on the platforms. There will be runner dudes on them, so try to jump and bomb them before you jump on the platform. Now break the rocks on the floor. Watch out, since there will be spikes. Try to fly over the spikes, bombing the runner dudes on the way. Now go up and right. Jump on those platforms, bombing the runner dudes, yada yada yada… After the platform segment, go down the vertical hallway, avoiding the eggs the egg thrower throws at you. Don’t bother going left. There’s nothing there. Go right instead. Go up this mountain passageway thingy, bombing the egg throwers and this one bomb thrower. Go right to the next screen. Boss Fight: Speedy: Oh boy, was that a long level! Welp, this boss is pretty fun. Just go and fly, avoiding the walls, floating platforms, spikes, and Speedy, while he tries to run into you. You can fly infinitely here. I find that constantly moving left and right helps a bit. I won’t say anything about the layout itself, since this is more of a trial and error boss. Speedy will give you a Purple Chaos Emerald after you win! Tails will fly away afterwards. This whole segment is auto controlled. 
Now you have unlocked the submarine thing. Well, get in it! First, equip the Vulcan Gun, though. Lake Rocky: Well, first water stage! The 1 button uses the item, as always, but the 2 button makes you turn around. That could take a while to get used to. Anyways, shoot down the birds in the submarine. Go down to the floor, then go through the cave below. Shoot the bombs down there to get rid of them. There will be some blocks above you. Don’t worry about that, since you can’t go up there yet. See the blocks to the right? You can’t shoot them, but your drill can dig through it! Just touch it with your drill. Go right to the next screen. In this screen, there are passageways with bombs. Just go down, since nothing is up. In the big room, just hug the floor and shoot any bird that comes your way. Same for the other big cave. You will see blocks below you, but you need a special item for that. Ignore it. Go right. Ignore the passageway on top. Then break the blocks with your drill. When you can go down, go down. Keep on going down, exploding the bombs on the way. Then go to the next screen. Oh god, bird attack! Birds will try to run into you, so make sure to shoot them down. Go right, bombing some more birds. You could technically go up at this point, but you’re not ready yet. Keep on going right until you go to the next screen. Cavern Island: Yay, new area. Wait, no, it’s another cave. Darn it! (‘-O’)- Regardless, go right. Bomb the mouse. This cave has water instead of lava. Go right to the pool with water. Bomb the mousys, then go to the third opening to the water. That’s the only way you will be able to be submerged in the water. Go down this hole in the pool. 
Now you are in a cave. Go left and bomb the rocks. When you see water below you, bomb the rocks below you, and go into the water. You will be pulled to the left water passageway. After you get out, enter the first water pool. The second one leads to the beginning of the level. After you get out the water passageway, bomb the bat. Go on the floor that breaks when you walk on it. Make sure to avoid the mousys when you come down! 
Go across the breaking floor, bombing the bats, before you get to a… tunnel with rocks blocking it. Bomb the rocks, and go down the tunnel. Now you should go right and bomb the mousys. Go into the water, and go right until you find a spring. Move the spring to the left until it is above the vertical water hallway. Jump on the spring, and claim the Mine! Mine mine mine! It’s for the submarine. 
Now go back down, and jump on the spring ( it resets) to the next area. Try to get to the top without getting hit by bats. You can go left or right. Don’t go left, since you’ll backtrack. Go right to the next screen. You will see a slope to the right. Go down it, and bomb the enemies you will find. When you get to the end of the slopes, go left. If you need health, bomb the “health rocks” next to the mousy, below the first set of the breaking floor. Go right, across the breaking floor, until you reach the end. Bomb the mousy, then bomb the rocks below you. 
Go down the water way. DON’T go up the vertical hallway. That makes you backtrack. Instead, go right. When you get out of the water, go down. Go left, bombing or avoiding the bats and drill things. Go down the vertical passageway you will see. Drop down to a small bit of ground you can stand on with running water on it. Use the Remote Bomb to bomb the wall in the small passageway. Now go down, and fly through the little hole you created. Go to the right and ride the running water, bombing any enemies you’ll see. Go to the left and throw some Remote Bombs down the gap to break the walls. 
You have found the Napalm Bomb! And yes, this item is necessary to progress through the game. Now go to the right and fall through the breaking floor. To the right will be a lot of blocks that you can use to refill your health. In the middle will be a way you can backtrack, just incase you missed the Napalm Bomb. To the left will be the way to progress. You will be in a new screen. Go to the right. You will eventually see a boss! :o Boss Fight: Mecha Golem 5-gou: Such a long name. Anyways, The only way you can damage the boss is to hit the head of it. Just fly up and unload bombs on the head. If you hear a little *ping* sound, that means you have damaged it. After some bombs will be the second phase of the boss. You have uncovered the Kukku that was controlling the boss, but this time, everytime you damage it, the Golem will hit the ground causing a bomb to fall on you! Just try to move around to avoid the bomb, since it seems to fall on your position when you hit it. After you beat the boss, you will get the Anti Air Missile! This is for the submarine. Speaking of which, go back in the submarine. Equip everything for the submarine you have, then let’s go! Lake Rocky (Second Visit): Go to the right until you reach the first cave. Use the Anti Air Missile to break the blocks to the top. Now go to the right to go to the next screen. Boss Fight: A Big Ship: Yep, a boss fight. In this fight, there will be Kukkus throwing barrels (I think) at you. The only way to beat the ship is from the bottom, and the Anti Air Missile will help you with that Because of that, you can now go to Green Island! So let’s go there. But before you do that, Item Collection #2: In Poloy Forest, go to this area. 
Duck and use the Napalm Bomb on the weirdly colored wall. Now go to the left, flying over the spikes and bombing the wall that hides the Spark! Now go to this area. 
Duck and use the Napalm Bomb on the weirdly colored wall, and go to the right. You can now go to the Caron Forest! And that’s all. Now go to Green Island. Green Island: A green island! Use the Napalm Bomb to get rid of the beehive. Go to the right and destroy the Napalm Bomb walls. Destroy the mini Kukku guy, then use the Remote Robot to push the spring in the small passageway to the left. Jump on the spring. Now go to the right (the left side serves no purpose) until you reach a tree with a lot of passageways in it. Go to the right without stopping to go to the passageway you’re supposed to get out of (the bottom one makes you backtrack). Now go to the right and fall down after you pass the next tree. Go to the right and enter the passageway. Bomb the middle two rocks, and the mini Kukku. Use the Remote Robot to go into the hole. Now go to the left. When you can’t go left anymore, fly up out of the tree. Get the item Extra Speed. Yes, it’s necessary. 
Now fly up slowly (there will be wind trying to push you up) to the highest hole in the tree. The middle hole serves no purpose and the very top… log thing will cause you to backtrack. Bomb the enemy inside and the rocks to the right to get inside the tree. Fly up and right out of the tree. Now platform across the floating wood, or you know, fly to the right and go to the next screen. Go to the right until you enter a tree and… spikes. Fly across them to enter the other tree. To the right will be… more spikes, but now with rocks. You have to bomb the rocks because they’re impeding your progress. And yes, there are two sets of rock columns. For the second one, fly next to it and drop a bomb. You will break some rocks, causing a foothold. Now fly to the next tree. Now fly up the said tree and go to the left. There are rocks on the bottom, blocking the spikes. Use the Napalm Bomb to destroy the beehive and go inside the next tree. Fly over to the next area, since in the middle of said tree is a hole. Platform across the tree trunks, bombing or napalming (yes, that’s a word now) the enemies. At the end of the platforming segment, go up and to the right (going to the left gives you a way to backtrack). After the next tree, there will be some steps going down. Go down them, and destroy the beehive. Bomb the rocks blocking the tree entrance and go inside the tree. Go up the tree and to the left. Go to the left and go inside the tree to the left. Go outside the tree to the left, and fly over the spikes (a wind current will help you). Inside the tree, fly up and go to the right (you know what? This guide is getting redundant :/). Bomb the rocks to the right, and you get access to an item! It’s the Night Goggles. This is also necessary. Now fly up in the middle of the little area. You will end up at the top of a tree. Fly to the right to the top of another tree. Fall down to the right, and continue to the right destroying enemies. To the very right will be one rock. Bomb it, and send the Remote Robot inside the little hole. When you drop down, go to the left. Then drop down in between the ledges then go to the right, and go inside the hole to get the White Chaos Emerald. That’s all you can do in this level, so backtrack to the beginning. Use the backtracking areas I mentioned to get back quicker. Now go to Caron Forest. Caron Forest: Another foresty area. Go to the right, destroying the napalm walls, until you reach an area where you can fly up. Fly up and go to the right. When you see a small passageway, use the Remote Robot to go inside. Use the Remote Robot to bring the rock down to you. Use the rock to get up on the ledge, and to climb up the rock formation. You can’t fly because there are wind currents bringing you down. At the top of the formation, fly up and go all the way to the left. Go all the way to the left first for the Blue Chaos Emerald, then break the rocks at the bottom, and fall down. Go to the right, until you reach a spring. Push it to the right, and eventually you’ll get the Triple Bomb! Now go back to where you had to push the rock and all that, then go to the next screen. Go to the left and down. Platform across the tiny platforms to the right, and land on the bigger platform. Now fly up and to the right. The wind current will pull you up to and area above. Go to the right and bomb the rocks to the right to get Sonic! No, you can’t play as him ;-;. Now go to the right and fall down. Go to the right and go up next to the spring. Use the Remote Robot to go into the area you came out of, and have it push the spring towards you. Now jump on it, and bomb the rock in the little passageway on the higher area. Use the Remote Robot to get in the small passageway and grab the Proton Torpedo! And that’s all you can do here so fall down a hole in the platforming segment to get out very quickly. Now go to Lake Rocky again. (if you want to make things a little easier, equip the Spark. It’s a basically a screen nuke). Lake Rocky (Third Visit): Go all the way to the third screen. Go up, and you will come to a different part of the lake. Now continue going up, until you reach another screen. Now just follow the natural passageway, and go to the right to Lake Rocky. You will be in Lake Crystal! Lake Crystal: This area can be hard. First, 
OH NOES ET BE 2 HIGH 4 ME!!!1111!!!!! Actually, if you hold the item button to the max (like a second after the revving sound disappears) you will just make it. Note: You can still jump high with the Speed Booster by staying still. The only thing that matters is how long you hold the item button. The second screen is trickier. There will be Kukkus throwing bombs at you from the air. And the logs will sometimes have Kukkus on them. You can use the Vulcan Gun to take care of the Kukkus (only the ones on the logs) if you wish. This part is harder, but there are less parts you need to use the Speed Booster. At the end, you will have access to Polly Mt. 2! Polly Mt. 2: The second of the legendary Polly Mts. IT’S SUPER DARK!!!1111!!! Yes, you need the Night Goggles here. 
In the next screen, go up and to the left. In the first big room, go to the middle where there’s a mousy and breakable rocks at the bottom. Break the rocks, but use the Remote Robot to go into the hole. Fly as the robot, and go to the small entrance to the right of the hole. Go inside, and follow it to the Fang. Yay… Now go up the level. You can’t fly up because of the wind, so you have to get up a different way. Go to the left, and then go to the right, jumping on the breaking floor. Go to the right until you see a mousy on a platform above the lava. Destroy the mousy, then destroy the rock above you. Now go to the right. Here’s the tricky part. You have to break the rocks, but you need to keep the bottom intact. So just bomb the top of the rocks. When you go to the end, you need to go to the right again, but this time, you’re higher up. At the end, go to the right until you see a hole in the ceiling. 
Use the Remote Robot to go in the hole. Go all the way to the left with it to get the Large Bomb! It is necessary. Now get out of the area. Item Collection #3: In Polly Mt. 1, go to this area. Use the Large Bomb to destroy the rocks. Now grab the item, Rocket Booter (?). Yes, that’s what it says. Shouldn’t it be Rocket BOOSTER? :v Now go to Volcanic Tunnel. Make sure you have the Regular Bomb, the Large Bomb, Remote Robot, and Remote Bomb with you. Go to the second part of the level. At the beginning, go down and to the right. Destroy the rocks with the Large Bomb, then go to the right. In the next room, go down. Bomb the rocks to the right, then go up (just fly, it’s not worth dealing with the breaking floor). Go to the right, and go to the area where there’s rocks in the middle of a pool of lava. 
Use the Large Bomb to break the rocks. Fall down the passageway, then go to the right and bomb those rocks with the Large Bomb. Now traverse through the area, preferably flying through the obstacles. Keep on going until you’re behind the boss. 
Use the Remote Bomb a few times to wreck it. Get rekt :v. When it’s destroyed (using the bomb doesn’t make a ping noise) bomb the rocks below your area, and then fly up to get the Extra Armor. AKA invincibility for your submarine. Now go to Lake Rocky, with only the Spark, Extra Armor, Mine, and Proton Torpedo.. Go left to exit. Lake Rocky (Fourth & Final Visit): Go to the second part, and then hug the floor until you see some rocks below you. Destroy them with the Mine, then go to the next screen. Instantly use the Extra Armor, since there are things down here that can take away 10 rings in one hit. Ow. Just follow the natural path, sometimes using the Mine to get through some blocks. In the second area, do the same thing until you reach a big room. Go up and to the right, then go down right before a room with lots of shooting things. Use the Mine when you go down, and after you do that go to the right. There will be a tube in the middle. 
Use the Proton Torpedo a few time on it and it should become destroyed. Go through. Now in the last screen, just go through the area naturally. When you reach the surface of the water, Tails will jump out. You now have access to Coco Island. Coco Island: Have the Triple Bomb, and the Remote Robot. You can substitute anything else for the last two slots. Go to the right over the breaking floor. Press the button to make the blue barrier electric thing disappear. Go to the right, using the Triple Bomb to destroy the enemies when they become vulnerable (or, you know, just fly over like a boss B-)). When you see breakable blocks below you, break them and go down. Break the wall to the right, then fly up. Break the other wall to the right, then hold right and go right. Break the wall on the floor, then hold right. Go up and press the button. Now go back to where you broke the wall on the floor, then break the wall to the right. Fall to the right, then press the other button. Now go down and to the left. Keep on going to the left, avoiding the bombs coming from where they’re coming from Now fly to the right where you’ll see a button. Hit it, then go down through the arrows. Go to the left. The laser gate down here is now not here. Go through the area the laser gate was protecting, then touch the two down arrows. You’ll go to the next screen. 
Go down, and bomb the blocks below you. Go down the hole to the left between the spikes. You’ll get the Teleport Device! Now fly out, and fly to the floating platform to the right. Use the Remote Robot to go into the small hole in the ceiling. When you drop down, go to the right. Avoid the rings coming from the contraptions above you, since they cause the Remote Robot to come back to you. It’s the only thing in the game that can do anything to the Remote Robot. After going all the way to the right, go to the left and fall down the hole with the one down arrow. You’ll fall down on a button that deactivates the laser to the left. Now break the blocks to the right. Go to the right and fall down. Now fly to the left, flying over the cannons. Break the blocks to the very left, then fall down there, and use the Remote Robot to crawl through the small passageway. Have the Remote Robot press the button to the right. Now go to the right and fall down and go down again into the hole to the left. Now go to the left across the conveyor belts, and break the blocks to the left. Now break the floor in the middle with cannons shooting at you :v. Now fall down and go to the right. Press the button, then go to the right and fly up to the right when you see a room with Kukkus. Then fall down to the right and keep on going right to the next screen. Boss Fight: Doctor Fukurokov (I literally had to copy and paste the complicated name): Yes, boss time. Tails will automatically walk to the right, then the doctor (no pun intended) will do something to cause Tails to fall. After Tails falls on something, you have control of Tails. Go to the right, and bomb the two blocks to the right. Use the Remote Robot to crawl through. Go up the second passageway. Then fly up over the down arrows and fly to the left to go up the small passageway a little to the left. Go to the right, then go up to the platform with a rock on it. Push the rock into the doctor. You killed him, you murderer! :o. Press the button to the right, then use Tails to fly through the opened passageway to the left. 
You will come back to the map. Coco Island will become a floating island. To get to it, equip the Rocket Booster (yes, not booter, GAME) and you’ll be able to go to Battle Fortress. fyi, equip the Vulcan Gun. It’s the only thing you can use in this stage. Battle Fortress: It’s a shooting type of level or something. The first part, you are quickly flying to the right. Pressing left will cause you to go left. Don’t do that Here, you’re supposed to go all the way to the top with Kukkus shooting at you. They also take 5 rings per hit. And there’s two ways to go at this. The first way is to slowing go up, trying to go up gradually and shooting at anything that can hurt you. The second way, which I will call the YOLO way, is to just go up without a care in the world. This way will work (I tried it), but only if you at least make an effort to avoid stuff (and you may die a few times in the process). After you reach the top and Tails slowing gets out of the flying submarine and walks to the right, you’ll be able to go to the next Battle Fortress. I shall call it Battle Fortress 2 for convenience sake. Battle Fortress 2: is not a shooty type level. Go to the right, and fly through the spikes and conveyor belts (make sure to be low on the ground so that you can go through the lower passageway). When you see the small passageway to the right, use the Remote Robot to crawl through and get the Wrench. Now you have to go back home and equip it ;w;. Also, if you have been following this guide correctly, you have all the items you can get! Yay! Now go back to where you were before and fall down. Break the blocks to the left, the ride the conveyor belt to the very left. Break the blocks there, then fly up and to the right. Fly over the down arrows you’ll see, then press the button. That will disable the blue laser barrier to the right of that. Go to the right where the barrier was, then go down and use the Remote Robot to go down the hole in the middle of the room. Go all the way to the right with the robot until you reach a room of spikes with a button to the right. Press the button to disable another barrier. Now go to the right as Tails and fly across conveyor belts and then go up when you can’t go right anymore. When you get outside, go down the conveyor belt platform things until you can’t go down anymore, then go to the right and go up the new conveyor belts. Go to the left across the conveyor belts (flying/jumping over the down arrows!) the keep on going to the left until you reach a room with spikes and one enemy in the middle. Break the blocks to the left, then go to the left. Climb up the platform in the middle to the left to go to the next part. IT’S A MAGICAL PLATFORM I TELL U! 
Go to the right, until you see down arrows above you, and a small passageway to the left. Use the Remote Robot to go through the passageway, and hit the button at the end of the passageway. Now go all the way to the left and go through the area the laser barrier was blocking before, then go up onto the conveyor belts above. Keep on going up until you are here. Bomb the blocks, then FLY down to the right and land on a ledge with some more blocks on it (I say “fly” because more down arrows). Then fly to the right and go down the first set of down arrows. Now fly to the very right and fly up until you can land on a big column. Now fly to the left and hug the wall to the left and just drop bombs until the Kukku dies. Now fly to the left some more and go to the lower passageway with blocks. Bomb the blocks, then fly to the left. When you land on solid ground, go to the left and use the Remote Robot to crawl through the small passageway. There will be the things that is the only thing that can affect the Remote Robot. Here’s a tip: when you’re going through the “sonar area” take “long jump” instead of pressing the jump button rapidly. You’ll gain a lot more ground that way. (i know, I know, ur amaze) After that area is a button. Press it, then go back to Tails. Now go back to the right and go to the upper passageway blocked by blocks. Bomb the blocks, and then fly to the left and bomb the other blocks to the left. When you’re in the room with the conveyor belts, stand in the middle and use the Remote Robot. Fly up and into the passageway, and then when you get out press the button to the right. Now go out of the area and fly to the right. The go up and to the left. You should be teleported to a boss fight. Boss Fight: Speedy (again)...: Yep, it’s that Kukku again. First thing first, stand on the lower platforms if you want to avoid the most attacks. Doesn't matter which, but I prefer the right side. Throw a bomb at Speedy whenever he comes near (he might fly into you, but he takes 2 rings, so no big deal). When he does the wave attack, he goes from the top, to the middle, to the bottom. This attack is why you want to be in the middle (on the floor you don’t have as many opportunities to attack, and he likes flying on the floor). After Speedy is done, fly up for the FINAL BATTLE OMG SUCH HYPE. 
Final Boss Fight: Great Battle Kukku 15th: The first part of this boss fight is the boss throwing bombs at you. Avoid the bombs and throw bombs back at him. After a while, the second part of the boss will start. He’ll crouch, and ”slide” bombs. Fly up to the sky, and try to be where the boss is while dropping bombs at him. When he stops in the middle, stay in the middle. He’ll throw bombs to the left and right, but in the middle you’re safe. When you go down to the ground for “flying fuel”, try to land away from the boss. If he comes near you on the floor, he’ll grab you and throw you (this also happens during the first part). After you beat him, the game will end. Tails will fly to his flying submarine, and fly to his home. The battleship will crash into the ocean. And credits! Tails will be building a bigger Remote Robot and… I’ll let you find out yourself what happens END OF GUIDE This was a guide that I partly finished in February. And now I’m gonna finish it fully this time Characters/Story (at the beginning of the game): After Sonic 2, Tails was bored. He took a vacation on Coco Island. Unfortunately, these bird people wanted to make his life miserable. So Tails fought back, without the help of Sonic. Yep, that’s the story in a nutshell. Controls: The 1 button is the “use” button. You can use the item you have The Actual Walkthrough: You start off on a map, highlighting your house. Go to that cave area you can go to on the map. You will be in the first area of the game, Poloy Forest. Important: The house is the only place that you can change the items you are holding (max of 4 at a time). Go to Equip to do this. You can also go to “Cont.” to see what password will let you go to the same spot you left at. “Dock” isn’t important in this stage of the game, but it will later. Also, going to your house refills your health. Poloy Forest: This is the first area of the game. Go left, and you will see a bird enemy that is flying. That bird is part of the Battle Kukku, the birds that interrupted your vacation. Use the bomb, and it should die. Now there is a bird on land. Same technique. Okay, now there will be spikes, and another bird guy. The spikes won’t insta-kill you like Mega Man, but they take away 4 rings… owch. Now you are walking right, with another bird guy, and rocks! Whatever shall we do? Well, blow them up with your bombs, of course!
There will be more rocks below you, but there will also be another, different rock. It’s brown, so that’s how you know it’s different. You can push it! (you have to push it to advance) You can get rid of the rocks below you by pressing down and the 1 button. You will throw the bomb downwards. Ignore that weird looking wall to the left of the little hole. You can’t break that yet. Go right, (there’s no point in going left yet) then go up and left. Keep on going right, and get rid of the birds in your way. Go up when there are platforms leading up, and go right. Don’t go left, because it’s pointless. You will fall down a vertical hallway. Again, going left is pointless. Go right, and push that spring with you. Push that spring until it’s aligned with that hole in the ground, then jump on it. If you go down, the spring will reset to its original location, so don’t go back down. You will waste time (there is no time limit, though, so don’t freak out if the spring happens to reset) Go right. You will be in the next screen. Go right, bomb the bird, and go right again. See that slightly darkened floor? That means the floor will break if you walk on it. Press right until you are on normal colored ground again, or fly over it.
See that hole in the ground? To pass it, just jump. You can’t fly over because wind will push you back. There’s no point going down the hole yet. When you go right, you will eventually see an item below you. Ignore it, you can’t get it yet. Keep on going right, bombing the birds, until you are going down some steps. Go on the first platform you can fly to on the right, then jump across until you encounter those rocks again. Bomb them, then get the item. You now have a Red Chaos Emerald! Your health will increase by 10 rings, and you can fly longer. Sorry, no super Tails :/.
Bomb the rocks below the chaos emerald, then go down that passageway. Go right after you drop down; there’s nothing to gain by going left. On the next screen, you will hear a new soundtrack! Boss time! Well, not yet. When you go into the tree, jump on the platforms. Go right, and you should encounter the boss, the Kukku Walker. Boss Fight: Kukku Walker: This boss is easy. It does one of two things: walk, or shoot fire. You can jump or fly to avoid the fire. It may seem like the bombs aren’t doing anything, but it is. It just takes a lot of bombs to destroy the boss. Go right after the boss is defeated, then pick up the item on the tree stump, Remote Robot.
This item allows you to get some previously inaccessible items in Poloy Forest. So, go back to Poloy Forest! You’ll have access to Volcanic Tunnel, but don’t go there yet. Note: You can exit levels quickly by going to the left of the screen when you start the level. Item collection #1: Go to Poloy Forest. Go through the level until you reach that hole in the ground where you can’t fly over it. Go down the hole. Go left while you are flying so that you don’t fall in the spikes. To the left, you will see a tree stump with a tiny hole in it. Use the Remote Robot to go through the hole and get the Speed Boots when you go to the end of the passageway.
Note: You can press the 1 button to have the Remote Robot go to Tails immediately. The Speed Boots allow you to run very quickly. You can’t attack, though, so beware! Now go up and right until you see another small hole. Use the Remote Robot to go through that hole.
In this passageway, there are spikes. Don’t worry, the Remote Robot is INVINCIBLE (to almost everything)! You will get a… Radio. The Radio allows you to change the music that is playing, so if you’re tired of the music in a level, you can change it! Even better, the music doesn’t change, even if you switch to a different item! That’s all that you can get in Poloy Forest, so let’s go to Volcanic Tunnel! Volcanic Tunnel: Welcome to the cave level! Go left, and break the rocks you will encounter. You will see a little mousy. It will drop tiny bombs. Bomb it. Now bomb the floor below you. Don’t go down it yet, instead go right. Bomb the three bats, and the mousy you will see. Now collect the item that’s surrounded by lava. You will get the Hammer! The hammer is like a… hammer.
Now go back to the hole in the ground. You should try to drop through the middle of the floor, since there is lava below, and they take 4 rings. Owch. Now go left. Bomb the mousy, and then bomb the wall to the left. I find that flying to the platform avoids the spiked ceiling. You can bomb the walls in this passageway if you need health. Now go up and right, to bomb this wall. Now fall down. Congratulations, you just wasted 1 minute of your life! Now go right. Bomb the wall to the right, then go right again. See that bat near the slanted floor? Bomb the bats. Now go right. See that red streak? Fireballs come out from it, so beware!
Now go right. See that platform with the fire sprout? Yea… fly up and over to avoid it. Now go over the lava pit, and bomb the mousy. Fall down the passageway to the right. Bomb the bats, and go right. When you see a small passageway, use the Remote Robot to go through it. Ignore the mousies - the Remote Robot is INVINCIBLE, remember? You will get the Remote Bomb from the item at the end. The Remote Bomb is a… remote bomb. It will crawl on the floor, and you can denote it whenever.
Now exit the level by going to the beginning of the level. Go to Tails house, and equip the Remote Bomb. Warning: you need to have the regular bomb and the Remote Robot as well! Now go back to Volcanic Tunnel, and go back to the area that you were at last. Go on to the area to the left, and go up it.
Now use the Remote Bomb to destroy the floor on the other side of the wall by putting it through the little hole. Denotate it when it gets close to the floor, and vola! Not go back down the passageway, and go through the hole the bomb created. Go left, bombing the mousy, and you should be at the next screen. The next screen has a lot of fire sprouts. Avoid them the best you can. Go left until you see spikes. Now, don’t go down: There is nothing you can do yet. Instead, fly over to the other side (jumping on the platforms is annoying). Not fly up to the ledge and… drill! A bomb should take care of Mr. Drill Guy. Fly over the hole with the fire sprouts, and use the Remote bomb to break the rocks. Remember to break all of them! Now go down the hole with the fire sprouts. Try to drop down the middle to avoid the fire sprouts. Jump over the lava pit, and bomb the mousy. Fly up, avoiding the fire sprouts, and go through the hole you made. There will be a bat up there who just hates you, and so you will get hit. You will most likely fall down because of the bat. Uggggg (can you tell that I hate this part?). Anyways, next you bomb the rocks, mousys, and yea. After more mousys will be a lot of rocks. Try to bomb the rocks to the right because… lava.
Fly over the lava pit with the spiked ceiling. Now, the floor will break here, so run! Now, the reward for your troubles happen to be a GREEN CHAOS EMERALD! 2 out of 6! Yea… Now bomb the blocks up and to the left of you. Bomb the bats, and bomb the other rocks that are… up and left of you. Now go up, taking care of the bats, and go right. There’s that drill guy again. Go right, walking across the breaking floor, and use the Remote Bomb for the floor (again). You can go down the hole the breaking floor made, to get to the hole faster. Go left, and you will be finished with Volcanic Tunnel! Next up is Polly Mt. 1? What does the “Mt” stand for? More importantly, who is Polly? The mysteries of this game. Regardless, let’s go. Polly Mt. 1: Okay… you start off underground. Go right, and you will see these bird dudes throwing bombs. You can take them out with one bomb of your own. Get on the platform, and it will start going up. Get off the platform when you get to the next floor. Don’t hit the spiked ceiling! On the other side of the spike pit will be a running bird dude. It will jump, run into a wall, rinse and repeat. Bomb it. Fly over the spike pit. Look, another spike pit and the runner dude! Do the same thing you did last time. Now go left, flying or jumping across the spike pits, and jump on the floating platforms you will see. There will be a bird throwing eggs. Bomb it. Go right, get on the moving platform, yada yada yada. See that item in the wall to the right? You can’t break the walls yet. So, get off the moving platform at the next level. Note: There is a spiked wall above you. Just walk towards the area. Tails will grab the ledge and pull himself up. Go left, grabbing the ledges as you go. Oh look, a hole! If you drop down it, a current of wind will bring you up. When you get up, bomb the floor below you. You will be in a cave-like area. You can exit the screen here, but naw. Let’s get back up.
Go right, bombing the egg-throwers. See that hole in the wall? You guessed it - we’re going to use the Remote Robot! Go up the passageway to find a Helmet! Yay? Okay, now fly next to the egg throwing bird (when it’s not throwing eggs, of course), go right, and bomb the runner dudes. Fly between the spikes, the immediately go right. The wind will bring you up, and spikes are on the ceiling, so… yea, you don’t want to hit them. Now go into this little cave area… IN THE CEILING. *gasp* Go right, and fall down this vertical hallway. Next part, there is a large vertical column with egg throwers. Try to avoid the eggs, and bomb their heads. Now, there will be spiked floors. Board the moving platform. Jump off, and go to the floating platform. Go left, and jump on the other floating platform. Go right, and board the other moving platform over the spikes. Okay, now comes the hard part (not). Fly over the spike pit without hitting the ceiling of spikes. It’s easier than it sounds. Okay, here’s the next screen. Fly to the top of the screen, then go right. Bomb the egg thrower. See that item? You can’t get it because TROLLOLOLOL! Actually… go down, and break the breakable blocks below you. Now go right, walking across the breaking floor. If you go down, you will be greeted by spikes. Owch. Oh, and if you fall down the other one, you are taken back to the beginning of Polly Mt 1. Fall down the third one. Okay, if you fall down the pit after the third “pit”, wind will pull you up! Go left. Bomb the egg throwers, and go up and left. Bomb the block, and you should be able to access the item. You got… Knuckles. Hooray, it’s the knucklehead! Actually, it’s just a punch attack. Stick to your bombs for now. Okay, now go left. See the breakable wall? Break it. Now fall down. You will be sent to the map screen. There’s a reason for this, I swear! Okay, go back in to Polly Mt 1. Now go to that cave area around the beginning of the level. Go right, to the next screen. Here’s a picture, just in case you forgot what it looked like.
Non-important Note/Comment: You know, you’d think the cave would be a special area. WRONG. Now you will be in a huge vertical hallway. Go and bomb the egg throwers from above. Also, wind
Now go left. Break those rocks (that’s the only way to get back up), and now go to that area just after the spikes on the floor. Now jump on the platforms. There will be runner dudes on them, so try to jump and bomb them before you jump on the platform. Now break the rocks on the floor. Watch out, since there will be spikes. Try to fly over the spikes, bombing the runner dudes on the way. Now go up and right. Jump on those platforms, bombing the runner dudes, yada yada yada… After the platform segment, go down the vertical hallway, avoiding the eggs the egg thrower throws at you. Don’t bother going left. There’s nothing there. Go right instead. Go up this mountain passageway thingy, bombing the egg throwers and this one bomb thrower. Go right to the next screen. Boss Fight: Speedy: Oh boy, was that a long level! Welp, this boss is pretty fun. Just go and fly, avoiding the walls, floating platforms, spikes, and Speedy, while he tries to run into you. You can fly infinitely here. I find that constantly moving left and right helps a bit. I won’t say anything about the layout itself, since this is more of a trial and error boss. Speedy will give you a Purple Chaos Emerald after you win! Tails will fly away afterwards. This whole segment is auto controlled.
Now you have unlocked the submarine thing. Well, get in it! First, equip the Vulcan Gun, though. Lake Rocky: Well, first water stage! The 1 button uses the item, as always, but the 2 button makes you turn around. That could take a while to get used to. Anyways, shoot down the birds in the submarine. Go down to the floor, then go through the cave below. Shoot the bombs down there to get rid of them. There will be some blocks above you. Don’t worry about that, since you can’t go up there yet. See the blocks to the right? You can’t shoot them, but your drill can dig through it! Just touch it with your drill. Go right to the next screen. In this screen, there are passageways with bombs. Just go down, since nothing is up. In the big room, just hug the floor and shoot any bird that comes your way. Same for the other big cave. You will see blocks below you, but you need a special item for that. Ignore it. Go right. Ignore the passageway on top. Then break the blocks with your drill. When you can go down, go down. Keep on going down, exploding the bombs on the way. Then go to the next screen. Oh god, bird attack! Birds will try to run into you, so make sure to shoot them down. Go right, bombing some more birds. You could technically go up at this point, but you’re not ready yet. Keep on going right until you go to the next screen. Cavern Island: Yay, new area. Wait, no, it’s another cave. Darn it! (‘-O’)- Regardless, go right. Bomb the mouse. This cave has water instead of lava. Go right to the pool with water. Bomb the mousys, then go to the third opening to the water. That’s the only way you will be able to be submerged in the water. Go down this hole in the pool.
Now you are in a cave. Go left and bomb the rocks. When you see water below you, bomb the rocks below you, and go into the water. You will be pulled to the left water passageway. After you get out, enter the first water pool. The second one leads to the beginning of the level. After you get out the water passageway, bomb the bat. Go on the floor that breaks when you walk on it. Make sure to avoid the mousys when you come down!
Go across the breaking floor, bombing the bats, before you get to a… tunnel with rocks blocking it. Bomb the rocks, and go down the tunnel. Now you should go right and bomb the mousys. Go into the water, and go right until you find a spring. Move the spring to the left until it is above the vertical water hallway. Jump on the spring, and claim the Mine! Mine mine mine! It’s for the submarine.
Now go back down, and jump on the spring ( it resets) to the next area. Try to get to the top without getting hit by bats. You can go left or right. Don’t go left, since you’ll backtrack. Go right to the next screen. You will see a slope to the right. Go down it, and bomb the enemies you will find. When you get to the end of the slopes, go left. If you need health, bomb the “health rocks” next to the mousy, below the first set of the breaking floor. Go right, across the breaking floor, until you reach the end. Bomb the mousy, then bomb the rocks below you.
Go down the water way. DON’T go up the vertical hallway. That makes you backtrack. Instead, go right. When you get out of the water, go down. Go left, bombing or avoiding the bats and drill things. Go down the vertical passageway you will see. Drop down to a small bit of ground you can stand on with running water on it. Use the Remote Bomb to bomb the wall in the small passageway. Now go down, and fly through the little hole you created. Go to the right and ride the running water, bombing any enemies you’ll see. Go to the left and throw some Remote Bombs down the gap to break the walls.
You have found the Napalm Bomb! And yes, this item is necessary to progress through the game. Now go to the right and fall through the breaking floor. To the right will be a lot of blocks that you can use to refill your health. In the middle will be a way you can backtrack, just incase you missed the Napalm Bomb. To the left will be the way to progress. You will be in a new screen. Go to the right. You will eventually see a boss! :o Boss Fight: Mecha Golem 5-gou: Such a long name. Anyways, The only way you can damage the boss is to hit the head of it. Just fly up and unload bombs on the head. If you hear a little *ping* sound, that means you have damaged it. After some bombs will be the second phase of the boss. You have uncovered the Kukku that was controlling the boss, but this time, everytime you damage it, the Golem will hit the ground causing a bomb to fall on you! Just try to move around to avoid the bomb, since it seems to fall on your position when you hit it. After you beat the boss, you will get the Anti Air Missile! This is for the submarine. Speaking of which, go back in the submarine. Equip everything for the submarine you have, then let’s go! Lake Rocky (Second Visit): Go to the right until you reach the first cave. Use the Anti Air Missile to break the blocks to the top. Now go to the right to go to the next screen. Boss Fight: A Big Ship: Yep, a boss fight. In this fight, there will be Kukkus throwing barrels (I think) at you. The only way to beat the ship is from the bottom, and the Anti Air Missile will help you with that Because of that, you can now go to Green Island! So let’s go there. But before you do that, Item Collection #2: In Poloy Forest, go to this area.
Duck and use the Napalm Bomb on the weirdly colored wall. Now go to the left, flying over the spikes and bombing the wall that hides the Spark! Now go to this area.
Duck and use the Napalm Bomb on the weirdly colored wall, and go to the right. You can now go to the Caron Forest! And that’s all. Now go to Green Island. Green Island: A green island! Use the Napalm Bomb to get rid of the beehive. Go to the right and destroy the Napalm Bomb walls. Destroy the mini Kukku guy, then use the Remote Robot to push the spring in the small passageway to the left. Jump on the spring. Now go to the right (the left side serves no purpose) until you reach a tree with a lot of passageways in it. Go to the right without stopping to go to the passageway you’re supposed to get out of (the bottom one makes you backtrack). Now go to the right and fall down after you pass the next tree. Go to the right and enter the passageway. Bomb the middle two rocks, and the mini Kukku. Use the Remote Robot to go into the hole. Now go to the left. When you can’t go left anymore, fly up out of the tree. Get the item Extra Speed. Yes, it’s necessary.
Now fly up slowly (there will be wind trying to push you up) to the highest hole in the tree. The middle hole serves no purpose and the very top… log thing will cause you to backtrack. Bomb the enemy inside and the rocks to the right to get inside the tree. Fly up and right out of the tree. Now platform across the floating wood, or you know, fly to the right and go to the next screen. Go to the right until you enter a tree and… spikes. Fly across them to enter the other tree. To the right will be… more spikes, but now with rocks. You have to bomb the rocks because they’re impeding your progress. And yes, there are two sets of rock columns. For the second one, fly next to it and drop a bomb. You will break some rocks, causing a foothold. Now fly to the next tree. Now fly up the said tree and go to the left. There are rocks on the bottom, blocking the spikes. Use the Napalm Bomb to destroy the beehive and go inside the next tree. Fly over to the next area, since in the middle of said tree is a hole. Platform across the tree trunks, bombing or napalming (yes, that’s a word now) the enemies. At the end of the platforming segment, go up and to the right (going to the left gives you a way to backtrack). After the next tree, there will be some steps going down. Go down them, and destroy the beehive. Bomb the rocks blocking the tree entrance and go inside the tree. Go up the tree and to the left. Go to the left and go inside the tree to the left. Go outside the tree to the left, and fly over the spikes (a wind current will help you). Inside the tree, fly up and go to the right (you know what? This guide is getting redundant :/). Bomb the rocks to the right, and you get access to an item! It’s the Night Goggles. This is also necessary. Now fly up in the middle of the little area. You will end up at the top of a tree. Fly to the right to the top of another tree. Fall down to the right, and continue to the right destroying enemies. To the very right will be one rock. Bomb it, and send the Remote Robot inside the little hole. When you drop down, go to the left. Then drop down in between the ledges then go to the right, and go inside the hole to get the White Chaos Emerald. That’s all you can do in this level, so backtrack to the beginning. Use the backtracking areas I mentioned to get back quicker. Now go to Caron Forest. Caron Forest: Another foresty area. Go to the right, destroying the napalm walls, until you reach an area where you can fly up. Fly up and go to the right. When you see a small passageway, use the Remote Robot to go inside. Use the Remote Robot to bring the rock down to you. Use the rock to get up on the ledge, and to climb up the rock formation. You can’t fly because there are wind currents bringing you down. At the top of the formation, fly up and go all the way to the left. Go all the way to the left first for the Blue Chaos Emerald, then break the rocks at the bottom, and fall down. Go to the right, until you reach a spring. Push it to the right, and eventually you’ll get the Triple Bomb! Now go back to where you had to push the rock and all that, then go to the next screen. Go to the left and down. Platform across the tiny platforms to the right, and land on the bigger platform. Now fly up and to the right. The wind current will pull you up to and area above. Go to the right and bomb the rocks to the right to get Sonic! No, you can’t play as him ;-;. Now go to the right and fall down. Go to the right and go up next to the spring. Use the Remote Robot to go into the area you came out of, and have it push the spring towards you. Now jump on it, and bomb the rock in the little passageway on the higher area. Use the Remote Robot to get in the small passageway and grab the Proton Torpedo! And that’s all you can do here so fall down a hole in the platforming segment to get out very quickly. Now go to Lake Rocky again. (if you want to make things a little easier, equip the Spark. It’s a basically a screen nuke). Lake Rocky (Third Visit): Go all the way to the third screen. Go up, and you will come to a different part of the lake. Now continue going up, until you reach another screen. Now just follow the natural passageway, and go to the right to Lake Rocky. You will be in Lake Crystal! Lake Crystal: This area can be hard. First,
OH NOES ET BE 2 HIGH 4 ME!!!1111!!!!! Actually, if you hold the item button to the max (like a second after the revving sound disappears) you will just make it. Note: You can still jump high with the Speed Booster by staying still. The only thing that matters is how long you hold the item button. The second screen is trickier. There will be Kukkus throwing bombs at you from the air. And the logs will sometimes have Kukkus on them. You can use the Vulcan Gun to take care of the Kukkus (only the ones on the logs) if you wish. This part is harder, but there are less parts you need to use the Speed Booster. At the end, you will have access to Polly Mt. 2! Polly Mt. 2: The second of the legendary Polly Mts. IT’S SUPER DARK!!!1111!!! Yes, you need the Night Goggles here.
In the next screen, go up and to the left. In the first big room, go to the middle where there’s a mousy and breakable rocks at the bottom. Break the rocks, but use the Remote Robot to go into the hole. Fly as the robot, and go to the small entrance to the right of the hole. Go inside, and follow it to the Fang. Yay… Now go up the level. You can’t fly up because of the wind, so you have to get up a different way. Go to the left, and then go to the right, jumping on the breaking floor. Go to the right until you see a mousy on a platform above the lava. Destroy the mousy, then destroy the rock above you. Now go to the right. Here’s the tricky part. You have to break the rocks, but you need to keep the bottom intact. So just bomb the top of the rocks. When you go to the end, you need to go to the right again, but this time, you’re higher up. At the end, go to the right until you see a hole in the ceiling.
Use the Remote Robot to go in the hole. Go all the way to the left with it to get the Large Bomb! It is necessary. Now get out of the area. Item Collection #3: In Polly Mt. 1, go to this area. Use the Large Bomb to destroy the rocks. Now grab the item, Rocket Booter (?). Yes, that’s what it says. Shouldn’t it be Rocket BOOSTER? :v Now go to Volcanic Tunnel. Make sure you have the Regular Bomb, the Large Bomb, Remote Robot, and Remote Bomb with you. Go to the second part of the level. At the beginning, go down and to the right. Destroy the rocks with the Large Bomb, then go to the right. In the next room, go down. Bomb the rocks to the right, then go up (just fly, it’s not worth dealing with the breaking floor). Go to the right, and go to the area where there’s rocks in the middle of a pool of lava.
Use the Large Bomb to break the rocks. Fall down the passageway, then go to the right and bomb those rocks with the Large Bomb. Now traverse through the area, preferably flying through the obstacles. Keep on going until you’re behind the boss.
Use the Remote Bomb a few times to wreck it. Get rekt :v. When it’s destroyed (using the bomb doesn’t make a ping noise) bomb the rocks below your area, and then fly up to get the Extra Armor. AKA invincibility for your submarine. Now go to Lake Rocky, with only the Spark, Extra Armor, Mine, and Proton Torpedo.. Go left to exit. Lake Rocky (Fourth & Final Visit): Go to the second part, and then hug the floor until you see some rocks below you. Destroy them with the Mine, then go to the next screen. Instantly use the Extra Armor, since there are things down here that can take away 10 rings in one hit. Ow. Just follow the natural path, sometimes using the Mine to get through some blocks. In the second area, do the same thing until you reach a big room. Go up and to the right, then go down right before a room with lots of shooting things. Use the Mine when you go down, and after you do that go to the right. There will be a tube in the middle.
Use the Proton Torpedo a few time on it and it should become destroyed. Go through. Now in the last screen, just go through the area naturally. When you reach the surface of the water, Tails will jump out. You now have access to Coco Island. Coco Island: Have the Triple Bomb, and the Remote Robot. You can substitute anything else for the last two slots. Go to the right over the breaking floor. Press the button to make the blue barrier electric thing disappear. Go to the right, using the Triple Bomb to destroy the enemies when they become vulnerable (or, you know, just fly over like a boss B-)). When you see breakable blocks below you, break them and go down. Break the wall to the right, then fly up. Break the other wall to the right, then hold right and go right. Break the wall on the floor, then hold right. Go up and press the button. Now go back to where you broke the wall on the floor, then break the wall to the right. Fall to the right, then press the other button. Now go down and to the left. Keep on going to the left, avoiding the bombs coming from where they’re coming from Now fly to the right where you’ll see a button. Hit it, then go down through the arrows. Go to the left. The laser gate down here is now not here. Go through the area the laser gate was protecting, then touch the two down arrows. You’ll go to the next screen.
Go down, and bomb the blocks below you. Go down the hole to the left between the spikes. You’ll get the Teleport Device! Now fly out, and fly to the floating platform to the right. Use the Remote Robot to go into the small hole in the ceiling. When you drop down, go to the right. Avoid the rings coming from the contraptions above you, since they cause the Remote Robot to come back to you. It’s the only thing in the game that can do anything to the Remote Robot. After going all the way to the right, go to the left and fall down the hole with the one down arrow. You’ll fall down on a button that deactivates the laser to the left. Now break the blocks to the right. Go to the right and fall down. Now fly to the left, flying over the cannons. Break the blocks to the very left, then fall down there, and use the Remote Robot to crawl through the small passageway. Have the Remote Robot press the button to the right. Now go to the right and fall down and go down again into the hole to the left. Now go to the left across the conveyor belts, and break the blocks to the left. Now break the floor in the middle with cannons shooting at you :v. Now fall down and go to the right. Press the button, then go to the right and fly up to the right when you see a room with Kukkus. Then fall down to the right and keep on going right to the next screen. Boss Fight: Doctor Fukurokov (I literally had to copy and paste the complicated name): Yes, boss time. Tails will automatically walk to the right, then the doctor (no pun intended) will do something to cause Tails to fall. After Tails falls on something, you have control of Tails. Go to the right, and bomb the two blocks to the right. Use the Remote Robot to crawl through. Go up the second passageway. Then fly up over the down arrows and fly to the left to go up the small passageway a little to the left. Go to the right, then go up to the platform with a rock on it. Push the rock into the doctor. You killed him, you murderer! :o. Press the button to the right, then use Tails to fly through the opened passageway to the left.
You will come back to the map. Coco Island will become a floating island. To get to it, equip the Rocket Booster (yes, not booter, GAME) and you’ll be able to go to Battle Fortress. fyi, equip the Vulcan Gun. It’s the only thing you can use in this stage. Battle Fortress: It’s a shooting type of level or something. The first part, you are quickly flying to the right. Pressing left will cause you to go left. Don’t do that Here, you’re supposed to go all the way to the top with Kukkus shooting at you. They also take 5 rings per hit. And there’s two ways to go at this. The first way is to slowing go up, trying to go up gradually and shooting at anything that can hurt you. The second way, which I will call the YOLO way, is to just go up without a care in the world. This way will work (I tried it), but only if you at least make an effort to avoid stuff (and you may die a few times in the process). After you reach the top and Tails slowing gets out of the flying submarine and walks to the right, you’ll be able to go to the next Battle Fortress. I shall call it Battle Fortress 2 for convenience sake. Battle Fortress 2: is not a shooty type level. Go to the right, and fly through the spikes and conveyor belts (make sure to be low on the ground so that you can go through the lower passageway). When you see the small passageway to the right, use the Remote Robot to crawl through and get the Wrench. Now you have to go back home and equip it ;w;. Also, if you have been following this guide correctly, you have all the items you can get! Yay! Now go back to where you were before and fall down. Break the blocks to the left, the ride the conveyor belt to the very left. Break the blocks there, then fly up and to the right. Fly over the down arrows you’ll see, then press the button. That will disable the blue laser barrier to the right of that. Go to the right where the barrier was, then go down and use the Remote Robot to go down the hole in the middle of the room. Go all the way to the right with the robot until you reach a room of spikes with a button to the right. Press the button to disable another barrier. Now go to the right as Tails and fly across conveyor belts and then go up when you can’t go right anymore. When you get outside, go down the conveyor belt platform things until you can’t go down anymore, then go to the right and go up the new conveyor belts. Go to the left across the conveyor belts (flying/jumping over the down arrows!) the keep on going to the left until you reach a room with spikes and one enemy in the middle. Break the blocks to the left, then go to the left. Climb up the platform in the middle to the left to go to the next part. IT’S A MAGICAL PLATFORM I TELL U!
Go to the right, until you see down arrows above you, and a small passageway to the left. Use the Remote Robot to go through the passageway, and hit the button at the end of the passageway. Now go all the way to the left and go through the area the laser barrier was blocking before, then go up onto the conveyor belts above. Keep on going up until you are here. Bomb the blocks, then FLY down to the right and land on a ledge with some more blocks on it (I say “fly” because more down arrows). Then fly to the right and go down the first set of down arrows. Now fly to the very right and fly up until you can land on a big column. Now fly to the left and hug the wall to the left and just drop bombs until the Kukku dies. Now fly to the left some more and go to the lower passageway with blocks. Bomb the blocks, then fly to the left. When you land on solid ground, go to the left and use the Remote Robot to crawl through the small passageway. There will be the things that is the only thing that can affect the Remote Robot. Here’s a tip: when you’re going through the “sonar area” take “long jump” instead of pressing the jump button rapidly. You’ll gain a lot more ground that way. (i know, I know, ur amaze) After that area is a button. Press it, then go back to Tails. Now go back to the right and go to the upper passageway blocked by blocks. Bomb the blocks, and then fly to the left and bomb the other blocks to the left. When you’re in the room with the conveyor belts, stand in the middle and use the Remote Robot. Fly up and into the passageway, and then when you get out press the button to the right. Now go out of the area and fly to the right. The go up and to the left. You should be teleported to a boss fight. Boss Fight: Speedy (again)...: Yep, it’s that Kukku again. First thing first, stand on the lower platforms if you want to avoid the most attacks. Doesn't matter which, but I prefer the right side. Throw a bomb at Speedy whenever he comes near (he might fly into you, but he takes 2 rings, so no big deal). When he does the wave attack, he goes from the top, to the middle, to the bottom. This attack is why you want to be in the middle (on the floor you don’t have as many opportunities to attack, and he likes flying on the floor). After Speedy is done, fly up for the FINAL BATTLE OMG SUCH HYPE.
Final Boss Fight: Great Battle Kukku 15th: The first part of this boss fight is the boss throwing bombs at you. Avoid the bombs and throw bombs back at him. After a while, the second part of the boss will start. He’ll crouch, and ”slide” bombs. Fly up to the sky, and try to be where the boss is while dropping bombs at him. When he stops in the middle, stay in the middle. He’ll throw bombs to the left and right, but in the middle you’re safe. When you go down to the ground for “flying fuel”, try to land away from the boss. If he comes near you on the floor, he’ll grab you and throw you (this also happens during the first part). After you beat him, the game will end. Tails will fly to his flying submarine, and fly to his home. The battleship will crash into the ocean. And credits! Tails will be building a bigger Remote Robot and… I’ll let you find out yourself what happens END OF GUIDE |
Vizzed Elite
Affected by 'Laziness Syndrome'
Registered: 11-30-14
Location: depression land
Last Post: 1554 days
Last Active: 424 days
| Zt is dead |
Affected by 'Laziness Syndrome'
Registered: 11-30-14
Location: depression land
Last Post: 1554 days
Last Active: 424 days
(edited by IgorBird122 on 08-23-15 08:17 PM) Post Rating: 9 Liked By: Barathemos, Bintsy, Eniitan, greenluigi, Laian, sonicbros, TornadoMudkip, Uzar, Zlinqx,
08-23-15 06:55 PM
ZeroTails is Offline
| ID: 1197759 | 30 Words
ZeroTails is Offline
| ID: 1197759 | 30 Words
ZeroTails
Cool Davideo7
Cool Davideo7
Level: 90
POSTS: 782/2465
POST EXP: 215125
LVL EXP: 7181235
CP: 18922.4
VIZ: 400242
POSTS: 782/2465
POST EXP: 215125
LVL EXP: 7181235
CP: 18922.4
VIZ: 400242
Likes: 2 Dislikes: 0
Local Mods : Forgot to turn off my layout .-.. Please turn it off for me :v. Summons~ Eniitan : sonicthehedgehog57 : Zlinqx : greenluigi : A user of this : Laian : PacmanandMariofan : juuldude : Bintsy : TornadoMudkip : Summons~ Eniitan : sonicthehedgehog57 : Zlinqx : greenluigi : A user of this : Laian : PacmanandMariofan : juuldude : Bintsy : TornadoMudkip : |
Vizzed Elite
Affected by 'Laziness Syndrome'
Registered: 11-30-14
Location: depression land
Last Post: 1554 days
Last Active: 424 days
| Zt is dead |
Affected by 'Laziness Syndrome'
Registered: 11-30-14
Location: depression land
Last Post: 1554 days
Last Active: 424 days
Post Rating: 2 Liked By: deggle, sonicthehedgehog57,
08-23-15 08:19 PM
 IgorBird122 is Offline
| ID: 1197765 | 49 Words
IgorBird122 is Offline
| ID: 1197765 | 49 Words
 IgorBird122 is Offline
| ID: 1197765 | 49 Words
IgorBird122
The_IB122
The_IB122
Level: 140

POSTS: 5125/6414
POST EXP: 526201
LVL EXP: 33030195
CP: 40905.1
VIZ: 779500

POSTS: 5125/6414
POST EXP: 526201
LVL EXP: 33030195
CP: 40905.1
VIZ: 779500
Likes: 0 Dislikes: 0
ZeroTails : Done, you can be able to remove the layout by yourself, all you have to do is edit your post and remove the header and your signature, and you're good.
The walkthrough is still pretty nice and well written, I hope you can keep up the good work. The walkthrough is still pretty nice and well written, I hope you can keep up the good work. |
Vizzed Elite
Affected by 'Laziness Syndrome'
Registered: 01-07-13
Location: The Big Easy
Last Post: 1487 days
Last Active: 1472 days
| The Shadow King |
Affected by 'Laziness Syndrome'
Registered: 01-07-13
Location: The Big Easy
Last Post: 1487 days
Last Active: 1472 days
09-14-16 05:30 PM
sonicbros is Offline
| ID: 1301539 | 6 Words
| ID: 1301539 | 6 Words
sonicbros
Level: 64

POSTS: 463/1006
POST EXP: 39902
LVL EXP: 2159409
CP: 7789.2
VIZ: 137923

POSTS: 463/1006
POST EXP: 39902
LVL EXP: 2159409
CP: 7789.2
VIZ: 137923
Likes: 1 Dislikes: 0
Now i can complete the game,thanks |
Trusted Member
Affected by 'Laziness Syndrome'
Registered: 10-20-11
Location: Mercury
Last Post: 2451 days
Last Active: 2009 days
Affected by 'Laziness Syndrome'
Registered: 10-20-11
Location: Mercury
Last Post: 2451 days
Last Active: 2009 days
Post Rating: 1 Liked By: ZeroTails,
