

 User Notice
 Forum Links
Play Return to Zork Online

Thread Information
Thread Actions


Order
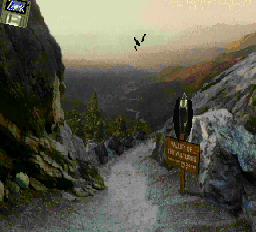
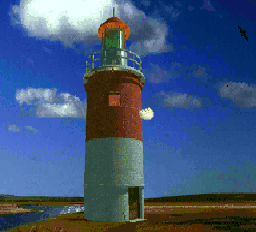
Return to Zork walkthrough
06-29-14 03:44 AM
Kradix is Offline
| ID: 1041860 | 8919 Words
| ID: 1041860 | 8919 Words
Kradix
Level: 13


POSTS: 13/28
POST EXP: 38779
LVL EXP: 9588
CP: 323.4
VIZ: 20942

POSTS: 13/28
POST EXP: 38779
LVL EXP: 9588
CP: 323.4
VIZ: 20942
Likes: 0 Dislikes: 0
Return to Zork walkthrough by Kradix
Your adventure begins in the valley of the vultures; what appears to be a crystal ball with a wizard speaking to you will appear, the wizard claims to have been talking for a long time and requires a new battery, a vague message but the need for a new battery seems clear. There is a path ahead of you and a sign where a vulture has come to roost on the right, if you examine the sign up close the wizard will explain how the location you are in used to be called the valley of the sparrows, and has recently been renamed. There is a bonding plant growing near the sign, but if you try to take it the vulture will attack you, you can only sustain 3 attacks from the vulture so you’ll need to find some other way to get rid of it. Zoom out to the open view of the valley, on the left is a rock on the ground, pick up the rock and then throw it at the vulture, when the vulture flies away you can now get to the bonding plant. You can simply pull it out by the roots, but it will die, and since you will need a healthy bonding plant later in the game you will need to find another way to retrieve it. You happen to be carrying a knife in your inventory, use this to dig up the bonding plant, this way it won’t die just yet; if you examine it up close the wizard will exclaim “I think it likes you.” Your inventory also contains a map, a tape recorder, a camera a box of matches, and the crystal ball which apparently is called a tele-orb. Although not required, you may take a picture of the scenery with your camera; remember: you have an unlimited number of shots, but not everything is photogenic. Proceed forward to the lighthouse, as you reach the entrance the wizard will suggest asking the keeper how the road to the south is. As you stand outside the entrance, the lighthouse keeper will mention something about a password, don’t worry: he’s just rambling on and will let you in soon enough. You can speak to the lighthouse keeper, what he says depends partly on your mood by clicking on the various icons on the left, what is clear however is that the vultures have been stealing various items, the keeper may also mention something about the town of East Shanbar disappearing, intriguing to say the least. When the lighthouse keeper has finished talking you are then given the option of asking about various things, you can use your map to ask about the road to the south, or also ask about the recording in which the wizard suggests this, if you use this option it will become apparent that the wizard’s name is Trembyle, lucky for you he’s a good wizard and will serve as a guide by offering hints; provided you acquire a new battery. You may also go to the top of the lighthouse out onto the balcony, you can see a tree on the far side of the river, but the only interactive thing here will be the rail, and you have no use for it for the time being. When you are done here you may leave the lighthouse to continue onwards, as you step outside, Trembyle will star telling a joke about a wild boar, unfortunately it is this moment that the battery to the tele-orb goes flat. Continuing forward will bring you to the road of the south, if you asked the lighthouse keeper about it he will have told you that it’s impossible to pass this way, first time players have probably also learnt this the hard way as your character dies if you try to go down the road. Note that the road to the south is also photogenic, showing the lighthouse keeper this picture is another way to confirm that the road is unpassable. Backtrack to the lighthouse, and you will find that you can also go round it to the left; you can do this without approaching the road to the south to start with if you wish. Here you will find yourself on the river bank, there are some wooden planks here, but they are too heavy to carry, there are also some vines growing against what apparently is the remains of the fence (that explains the planks) however the roots of the vines are too deep to pull them out, you will need to cut the vines using your knife, then you can tie them onto the planks to create a raft, you need only to click on the raft to float down the river to the nearby town of Shanbar, you will automatically haul yourself onto the bridge as you pass by, your raft will be lost, but no matter at least you are on land again. Keep in mind that the east side of town has mysteriously disappeared to the point that even the eastern half of the bridge is gone, and that attempting to cross will prove fatal, so only west Shanbar is available to explore. There are 4 buildings in view; starting from the one closest on the left, and moving clockwise they are: the mayor’s office, a gift shop, an abandoned hardware store and the school house. The gift shop is locked, and the bell to the school house is missing its rope, however the bell can be rung by striking it with your knife and Ms Peepers will answer, but let’s look elsewhere first. The abandoned warehouse is badly dilapidated you will find a crank handle and a wooden box here, there are also some mice scampering about, you can pick them up, but they are diseased and will bite you after a few minutes, this can be avoided by putting the mice in the box, the mice however are of no value, and can actually work against you later in the game you may carry them in the box if you wish, but will need to get rid of them later. The mayor greets you as you enter his office, you may speak to him and ask about various things in much the same manner as you did with the lighthouse keeper; apparently the 2 men have been working on an anti-vulture warning system although it doesn’t appear to be working. The mayor also tells you the file cabinet to the right is available to the public. Some of the files offer useful hints on how to solve various puzzles in the game, others are just for fun, the files will also You may have noticed a cottage which has a water wheel as you were approaching the town on your raft, to get there you must first turn around so you are facing the bridge, then click to the left. As you approach, it becomes apparent that the cottage is in fact an old mill, inside you will find Boos Myller, it’s clear that he’s been drinking, and he will pour you a glass of rye. There are 2 doors here, the one on the right is the door you just entered, the one on the left is the back door. If you drink the rye the room will start spinning then you will pass out, when you come to you will be out the back of the mill, take the key on the ground and remove the chock that is stopping the water wheel from turning. Re-enter the mill and Boos will pour you another glass of rye. Boos seems to be in high spirits and is in the mood for celebrating, you can make a toast with him if you are holding the glass of rye. If you read the file on toasting in the mayor’s office you will have noticed it consists of 4 steps and that it is proper custom for the guest to drink first while the host waits, Boos will have stated the first part of the toasting process and will have his glass raised waiting for you to drink, however the effects of the drink should be apparent so you may need to find another way to proceed. Since Boos is already quite drunk, he probably won’t notice if you tip your glass out on the plant on the left first, then you can pretend to drink and Boos will follow suite; proceed in this manner twice more until Boos has taken his third drink then ask for his keys, in his own words Boos claims to be “Too drive to drunk” and will hand his keys over. The glass of rye will be in your inventory, Although it is tempting to go down the trapdoor, you haven’t completed all tasks in west Shanbar yet, go back to town then use the key you picked up behind the mill to unlock the door to the gift shop. There will be a battery sitting on the shelf, pick up the battery then drop it into the tele-orb. As his image comes into focus you will hear Trembyle say “...and that’s the only way to get out of there alive, I hope you remember that when the time comes.” It’s unclear what this refers to, but at least the tele-orb is working again. There is also a cash register on the counter, inside you will find some coins, and 2 tickets, take these items. Go to the school house if you haven’t been there yet, either the knife or crank handle can be used to ring the bell. Ms Peepers will tell you you’re late for class the gives you a pop quiz. The quiz changes each time you play, but the question is always about a day of the week or in some versions, a month of the year. In sequential order they are: Days:- Sand day, Mud day, Grues day, Wands day, birthday, Frob day, Star day (Note:- spaces must be included, except for birthday, otherwise the game will consider your answer incorrect.) Months:- Estuary, Frobuary, Arch, Oracle, Mage, Jam, Jelly, Augur, Suspender, Ottobur, Mumbermur, Dismember. Be careful here, you only get 3 attempts to get it right. When you have answered the question, Ms Peepers will give you her notebook and ask you to record what happened to east Shanbar, this notebook will One last place remains, you need to check under the bridge, be sure that the directional arrow is pointing down, so you don’t accidently step across the bridge. Under the bridge you will find a waif, he will explain how he escaped the cliffs of depression, and if you’re friendly to him he will tell you of his longing to go somewhere fun. The tickets you picked up before are to the theme park dizzy world, give the tickets to the waif and he will give you something in return, it is unclear at this time what the item is, it will be referred to as ‘waif’s gift’ in your inventory. Use the flask you picked up from the mill in the river to obtain a flask of water. Now is the time to go down the trap door that open in the mill, when you returned there, Boos will have recovered, but is now sitting over to the left, and in his generous nature will pour you yet another glass of rye. Go down the trap door and you will descend a ladder to find a door with a padlock, use Boos’ keys to unlock the door; strangely enough you will find yourself in another mill, which looks identical to the one you just left except there’s nobody here. Take the door on the right and you will find yourself on the outskirts of a town, the triumphant music playing indicates that this must be the lost township of east Shanbar. You can go left into town or right to the hero’s memorial, but since the town is what you’re looking for go left. There are 5 buildings here, and following the same principle as before they are:- a general store, Moodock’s armoury, an incinerator, a blacksmith’s and the Inn of Isenough. The general store is locked; there is nothing to do at the incinerator or blacksmith’s just yet, and you do not have everything you need for the Inn just yet, so go to Moodock’s armoury. You can speak to Moodock and ask him about various things as with other characters, occasionally you may also hear his wife Molly talking from the next rooms, Moodock will usually tell you “Just ignore her.” There is a game board on the table in front of Moodock, when you click on it, he will explain the rules of the game. You may recall the file on the game survivor from the mayor’s office, as well as details in the notebook, between these and Moodock’s explanation it should be clear how to play the game. Since you are granted the Canuk piece you will be at liberty to move to any square on the board that hasn’t been turned into a pit, it shouldn’t be hard to win. After the game Moodock will give you a sword and a token, the sword is rather rusty and could use shining up, take it across the road to the blacksmith to do so. While you’re waiting for your sword to be shined up, take a moment to explore. If you continue past the blacksmith you will come to a fork in the road the path to the left will lead you to some ruins, while the path to the right will take you to the whispering woods. You are likely to get lost in the woods at this time, plus if you get in too deep your vision will fade, and you’ll eventually get eaten by a creature called a grue, so perhaps you should go to the ruins for now. You will see some tiles on the ground pick them up, then turn around where you will see a frame to drop the tiles into, by doing this you will create a slide puzzle. This is another item mentioned in the files, when the tiles present are arranged in the correct order the final tile will magically appear to complete the message. In this case you have 11 tiles of a set of 12, there are 2 lots of writing on them, you may follow either as they both require the same final solution. The correct sequences are: small writing:- Water unseen at falls mix with bat dropping yields potion for (invisibility), large writing:- (First tile is blank) SEARCH FOR THREE MORE PIECES ON THE GROUND WHERE THIS (WAS FOUND). The final tile will appear once you have arranged the others in the correct order. The three pieces mentioned will also appear on the ground when you close from the puzzle interface. They are a disc piece and 2 illuminyte rocks, take these as you’ll need them. Ahead is the forest of the spirits, unlike the whispering woods, you won’t go blind here, but there is still the potential to get lost. However if you enter the forest then go north, east, east, south you will find a tree with metal leaves. You can attempt to strike the tree with your knife, but will find the branches out of reach, perhaps if you used the sword instead. Retrace your steps out of the forest (north, west, west, south in case you’re lost), go back to town then cross the bridge, note how this area is called the new west Shanbar, continue forwards to the hero memorial, you may go either left or right. Going right will take you to the entrance of the troll caverns, you can enter but it’s too dark to see and you will be warned about grues, remember that grues will eat you if you linger in the dark too long. You can light a match from your inventory, this will keep the grues away, but you will find yourself confronted by one of the troll guards, there’s nothing you can do to pass right now, so you may as well leave. You will also have noticed the skeleton next to the entrance to the troll caverns, if you look close at the skeleton’s right hand you will see LUD written in the mud. Go back to the hero memorial and turn left; you should now be facing the fool’s memorial with a book resting on its pedestal. You can’t read the book because it’s in a language you don’t understand, but some of the other characters can so take it with you. From here you can now either continue forwards to Snoot’s farm, or take the path to the right to Pugney’s ranch, you will need to go to both at some point, but to save time, I suggest going to Snoot’s farm first. You can knock on the door to Snoot’s farmhouse, but no one will answer, you can sneak in through the window but the guardian is watching you, if you try to leave he will appear and confiscate your inventory as he does to anyone who breaks Zorkian law, note this will also happen if you kill any of the characters by stabbing them with the knife or sword, you can avoid losing your items by dropping them first, but the character will then be removed from the game and you may not be able to proceed. To avoid been penalised for breaking and entering click on the door second from the left, you will find Rebecca Snoot brushing her teeth in the bathroom, she’ll put your lights out with hefty right hook, then turn a shot gun on you, answer her question to gain her trust. The question will be similar the test you had with Ms Peepers, check the days and months given earlier for the solution, again you will only have 3 chances, after that Rebecca will shoot you. Once you have gained her trust Rebecca will give you free reign to her house and let you take what you need, this will also appease the guardian so he won’t confiscate your stuff. You will find yourself back in the living room of the farmhouse, if you take the door on the left you will find Alexis the poodle who will bark at you. There is no way to get past Alexis, but your tape recorder will now have a recording of her growling. The room on the far right is Rebecca’s bedroom, the only item of interest here is the mirror on her dresser. The big double doorway leads from the family from to the kitchen, you can try turning the oven on, but it will blow up, Trembyle will comment on an event called the great diffusion, this is a significant event in Zorkian history which you may have read about in the files from the mayor’s office. Take the thermos on the table and the frozen meat from the fridge, if you examine the box of cereal sitting on the table you may notice it mentions prizes inside, you won’t get one from this particular box, but keep the prizes in mind. To the left is a sink with a cake of soap sitting on the side, take the soap, then drop it into the sink, turn the water on to get soapy water and use this to wash the waif’s gift, turns out it’s another piece of disc that goes with the first one you found. When you are finished in Snoot’s house, leave and then go to the right, you should now be facing a silo hatch; there is a hole for a crank handle which you should possess if you picked it up from the abandoned hardware store. You can turn the crank either clockwise or counter-clockwise, but only the former will yield a result, the silo is full of carrots, take some with you then continue to the right. You are now at Pugney’s range, there should be a farmhouse here with a barn behind it. As you approach Pugney’s house you will see a box of bras on the ground, don’t touch it though as Pugney will accuse you of stealing and hopes the guardian gets you, which he will. Go up to Pugney’s door and click the blind to get his attention. Pugney isn’t in a good mood and wants you to go away, choose the apologetic icon to get his permission to take the bra box with you. Pugney won’t say much else, although he does comment on the book you picked up earlier, apparently it’s a joke book, but he can’t read it either. Now that you have Pugney’s permission to take the bra box, do so then go to his barn. Inside you will find a cow, if you try to milk her she will kick you out of the barn, something about cold hands. To overcome this problem you will need to warm your hands first, to do this you will need to light a fire with the box of matches you’re carrying. There’s plenty of hay in the barn, but if you try to light it all at once you’ll burn the place town, so take a small clump of hay, then drop it nearby, then light this small clump and warm your hands, the cow will now let you milk her, but remember to be holding the thermos or you will spill the milk. Pugney mentioned something about the cow only eating carrots, so give her the ones you picked up from Snoot’s silo. Behind the barn is the vulture pits, although Rebecca may appear there, after your initial counter she will pop up periodically on the path to either: the vulture pits, the troll caverns or the ruins to offer various bits of information. If you do meet Rebecca you can ask her about the items in your inventory, note that although she takes a good look at the book, she won’t be able to read it. If Rebecca doesn’t appear you will find yourself at the entrance to the vulture pits, don’t go in though, otherwise you’ll be swooped by a vulture. Your sword should be ready by now, go back to east Shanbar and speak to the blacksmith, he will charge 2 zorkmids for his works, you should have 6 zorkmids if you took the coins from the cash register in the gift shop so you’ll be able to pay him after which he will give you a shiny sword. You can also ask him about the book, he knows the language but will charge another 2 zorkmids, if you do pay he will begin reading a joke, apparently it’s the same one about a boar in the forest that Trembyle began telling before the battery to the tele-orb went flat; unfortunately the blacksmith will smudge the page with his greasy fingerprint, in compensation he will give 1 zorkmid back. Now that you have the sword back you can try striking the tree with metal leaves in the forest of the spirits again, return there and strike the tree, some leaves will fall to the ground but the blade of your sword will break. The metal leaves that fell are actually coins, (apparently money does grow on trees here,) pick them up to replenish your pockets. Go back to the blacksmith to issue a complaint about the sword, when you show it to him he will tell you it’s your sword but you don’t recognise it since it was so dirty before, although it goes against most people’s nature, you will need to threaten him about it to proceed, he will then give you a voucher explaining that he sold the sword to Ben Fyshin by mistake, you haven’t met Ben yet so you need to find him first. Ben is a sailor so he can probably be found near the water, namely to the left of the bridge to new west Shanbar. When you find Ben he will tell you that you can hire a boat for 2 zorkmids, but there’s a few things you should take care of first. Give Ben the voucher, and he will give you the dwarven sword back, if you read about this item in the files you should know that this sword is unbreakable, and can therefore be used to strike the tree with metal leaves, and won’t shatter. (Alternatively you can simply ask the blacksmith about the sword when he first gives the wrong one, following the same procedure as before, he will give you the dwarven sword back directly, rather than a voucher.) Next click on the piece of rope Ben is holding, and he will show you how to tie a cow-hitch, finally; ask Ben about any female character either by photo or a recording and he will tell you about his lost love Witch Itah, and gives you a letter to take to her. Reading other people’s mail is another offense the guardian will come after you for, so don’t open the letter. If you pay for a boat you will notice the motor bears a resemblance to a hamster wheel, Ben may have mentioned something about it needing something for the “squeaky wheel.” If you are carrying the mice from the hardware store in the box you can now remove them, and put them in the engine, but they are not large enough to power the engine, you will need something larger such as rats. Fortunately Ben believes in customer satisfaction, he will hold the boat for you until it’s running, so you can leave and come back later and he won’t charge you again. You should have encountered Rebecca at least once on the path since your encounter at the farmhouse by now, in which she would have told you about a being called Morphius who keeps introducing itself in her dreams. You can experience a similar phenomenon by paying for a room at the Inn of isenough. When you enter the inn, you will probably recognise Moodock’s wife Molly by her southern accent you can interact with her as with other characters, if you ask about the lighthouse she jokingly mention that the anti-vulture warning system might work better if it relied on sound, she will wonder if the light was ever fixed, so apparently the lighthouse is lacking in light which is why the anti-vulture warning system doesn’t work. Molly charges 3 zorkmids per night at the inn, pay for a room, then take the elevator to the third floor. When you enter your room you will see a nightstand next to the bed, place your illuminyte rocks on it then click on the panel near the door. If you turn the t.v. on, you will see a nonsensical ad about a new headache remedy; fun to watch, but has no significance in the game. There are 2 dials on the panel, one is a tuner for the radio, which allows you to listen to all the music from the game, the other is a light switch; according to the files illuminyte has grue repellent properties, so it’s safe to turn the light off now, the room will have a healthy green glow, and you can To achieve a high score and for additional hints, you can repeat this process twice more, although you will have to leave the inn and come back again, and may need to collect more metal leaves to pay for the room, you may also notice that Trembyle appears each time you approach the inn to offer valuable hints, you may consider coming here several times, but after the third dream it is time to proceed. You still haven’t seen inside the general store, the disgruntled owner has left a note on the door saying that anyone who gets in can have the store, but neither Boos’ keys nor the one you found behind his mill fits the lock; perhaps there is another way though. Go to the incinerator and pull the first lever, the main compartment will open, throw the box of bras that you collected from Pugney’s ranch into the flames. The files in the mayor’s office warned about the danger of having both compartments open at once, so be sure to close the main section before opening the drawer via the second lever (Tip: on the odd chance that you get distracted and forget which one’s which and don’t want to risk pulling the wrong lever, simply move away from the incinerator, the compartments will automatically close for safety’s sake.) In the open drawer you should find a wire remnant from one of the bras, but it’s still glowing red hot and can’t be picked up. Pour the water from the flask that you collected earlier to cool the wire, then return to the general store. Use the wire to pick the lock; you can now enter the store. The place is in a state of disarray, you should see some rats scampering about, and a box of cereal. Since the mice weren’t strong enough to power the engine, these rats might work better, they are also diseased, so you will need to put them in the box, unfortunately if you put them in the box with the mice, the mice will kill the rats and you won’t be able to use them, so dispose of the mice first, simply taking them out of the box and dropping them on the floor will suffice. If the mice did kill the rats, leave the store then come back to find some more rats. Remember what the box of cereal at Snoot’s farm said? Something about prizes, shake up the box of cereal here, nothing happens, but persistence is always rewarded well; shake up the box a second time and you will find a whistle. The rats and whistle are all that is needed in the store, and now that you have the rats you can test them in the boat engine. Return to Ben, then zoom in on the motor, take the rats out of the box and place them in the motor, this time it should start. Take the boat down the river to Witch Itah’s place; the rats will turn to stone as you pull up, so you won’t be able to leave the way you came. Enter Witch Itah’s house and speak to her as you would any other character, but don’t make her mad, or she’ll turn you into a bog rat. Be sure to ask her about the book, as she can read it, and will tell one of the jokes. Some versions of the game will allow you to take the bat cage if you ask Witch Itah about the whispering woods or the thermos, so long as it has milk in it, others require you to come back a second time before she will give you permission. Give Witch Itah the letter from Ben, she will leave by taking your boat but gives you permission to take her stick so that you can navigate the bogs. Take the stick and leave her hut. To navigate the bogs you must be holding Witch Itah’s stick, and click on the islet in front of your to see if the ground is firm enough to walk on. There path out of creeping bogs changes each time you play the game, so directions cannot be given here, just remember to test each islet with the stick before attempting to move forward. When you exit creeping bogs, turn around and you should find yourself at the entrance to the whispering woods, if you have the bats you can enter, if not you will need to go back to Witch Itah’s place and ask her about the whispering woods on your map; -this means having to rent another boat from Ben, which may require another trip to the tree with metal leaves first, and then navigating your way through the bogs again.- now that you have the bats to guide you, you can release them from their cage, they will fly of leaving a trail of guano behind them. The tiles mentioned something about mixing water from the falls with bat dropping to make an invisibility potion, so take a piece of it and put it in the flask. The bats will appear each time you move forward to show you the way to go, however your vision will still fade, the way to remedy this is to drink milk from the thermos to improve your sight, however you can only drink from the thermos twice, so use it sparingly. The path through the whispering woods is: south, east, east, south, east, south, east, south, east, north, north, north, east, east, south, south, south, west, south, south. When your leave the woods you will find yourself at the ferryman’s dock. The whispering woods get their name from the voice that repeats the same message over and over “Three rings begin, two rings return.” Therefore ring the bell 3 times to summon the ferryman. The token that Moodock gave you is a pass across the lake, you can give it to the ferryman, but will not have it to return afterwards, so show it to him only. Once across you can ring the bell twice to return, but there’s no need to just yet, so turn around and take the path to Canuk’s shack. No one will answer if you knock manually, and the door knocker appears to be fused to the door, pry it off with the sword, if you haven’t got the dwarven sword back it will break here, necessitating a trip to the blacksmith later. The door knocker is in fact a magnet, which will be of use later, but for now enter Canuk’s shack. Okay, no sign of Canuk, but there’s a duck here, and a scroll, pick up the scroll and read it out to the duck to restore Canuk to his human form. A grateful Canuk will offer to “shed some light along your path.” Canuk can also read the book you found, show it to him to get a another joke. Whatever you do, don’t ask Canuk about the scroll. Canuk tells you that the pieces of disc are the remains of the last flying disc of Frobozz used to shatter walls of illusion, it also becomes apparent here tha1t Canuk is possessed by Morphius, who sometimes speaks through Canuk; Morphius claims to live behind a wall of illusion. Another item of interest is the whistle you found in the cereal box, apparently it can be used to call vultures, (you may have already confirmed this if you tested it in an open space.) Ask Canuk about the ship in the bottle behind him, and he will tell you that a piece of the disc is in there; he will then cast a shrinking spell on you so that you may retrieve it, the spell will only last 20 minutes, however you are liable to drown before that, so don’t dally. Look at the sail above you, the number 9427 will be written upside down, memorise this number. Enter the ship’s cabin and take the cloth on the bench, then approach the safe, the number you saw before is the combination, so set the tumblers appropriately and open the safe, inside you will find the promised piece of disc plus a rusty piece of metal which you can shine up with the cloth you picked up. By now you are probably turning purple, so leave the bottle, make sure you are holding either the shiny metal thing, or Rebecca’s mirror as Morphius will take possession of Canuk and try to steal the disc piece from you, Canuk will cast a spell which you need to deflect back to turn him into a duck again. Do not read the scroll again, as Canuk will not fall for the reflection trick a second time. You may find that the scroll disappears as you leave the shack, some versions of the game allow you to get round this by feeding the scroll to the duck which then lays an egg which you can then take with you and break open to retrieve the scroll, but as you will have no further use for it, there’s no need to. You can now return to the ferryman’s dock and ring the bell twice to call him back, if you still have the token you can show it to him again to get across, but you will still have to go through the whispering woods, and if you’ve run out of milk, you won’t make it through. The way round this is to us the magnet and whistle together, a vulture will come down and grab hold of the magnet allowing you to travel anywhere you have already visited on the map, as well as the rapids which you have not visited, but will drown if you attempt to go there anyway. This quick travel feature will remain for the rest of the game. Go back to west Shanbar and show the book to the mayor, he can also read it, and will tell another joke. Show the book to Ms Peepers also, and she will suggest showing it to Rebecca, Rebecca couldn’t read it before but has studied since then so she’ll be able to read it the next time you encounter her. If you ask Ms Peepers about Moodock she will talk about the game, and also point out that the wizard is allowed to pass if he can’t move, a detail that Moodock neglected to mention. Go back to east Shanbar and look around for Rebecca, when you do find her, show her the book and she will give you a fourth joke. Down past Snoot’s farm you can see a dead tree overhanging a cliff, when you approach this tree, you will be at the cliffs of depression which the waif you met earlier escaped from. Take the rope that forms a safety guard, then tie it onto the tree and climb down. You will now find yourself at the entrances to Chuckle’s comedy club, and a sign stating that a bonding plant is required for entrance. You should have a bonding plant from early in the game, but if you pulled it out by the roots, it will have died, and a healthy bonding plant is required to get in, this is why you must dig it up. If you have a healthy bonding plant you will be able to enter the comedy club. Be mindful that the bonding plant will slowly wilt while you’re at the cliffs of depression, and if it dies the game will end. Open your inventory, then play the jokes from Witch Itah, Canuk, the mayor and Rebecca to the audience (any order is fine, as long as you play all 4 jokes, nothing else will make them laugh and a repeated joke is met with criticism). Once you win the contest, Cliff will give you a prize, which happens to be another piece of the disc; leave quickly before your bonding plant dies. Climb back up and then take the rope as you’ll need it again later. So far you have seen very little of the forest of the spirits, so return there now. By the way, if you made the mistake of giving the token to the ferryman, you can get it back by striking the tree with metal leaves, but this is not the purpose of your trip. This time go north, north, west, south, west. You should encounter a bowman engaged in combat with a fairy, however he takes no notice of you and continues to shoot arrows at the fairy, note that the bowman comments on been blind. If there’s any milk left in the thermos you can give it the bowman to cure his blindness, if not you will need to get more milk. Go back to Pugney’s ranch and enter the shed. Remember that you will need to take another clump of hay then light a fire and warm your hands before milking the cow, and if you didn’t feed her carrots before she won’t let you milk her. You can also drink from the thermos a third time now to improve you vision, after this you may explore the whispering woods at leisure without having to worry about your vision failing. Take the milk to the bowman and give it to him if you haven’t done so already, he will leave his bow and arrows on the ground and leave the scene, take these as well as the thermos, then proceed north, north, west. The area will be dark and you will need to light a match; the fairy you met earlier will be here, remember to take a friendly attitude when you encounter her because you won’t be seeing her again, and you won’t get the fairy dust. Continue west, north, north, north, east, east, east; you can now either continue east or turn right to heed south, if you choose south you will encounter a tree spirit who will sing to you, what she sings will depend on your attitude, curb any violent tendencies though or the guardian will come after you. The tree spirits songs offer hints on how to proceed, but are not essential to completing the game. Leave the area with the tree spirit, then go east, east, south, east. You should see a pile of leaves on the ground, don’t touch them because they’re a trap, throw an item from your inventory at them to set off the trap, then use you sword to cut open the trap to get your item back. Continue forwards then go, north, north, north, north where you will find the hungry boar memorial, strike the boar 3 times with your sword to recover another piece of the disc. The meat you took from the fridge at Snoot’s farm will be quite rotten by now, in fact you may have dropped it somewhere so it wouldn’t offend other characters, if this is the case then you need to go and retrieve it. Use your map to go to the vulture pits then sprinkle the fairy dust on the meat, the fairy dust is in fact a You can now use the map to return to the lighthouse, the keeper will ask you what that glowing thing is, meaning the illuminyte, give him one of the rocks so he’ll let you in. The lighthouse keeper has the remaining piece of the disc, ask him about it to get it, and he will tell you to take it across the river to the holy woman at Bel Naire temple. Now that you have a larger inventory than the first time you come here, you can ask about various items, if you ask the keeper about the rope, he will tell you that you can use it to make a rope bridge, but to be sure it’s double strength. Go upstairs to the balcony, where the rail will be of use to you this time. Start your rope bridge by tying the rope to the rail, if you simply tie the rope on, the knot will come undone, and you will fall to your death when you try to cross the bridge, so be sure to use the cow hitch. The lighthouse keeper warned you to make a double rope bridge, to do that it will need to be thrown across the river then looped back onto the rail, failure to do so will also be fatal. The talon you found in the vulture pit is the legendary return talon, which acts much like a boomerang, by tying it onto the rope you can throw the rope out, then the return path of the talon will bring it back to you, thus creating a double rope bridge. You can now cross to the big tree on the other side of the river, proceed forward to the Bel Naire temple and take the shield the statue is holding. Inside the temple, you will be greeted by the holy woman, she will tell you that there is only one disc left that can shatter the wall of illusion, and that this disc has been broken into pieces that must be reforged, and that somehow your orb will focus the light. If you have been following this guide you will already have all the disc pieces, plus the orb needed to focus the light, all that is left is to find the forge itself. Ask the holy woman about the dwarven sword and she will ask you to let her bless it, give it to her so that she can bless the sword, where she will then tell you it will serve you faithfully when fighting evil. Leave the temple and turn around, to the left you can see the lighthouse in the distance, now operational again thanks to the illuminyte rock, on the right is a path to the dwarven mines, note that this path is not available to you if you have not have not entered the temple first. The Dwarven leader seems a little gruff at first, but will and you a mining helmet, only then does he notice your sword and realise you must be on the same side. A dwarven general will come over and the 2 dwarves will make a few statements about a stockpile of illuminyte, it may seem like gibberish, but it’s actually directions through the mine. Now that you have a miner’s helmet, you can explore the troll caverns hands free, put on the helmet, and then use your map to go back to the caverns. Since the holy woman has blessed your sword, it will now glow blue in the presence of danger as it should be doing now take the sword and enter the caverns. There are various angles at which you can strike from, but only one of them will be successful. The letters written in the mud by the skeleton outside are actually hints on how to strike, LUD is referring to (L)eft, (U)p, (D)own, which are the directions you must swing your sword to dispatch each of the 3 troll guards. Eventually you will find yourself in the troll leader’s throne room, he’s pretty confident that you won’t kill him, even if you did kill his guards. It is possible to kill the troll leader with the sword, but this is not what you’re meant to do, instead talk to him and threaten him repeatedly, until he flees in cowardice leaving you with the necklace of fear You may have learnt from Rebecca that this necklace strikes fear into the hearts of your enemies, but who might you use it own. The slide puzzle said something about mixing water from the falls with bat dropping to make the invisibility potion, but which falls was it referring to? Go back to the forest of the spirits and go north, north, west, south, west, north, north, west, west, north, north, north, east, east, east, east, east, south, east, east, north, north, north, west, north, west, west, west, west, south, west, west, north, west, west; you should now find yourself confronted by a giant spider, show the necklace the troll leader gave you to the spider to scare it away, then use your sword to clear away the spider’s web. The path to the falls is now clear. Go to the back of the water fall and fill the flask with water, if there is guano in the flask you should now have a glowing blue potion. Use your map to return to the dwarven mines, then click behind dwarves to get to the mine cart, enter the mine and follow their directions to get through the tunnel. If you need the directions they are: Left, Right, Straight, Right, Left, Right, Straight, Right, Left, Left, Right, Straight. At the other end of the tunnel you will find yourself at some ancient ruins, which judging by the statues must be the shrine to the muses. Pushing either of the buttons will make the statues move but there is more at play here. There is a bowl shaped trencher here in which the disc pieces will fit and the holy woman mentioned something about the orb you carry focusing the light. The statue on the far right will hold the orb for you, but this is not enough to reforge the disc. The file about the muses will offer you hints on which objects need to be placed but for simplicity the items are witches staff, talon (need to return to the light house to retrieve it from the bridge), thermos; it is too dangerous to place any items o the central statue, the next statue requires both the box and mining helmet, (take it off if you haven’t done so already), the next statue holds the shield, and as already mentioned, the final statue holds the orb. Pushing either button will set the statues in motion again (in some versions only the green button is effective), but this time with their equipment in place they will be able to reforge the disc for you. With the disc reforged you must now shatter the wall of illusion, if you don’t know where it is then go back to the cliffs of depression then turn around, there should be an option to go to the left, here you will find what appears to be a tranquil scene, but if you try to go this way you will find that your path is blocked. This must be the wall of your illusion, throw the reforged disc to shatter it. The wall will break like glass to reveal a rather bleak scene behind it, in the distance you can see a citadel, when you approach it becomes apparent that this is where Morphius can be found. Above the gate to the citadel is a large sculpted hand, use the bow and arrows to shoot an arrow at the hand and the citadel gates will open. The orc guard inside is too strong to fight, so you will need to use brain over brawn to get rid of him. Drink the invisibility potion you made in the flask then play the recording of Alexis to get rid of the guard. One final obstacle remains before you can confront Morphius: an unstable bridge above a lake of lava, if you try to cross the bridge you will fall to your death, you need to lighten your load first. Throw all your inventory items into the lava until you are told the bridge is safe to cross, you may need to return to the forge to take any items you left behind if your current inventory is not sufficient. You now have your final confrontation with Morphius, he will challenge you to a game of survivor, only this time you play as wizard Trembyle. Remember that the Trembyle piece moves in a manner similar to how a knight moves in chess, and that Ms Peepers told you that the wizard may pass if he can’t make a move. Be careful, although you can pass it is still possible to trap yourself, and the objective of the game is to have all unoccupied squares turned into pits. When you finally beat Morphius at survivor the closing sequence will play. By following this walkthrough in all details you should obtain a maximum score of 225. Your adventure begins in the valley of the vultures; what appears to be a crystal ball with a wizard speaking to you will appear, the wizard claims to have been talking for a long time and requires a new battery, a vague message but the need for a new battery seems clear. There is a path ahead of you and a sign where a vulture has come to roost on the right, if you examine the sign up close the wizard will explain how the location you are in used to be called the valley of the sparrows, and has recently been renamed. There is a bonding plant growing near the sign, but if you try to take it the vulture will attack you, you can only sustain 3 attacks from the vulture so you’ll need to find some other way to get rid of it. Zoom out to the open view of the valley, on the left is a rock on the ground, pick up the rock and then throw it at the vulture, when the vulture flies away you can now get to the bonding plant. You can simply pull it out by the roots, but it will die, and since you will need a healthy bonding plant later in the game you will need to find another way to retrieve it. You happen to be carrying a knife in your inventory, use this to dig up the bonding plant, this way it won’t die just yet; if you examine it up close the wizard will exclaim “I think it likes you.” Your inventory also contains a map, a tape recorder, a camera a box of matches, and the crystal ball which apparently is called a tele-orb. Although not required, you may take a picture of the scenery with your camera; remember: you have an unlimited number of shots, but not everything is photogenic. Proceed forward to the lighthouse, as you reach the entrance the wizard will suggest asking the keeper how the road to the south is. As you stand outside the entrance, the lighthouse keeper will mention something about a password, don’t worry: he’s just rambling on and will let you in soon enough. You can speak to the lighthouse keeper, what he says depends partly on your mood by clicking on the various icons on the left, what is clear however is that the vultures have been stealing various items, the keeper may also mention something about the town of East Shanbar disappearing, intriguing to say the least. When the lighthouse keeper has finished talking you are then given the option of asking about various things, you can use your map to ask about the road to the south, or also ask about the recording in which the wizard suggests this, if you use this option it will become apparent that the wizard’s name is Trembyle, lucky for you he’s a good wizard and will serve as a guide by offering hints; provided you acquire a new battery. You may also go to the top of the lighthouse out onto the balcony, you can see a tree on the far side of the river, but the only interactive thing here will be the rail, and you have no use for it for the time being. When you are done here you may leave the lighthouse to continue onwards, as you step outside, Trembyle will star telling a joke about a wild boar, unfortunately it is this moment that the battery to the tele-orb goes flat. Continuing forward will bring you to the road of the south, if you asked the lighthouse keeper about it he will have told you that it’s impossible to pass this way, first time players have probably also learnt this the hard way as your character dies if you try to go down the road. Note that the road to the south is also photogenic, showing the lighthouse keeper this picture is another way to confirm that the road is unpassable. Backtrack to the lighthouse, and you will find that you can also go round it to the left; you can do this without approaching the road to the south to start with if you wish. Here you will find yourself on the river bank, there are some wooden planks here, but they are too heavy to carry, there are also some vines growing against what apparently is the remains of the fence (that explains the planks) however the roots of the vines are too deep to pull them out, you will need to cut the vines using your knife, then you can tie them onto the planks to create a raft, you need only to click on the raft to float down the river to the nearby town of Shanbar, you will automatically haul yourself onto the bridge as you pass by, your raft will be lost, but no matter at least you are on land again. Keep in mind that the east side of town has mysteriously disappeared to the point that even the eastern half of the bridge is gone, and that attempting to cross will prove fatal, so only west Shanbar is available to explore. There are 4 buildings in view; starting from the one closest on the left, and moving clockwise they are: the mayor’s office, a gift shop, an abandoned hardware store and the school house. The gift shop is locked, and the bell to the school house is missing its rope, however the bell can be rung by striking it with your knife and Ms Peepers will answer, but let’s look elsewhere first. The abandoned warehouse is badly dilapidated you will find a crank handle and a wooden box here, there are also some mice scampering about, you can pick them up, but they are diseased and will bite you after a few minutes, this can be avoided by putting the mice in the box, the mice however are of no value, and can actually work against you later in the game you may carry them in the box if you wish, but will need to get rid of them later. The mayor greets you as you enter his office, you may speak to him and ask about various things in much the same manner as you did with the lighthouse keeper; apparently the 2 men have been working on an anti-vulture warning system although it doesn’t appear to be working. The mayor also tells you the file cabinet to the right is available to the public. Some of the files offer useful hints on how to solve various puzzles in the game, others are just for fun, the files will also You may have noticed a cottage which has a water wheel as you were approaching the town on your raft, to get there you must first turn around so you are facing the bridge, then click to the left. As you approach, it becomes apparent that the cottage is in fact an old mill, inside you will find Boos Myller, it’s clear that he’s been drinking, and he will pour you a glass of rye. There are 2 doors here, the one on the right is the door you just entered, the one on the left is the back door. If you drink the rye the room will start spinning then you will pass out, when you come to you will be out the back of the mill, take the key on the ground and remove the chock that is stopping the water wheel from turning. Re-enter the mill and Boos will pour you another glass of rye. Boos seems to be in high spirits and is in the mood for celebrating, you can make a toast with him if you are holding the glass of rye. If you read the file on toasting in the mayor’s office you will have noticed it consists of 4 steps and that it is proper custom for the guest to drink first while the host waits, Boos will have stated the first part of the toasting process and will have his glass raised waiting for you to drink, however the effects of the drink should be apparent so you may need to find another way to proceed. Since Boos is already quite drunk, he probably won’t notice if you tip your glass out on the plant on the left first, then you can pretend to drink and Boos will follow suite; proceed in this manner twice more until Boos has taken his third drink then ask for his keys, in his own words Boos claims to be “Too drive to drunk” and will hand his keys over. The glass of rye will be in your inventory, Although it is tempting to go down the trapdoor, you haven’t completed all tasks in west Shanbar yet, go back to town then use the key you picked up behind the mill to unlock the door to the gift shop. There will be a battery sitting on the shelf, pick up the battery then drop it into the tele-orb. As his image comes into focus you will hear Trembyle say “...and that’s the only way to get out of there alive, I hope you remember that when the time comes.” It’s unclear what this refers to, but at least the tele-orb is working again. There is also a cash register on the counter, inside you will find some coins, and 2 tickets, take these items. Go to the school house if you haven’t been there yet, either the knife or crank handle can be used to ring the bell. Ms Peepers will tell you you’re late for class the gives you a pop quiz. The quiz changes each time you play, but the question is always about a day of the week or in some versions, a month of the year. In sequential order they are: Days:- Sand day, Mud day, Grues day, Wands day, birthday, Frob day, Star day (Note:- spaces must be included, except for birthday, otherwise the game will consider your answer incorrect.) Months:- Estuary, Frobuary, Arch, Oracle, Mage, Jam, Jelly, Augur, Suspender, Ottobur, Mumbermur, Dismember. Be careful here, you only get 3 attempts to get it right. When you have answered the question, Ms Peepers will give you her notebook and ask you to record what happened to east Shanbar, this notebook will One last place remains, you need to check under the bridge, be sure that the directional arrow is pointing down, so you don’t accidently step across the bridge. Under the bridge you will find a waif, he will explain how he escaped the cliffs of depression, and if you’re friendly to him he will tell you of his longing to go somewhere fun. The tickets you picked up before are to the theme park dizzy world, give the tickets to the waif and he will give you something in return, it is unclear at this time what the item is, it will be referred to as ‘waif’s gift’ in your inventory. Use the flask you picked up from the mill in the river to obtain a flask of water. Now is the time to go down the trap door that open in the mill, when you returned there, Boos will have recovered, but is now sitting over to the left, and in his generous nature will pour you yet another glass of rye. Go down the trap door and you will descend a ladder to find a door with a padlock, use Boos’ keys to unlock the door; strangely enough you will find yourself in another mill, which looks identical to the one you just left except there’s nobody here. Take the door on the right and you will find yourself on the outskirts of a town, the triumphant music playing indicates that this must be the lost township of east Shanbar. You can go left into town or right to the hero’s memorial, but since the town is what you’re looking for go left. There are 5 buildings here, and following the same principle as before they are:- a general store, Moodock’s armoury, an incinerator, a blacksmith’s and the Inn of Isenough. The general store is locked; there is nothing to do at the incinerator or blacksmith’s just yet, and you do not have everything you need for the Inn just yet, so go to Moodock’s armoury. You can speak to Moodock and ask him about various things as with other characters, occasionally you may also hear his wife Molly talking from the next rooms, Moodock will usually tell you “Just ignore her.” There is a game board on the table in front of Moodock, when you click on it, he will explain the rules of the game. You may recall the file on the game survivor from the mayor’s office, as well as details in the notebook, between these and Moodock’s explanation it should be clear how to play the game. Since you are granted the Canuk piece you will be at liberty to move to any square on the board that hasn’t been turned into a pit, it shouldn’t be hard to win. After the game Moodock will give you a sword and a token, the sword is rather rusty and could use shining up, take it across the road to the blacksmith to do so. While you’re waiting for your sword to be shined up, take a moment to explore. If you continue past the blacksmith you will come to a fork in the road the path to the left will lead you to some ruins, while the path to the right will take you to the whispering woods. You are likely to get lost in the woods at this time, plus if you get in too deep your vision will fade, and you’ll eventually get eaten by a creature called a grue, so perhaps you should go to the ruins for now. You will see some tiles on the ground pick them up, then turn around where you will see a frame to drop the tiles into, by doing this you will create a slide puzzle. This is another item mentioned in the files, when the tiles present are arranged in the correct order the final tile will magically appear to complete the message. In this case you have 11 tiles of a set of 12, there are 2 lots of writing on them, you may follow either as they both require the same final solution. The correct sequences are: small writing:- Water unseen at falls mix with bat dropping yields potion for (invisibility), large writing:- (First tile is blank) SEARCH FOR THREE MORE PIECES ON THE GROUND WHERE THIS (WAS FOUND). The final tile will appear once you have arranged the others in the correct order. The three pieces mentioned will also appear on the ground when you close from the puzzle interface. They are a disc piece and 2 illuminyte rocks, take these as you’ll need them. Ahead is the forest of the spirits, unlike the whispering woods, you won’t go blind here, but there is still the potential to get lost. However if you enter the forest then go north, east, east, south you will find a tree with metal leaves. You can attempt to strike the tree with your knife, but will find the branches out of reach, perhaps if you used the sword instead. Retrace your steps out of the forest (north, west, west, south in case you’re lost), go back to town then cross the bridge, note how this area is called the new west Shanbar, continue forwards to the hero memorial, you may go either left or right. Going right will take you to the entrance of the troll caverns, you can enter but it’s too dark to see and you will be warned about grues, remember that grues will eat you if you linger in the dark too long. You can light a match from your inventory, this will keep the grues away, but you will find yourself confronted by one of the troll guards, there’s nothing you can do to pass right now, so you may as well leave. You will also have noticed the skeleton next to the entrance to the troll caverns, if you look close at the skeleton’s right hand you will see LUD written in the mud. Go back to the hero memorial and turn left; you should now be facing the fool’s memorial with a book resting on its pedestal. You can’t read the book because it’s in a language you don’t understand, but some of the other characters can so take it with you. From here you can now either continue forwards to Snoot’s farm, or take the path to the right to Pugney’s ranch, you will need to go to both at some point, but to save time, I suggest going to Snoot’s farm first. You can knock on the door to Snoot’s farmhouse, but no one will answer, you can sneak in through the window but the guardian is watching you, if you try to leave he will appear and confiscate your inventory as he does to anyone who breaks Zorkian law, note this will also happen if you kill any of the characters by stabbing them with the knife or sword, you can avoid losing your items by dropping them first, but the character will then be removed from the game and you may not be able to proceed. To avoid been penalised for breaking and entering click on the door second from the left, you will find Rebecca Snoot brushing her teeth in the bathroom, she’ll put your lights out with hefty right hook, then turn a shot gun on you, answer her question to gain her trust. The question will be similar the test you had with Ms Peepers, check the days and months given earlier for the solution, again you will only have 3 chances, after that Rebecca will shoot you. Once you have gained her trust Rebecca will give you free reign to her house and let you take what you need, this will also appease the guardian so he won’t confiscate your stuff. You will find yourself back in the living room of the farmhouse, if you take the door on the left you will find Alexis the poodle who will bark at you. There is no way to get past Alexis, but your tape recorder will now have a recording of her growling. The room on the far right is Rebecca’s bedroom, the only item of interest here is the mirror on her dresser. The big double doorway leads from the family from to the kitchen, you can try turning the oven on, but it will blow up, Trembyle will comment on an event called the great diffusion, this is a significant event in Zorkian history which you may have read about in the files from the mayor’s office. Take the thermos on the table and the frozen meat from the fridge, if you examine the box of cereal sitting on the table you may notice it mentions prizes inside, you won’t get one from this particular box, but keep the prizes in mind. To the left is a sink with a cake of soap sitting on the side, take the soap, then drop it into the sink, turn the water on to get soapy water and use this to wash the waif’s gift, turns out it’s another piece of disc that goes with the first one you found. When you are finished in Snoot’s house, leave and then go to the right, you should now be facing a silo hatch; there is a hole for a crank handle which you should possess if you picked it up from the abandoned hardware store. You can turn the crank either clockwise or counter-clockwise, but only the former will yield a result, the silo is full of carrots, take some with you then continue to the right. You are now at Pugney’s range, there should be a farmhouse here with a barn behind it. As you approach Pugney’s house you will see a box of bras on the ground, don’t touch it though as Pugney will accuse you of stealing and hopes the guardian gets you, which he will. Go up to Pugney’s door and click the blind to get his attention. Pugney isn’t in a good mood and wants you to go away, choose the apologetic icon to get his permission to take the bra box with you. Pugney won’t say much else, although he does comment on the book you picked up earlier, apparently it’s a joke book, but he can’t read it either. Now that you have Pugney’s permission to take the bra box, do so then go to his barn. Inside you will find a cow, if you try to milk her she will kick you out of the barn, something about cold hands. To overcome this problem you will need to warm your hands first, to do this you will need to light a fire with the box of matches you’re carrying. There’s plenty of hay in the barn, but if you try to light it all at once you’ll burn the place town, so take a small clump of hay, then drop it nearby, then light this small clump and warm your hands, the cow will now let you milk her, but remember to be holding the thermos or you will spill the milk. Pugney mentioned something about the cow only eating carrots, so give her the ones you picked up from Snoot’s silo. Behind the barn is the vulture pits, although Rebecca may appear there, after your initial counter she will pop up periodically on the path to either: the vulture pits, the troll caverns or the ruins to offer various bits of information. If you do meet Rebecca you can ask her about the items in your inventory, note that although she takes a good look at the book, she won’t be able to read it. If Rebecca doesn’t appear you will find yourself at the entrance to the vulture pits, don’t go in though, otherwise you’ll be swooped by a vulture. Your sword should be ready by now, go back to east Shanbar and speak to the blacksmith, he will charge 2 zorkmids for his works, you should have 6 zorkmids if you took the coins from the cash register in the gift shop so you’ll be able to pay him after which he will give you a shiny sword. You can also ask him about the book, he knows the language but will charge another 2 zorkmids, if you do pay he will begin reading a joke, apparently it’s the same one about a boar in the forest that Trembyle began telling before the battery to the tele-orb went flat; unfortunately the blacksmith will smudge the page with his greasy fingerprint, in compensation he will give 1 zorkmid back. Now that you have the sword back you can try striking the tree with metal leaves in the forest of the spirits again, return there and strike the tree, some leaves will fall to the ground but the blade of your sword will break. The metal leaves that fell are actually coins, (apparently money does grow on trees here,) pick them up to replenish your pockets. Go back to the blacksmith to issue a complaint about the sword, when you show it to him he will tell you it’s your sword but you don’t recognise it since it was so dirty before, although it goes against most people’s nature, you will need to threaten him about it to proceed, he will then give you a voucher explaining that he sold the sword to Ben Fyshin by mistake, you haven’t met Ben yet so you need to find him first. Ben is a sailor so he can probably be found near the water, namely to the left of the bridge to new west Shanbar. When you find Ben he will tell you that you can hire a boat for 2 zorkmids, but there’s a few things you should take care of first. Give Ben the voucher, and he will give you the dwarven sword back, if you read about this item in the files you should know that this sword is unbreakable, and can therefore be used to strike the tree with metal leaves, and won’t shatter. (Alternatively you can simply ask the blacksmith about the sword when he first gives the wrong one, following the same procedure as before, he will give you the dwarven sword back directly, rather than a voucher.) Next click on the piece of rope Ben is holding, and he will show you how to tie a cow-hitch, finally; ask Ben about any female character either by photo or a recording and he will tell you about his lost love Witch Itah, and gives you a letter to take to her. Reading other people’s mail is another offense the guardian will come after you for, so don’t open the letter. If you pay for a boat you will notice the motor bears a resemblance to a hamster wheel, Ben may have mentioned something about it needing something for the “squeaky wheel.” If you are carrying the mice from the hardware store in the box you can now remove them, and put them in the engine, but they are not large enough to power the engine, you will need something larger such as rats. Fortunately Ben believes in customer satisfaction, he will hold the boat for you until it’s running, so you can leave and come back later and he won’t charge you again. You should have encountered Rebecca at least once on the path since your encounter at the farmhouse by now, in which she would have told you about a being called Morphius who keeps introducing itself in her dreams. You can experience a similar phenomenon by paying for a room at the Inn of isenough. When you enter the inn, you will probably recognise Moodock’s wife Molly by her southern accent you can interact with her as with other characters, if you ask about the lighthouse she jokingly mention that the anti-vulture warning system might work better if it relied on sound, she will wonder if the light was ever fixed, so apparently the lighthouse is lacking in light which is why the anti-vulture warning system doesn’t work. Molly charges 3 zorkmids per night at the inn, pay for a room, then take the elevator to the third floor. When you enter your room you will see a nightstand next to the bed, place your illuminyte rocks on it then click on the panel near the door. If you turn the t.v. on, you will see a nonsensical ad about a new headache remedy; fun to watch, but has no significance in the game. There are 2 dials on the panel, one is a tuner for the radio, which allows you to listen to all the music from the game, the other is a light switch; according to the files illuminyte has grue repellent properties, so it’s safe to turn the light off now, the room will have a healthy green glow, and you can To achieve a high score and for additional hints, you can repeat this process twice more, although you will have to leave the inn and come back again, and may need to collect more metal leaves to pay for the room, you may also notice that Trembyle appears each time you approach the inn to offer valuable hints, you may consider coming here several times, but after the third dream it is time to proceed. You still haven’t seen inside the general store, the disgruntled owner has left a note on the door saying that anyone who gets in can have the store, but neither Boos’ keys nor the one you found behind his mill fits the lock; perhaps there is another way though. Go to the incinerator and pull the first lever, the main compartment will open, throw the box of bras that you collected from Pugney’s ranch into the flames. The files in the mayor’s office warned about the danger of having both compartments open at once, so be sure to close the main section before opening the drawer via the second lever (Tip: on the odd chance that you get distracted and forget which one’s which and don’t want to risk pulling the wrong lever, simply move away from the incinerator, the compartments will automatically close for safety’s sake.) In the open drawer you should find a wire remnant from one of the bras, but it’s still glowing red hot and can’t be picked up. Pour the water from the flask that you collected earlier to cool the wire, then return to the general store. Use the wire to pick the lock; you can now enter the store. The place is in a state of disarray, you should see some rats scampering about, and a box of cereal. Since the mice weren’t strong enough to power the engine, these rats might work better, they are also diseased, so you will need to put them in the box, unfortunately if you put them in the box with the mice, the mice will kill the rats and you won’t be able to use them, so dispose of the mice first, simply taking them out of the box and dropping them on the floor will suffice. If the mice did kill the rats, leave the store then come back to find some more rats. Remember what the box of cereal at Snoot’s farm said? Something about prizes, shake up the box of cereal here, nothing happens, but persistence is always rewarded well; shake up the box a second time and you will find a whistle. The rats and whistle are all that is needed in the store, and now that you have the rats you can test them in the boat engine. Return to Ben, then zoom in on the motor, take the rats out of the box and place them in the motor, this time it should start. Take the boat down the river to Witch Itah’s place; the rats will turn to stone as you pull up, so you won’t be able to leave the way you came. Enter Witch Itah’s house and speak to her as you would any other character, but don’t make her mad, or she’ll turn you into a bog rat. Be sure to ask her about the book, as she can read it, and will tell one of the jokes. Some versions of the game will allow you to take the bat cage if you ask Witch Itah about the whispering woods or the thermos, so long as it has milk in it, others require you to come back a second time before she will give you permission. Give Witch Itah the letter from Ben, she will leave by taking your boat but gives you permission to take her stick so that you can navigate the bogs. Take the stick and leave her hut. To navigate the bogs you must be holding Witch Itah’s stick, and click on the islet in front of your to see if the ground is firm enough to walk on. There path out of creeping bogs changes each time you play the game, so directions cannot be given here, just remember to test each islet with the stick before attempting to move forward. When you exit creeping bogs, turn around and you should find yourself at the entrance to the whispering woods, if you have the bats you can enter, if not you will need to go back to Witch Itah’s place and ask her about the whispering woods on your map; -this means having to rent another boat from Ben, which may require another trip to the tree with metal leaves first, and then navigating your way through the bogs again.- now that you have the bats to guide you, you can release them from their cage, they will fly of leaving a trail of guano behind them. The tiles mentioned something about mixing water from the falls with bat dropping to make an invisibility potion, so take a piece of it and put it in the flask. The bats will appear each time you move forward to show you the way to go, however your vision will still fade, the way to remedy this is to drink milk from the thermos to improve your sight, however you can only drink from the thermos twice, so use it sparingly. The path through the whispering woods is: south, east, east, south, east, south, east, south, east, north, north, north, east, east, south, south, south, west, south, south. When your leave the woods you will find yourself at the ferryman’s dock. The whispering woods get their name from the voice that repeats the same message over and over “Three rings begin, two rings return.” Therefore ring the bell 3 times to summon the ferryman. The token that Moodock gave you is a pass across the lake, you can give it to the ferryman, but will not have it to return afterwards, so show it to him only. Once across you can ring the bell twice to return, but there’s no need to just yet, so turn around and take the path to Canuk’s shack. No one will answer if you knock manually, and the door knocker appears to be fused to the door, pry it off with the sword, if you haven’t got the dwarven sword back it will break here, necessitating a trip to the blacksmith later. The door knocker is in fact a magnet, which will be of use later, but for now enter Canuk’s shack. Okay, no sign of Canuk, but there’s a duck here, and a scroll, pick up the scroll and read it out to the duck to restore Canuk to his human form. A grateful Canuk will offer to “shed some light along your path.” Canuk can also read the book you found, show it to him to get a another joke. Whatever you do, don’t ask Canuk about the scroll. Canuk tells you that the pieces of disc are the remains of the last flying disc of Frobozz used to shatter walls of illusion, it also becomes apparent here tha1t Canuk is possessed by Morphius, who sometimes speaks through Canuk; Morphius claims to live behind a wall of illusion. Another item of interest is the whistle you found in the cereal box, apparently it can be used to call vultures, (you may have already confirmed this if you tested it in an open space.) Ask Canuk about the ship in the bottle behind him, and he will tell you that a piece of the disc is in there; he will then cast a shrinking spell on you so that you may retrieve it, the spell will only last 20 minutes, however you are liable to drown before that, so don’t dally. Look at the sail above you, the number 9427 will be written upside down, memorise this number. Enter the ship’s cabin and take the cloth on the bench, then approach the safe, the number you saw before is the combination, so set the tumblers appropriately and open the safe, inside you will find the promised piece of disc plus a rusty piece of metal which you can shine up with the cloth you picked up. By now you are probably turning purple, so leave the bottle, make sure you are holding either the shiny metal thing, or Rebecca’s mirror as Morphius will take possession of Canuk and try to steal the disc piece from you, Canuk will cast a spell which you need to deflect back to turn him into a duck again. Do not read the scroll again, as Canuk will not fall for the reflection trick a second time. You may find that the scroll disappears as you leave the shack, some versions of the game allow you to get round this by feeding the scroll to the duck which then lays an egg which you can then take with you and break open to retrieve the scroll, but as you will have no further use for it, there’s no need to. You can now return to the ferryman’s dock and ring the bell twice to call him back, if you still have the token you can show it to him again to get across, but you will still have to go through the whispering woods, and if you’ve run out of milk, you won’t make it through. The way round this is to us the magnet and whistle together, a vulture will come down and grab hold of the magnet allowing you to travel anywhere you have already visited on the map, as well as the rapids which you have not visited, but will drown if you attempt to go there anyway. This quick travel feature will remain for the rest of the game. Go back to west Shanbar and show the book to the mayor, he can also read it, and will tell another joke. Show the book to Ms Peepers also, and she will suggest showing it to Rebecca, Rebecca couldn’t read it before but has studied since then so she’ll be able to read it the next time you encounter her. If you ask Ms Peepers about Moodock she will talk about the game, and also point out that the wizard is allowed to pass if he can’t move, a detail that Moodock neglected to mention. Go back to east Shanbar and look around for Rebecca, when you do find her, show her the book and she will give you a fourth joke. Down past Snoot’s farm you can see a dead tree overhanging a cliff, when you approach this tree, you will be at the cliffs of depression which the waif you met earlier escaped from. Take the rope that forms a safety guard, then tie it onto the tree and climb down. You will now find yourself at the entrances to Chuckle’s comedy club, and a sign stating that a bonding plant is required for entrance. You should have a bonding plant from early in the game, but if you pulled it out by the roots, it will have died, and a healthy bonding plant is required to get in, this is why you must dig it up. If you have a healthy bonding plant you will be able to enter the comedy club. Be mindful that the bonding plant will slowly wilt while you’re at the cliffs of depression, and if it dies the game will end. Open your inventory, then play the jokes from Witch Itah, Canuk, the mayor and Rebecca to the audience (any order is fine, as long as you play all 4 jokes, nothing else will make them laugh and a repeated joke is met with criticism). Once you win the contest, Cliff will give you a prize, which happens to be another piece of the disc; leave quickly before your bonding plant dies. Climb back up and then take the rope as you’ll need it again later. So far you have seen very little of the forest of the spirits, so return there now. By the way, if you made the mistake of giving the token to the ferryman, you can get it back by striking the tree with metal leaves, but this is not the purpose of your trip. This time go north, north, west, south, west. You should encounter a bowman engaged in combat with a fairy, however he takes no notice of you and continues to shoot arrows at the fairy, note that the bowman comments on been blind. If there’s any milk left in the thermos you can give it the bowman to cure his blindness, if not you will need to get more milk. Go back to Pugney’s ranch and enter the shed. Remember that you will need to take another clump of hay then light a fire and warm your hands before milking the cow, and if you didn’t feed her carrots before she won’t let you milk her. You can also drink from the thermos a third time now to improve you vision, after this you may explore the whispering woods at leisure without having to worry about your vision failing. Take the milk to the bowman and give it to him if you haven’t done so already, he will leave his bow and arrows on the ground and leave the scene, take these as well as the thermos, then proceed north, north, west. The area will be dark and you will need to light a match; the fairy you met earlier will be here, remember to take a friendly attitude when you encounter her because you won’t be seeing her again, and you won’t get the fairy dust. Continue west, north, north, north, east, east, east; you can now either continue east or turn right to heed south, if you choose south you will encounter a tree spirit who will sing to you, what she sings will depend on your attitude, curb any violent tendencies though or the guardian will come after you. The tree spirits songs offer hints on how to proceed, but are not essential to completing the game. Leave the area with the tree spirit, then go east, east, south, east. You should see a pile of leaves on the ground, don’t touch them because they’re a trap, throw an item from your inventory at them to set off the trap, then use you sword to cut open the trap to get your item back. Continue forwards then go, north, north, north, north where you will find the hungry boar memorial, strike the boar 3 times with your sword to recover another piece of the disc. The meat you took from the fridge at Snoot’s farm will be quite rotten by now, in fact you may have dropped it somewhere so it wouldn’t offend other characters, if this is the case then you need to go and retrieve it. Use your map to go to the vulture pits then sprinkle the fairy dust on the meat, the fairy dust is in fact a You can now use the map to return to the lighthouse, the keeper will ask you what that glowing thing is, meaning the illuminyte, give him one of the rocks so he’ll let you in. The lighthouse keeper has the remaining piece of the disc, ask him about it to get it, and he will tell you to take it across the river to the holy woman at Bel Naire temple. Now that you have a larger inventory than the first time you come here, you can ask about various items, if you ask the keeper about the rope, he will tell you that you can use it to make a rope bridge, but to be sure it’s double strength. Go upstairs to the balcony, where the rail will be of use to you this time. Start your rope bridge by tying the rope to the rail, if you simply tie the rope on, the knot will come undone, and you will fall to your death when you try to cross the bridge, so be sure to use the cow hitch. The lighthouse keeper warned you to make a double rope bridge, to do that it will need to be thrown across the river then looped back onto the rail, failure to do so will also be fatal. The talon you found in the vulture pit is the legendary return talon, which acts much like a boomerang, by tying it onto the rope you can throw the rope out, then the return path of the talon will bring it back to you, thus creating a double rope bridge. You can now cross to the big tree on the other side of the river, proceed forward to the Bel Naire temple and take the shield the statue is holding. Inside the temple, you will be greeted by the holy woman, she will tell you that there is only one disc left that can shatter the wall of illusion, and that this disc has been broken into pieces that must be reforged, and that somehow your orb will focus the light. If you have been following this guide you will already have all the disc pieces, plus the orb needed to focus the light, all that is left is to find the forge itself. Ask the holy woman about the dwarven sword and she will ask you to let her bless it, give it to her so that she can bless the sword, where she will then tell you it will serve you faithfully when fighting evil. Leave the temple and turn around, to the left you can see the lighthouse in the distance, now operational again thanks to the illuminyte rock, on the right is a path to the dwarven mines, note that this path is not available to you if you have not have not entered the temple first. The Dwarven leader seems a little gruff at first, but will and you a mining helmet, only then does he notice your sword and realise you must be on the same side. A dwarven general will come over and the 2 dwarves will make a few statements about a stockpile of illuminyte, it may seem like gibberish, but it’s actually directions through the mine. Now that you have a miner’s helmet, you can explore the troll caverns hands free, put on the helmet, and then use your map to go back to the caverns. Since the holy woman has blessed your sword, it will now glow blue in the presence of danger as it should be doing now take the sword and enter the caverns. There are various angles at which you can strike from, but only one of them will be successful. The letters written in the mud by the skeleton outside are actually hints on how to strike, LUD is referring to (L)eft, (U)p, (D)own, which are the directions you must swing your sword to dispatch each of the 3 troll guards. Eventually you will find yourself in the troll leader’s throne room, he’s pretty confident that you won’t kill him, even if you did kill his guards. It is possible to kill the troll leader with the sword, but this is not what you’re meant to do, instead talk to him and threaten him repeatedly, until he flees in cowardice leaving you with the necklace of fear You may have learnt from Rebecca that this necklace strikes fear into the hearts of your enemies, but who might you use it own. The slide puzzle said something about mixing water from the falls with bat dropping to make the invisibility potion, but which falls was it referring to? Go back to the forest of the spirits and go north, north, west, south, west, north, north, west, west, north, north, north, east, east, east, east, east, south, east, east, north, north, north, west, north, west, west, west, west, south, west, west, north, west, west; you should now find yourself confronted by a giant spider, show the necklace the troll leader gave you to the spider to scare it away, then use your sword to clear away the spider’s web. The path to the falls is now clear. Go to the back of the water fall and fill the flask with water, if there is guano in the flask you should now have a glowing blue potion. Use your map to return to the dwarven mines, then click behind dwarves to get to the mine cart, enter the mine and follow their directions to get through the tunnel. If you need the directions they are: Left, Right, Straight, Right, Left, Right, Straight, Right, Left, Left, Right, Straight. At the other end of the tunnel you will find yourself at some ancient ruins, which judging by the statues must be the shrine to the muses. Pushing either of the buttons will make the statues move but there is more at play here. There is a bowl shaped trencher here in which the disc pieces will fit and the holy woman mentioned something about the orb you carry focusing the light. The statue on the far right will hold the orb for you, but this is not enough to reforge the disc. The file about the muses will offer you hints on which objects need to be placed but for simplicity the items are witches staff, talon (need to return to the light house to retrieve it from the bridge), thermos; it is too dangerous to place any items o the central statue, the next statue requires both the box and mining helmet, (take it off if you haven’t done so already), the next statue holds the shield, and as already mentioned, the final statue holds the orb. Pushing either button will set the statues in motion again (in some versions only the green button is effective), but this time with their equipment in place they will be able to reforge the disc for you. With the disc reforged you must now shatter the wall of illusion, if you don’t know where it is then go back to the cliffs of depression then turn around, there should be an option to go to the left, here you will find what appears to be a tranquil scene, but if you try to go this way you will find that your path is blocked. This must be the wall of your illusion, throw the reforged disc to shatter it. The wall will break like glass to reveal a rather bleak scene behind it, in the distance you can see a citadel, when you approach it becomes apparent that this is where Morphius can be found. Above the gate to the citadel is a large sculpted hand, use the bow and arrows to shoot an arrow at the hand and the citadel gates will open. The orc guard inside is too strong to fight, so you will need to use brain over brawn to get rid of him. Drink the invisibility potion you made in the flask then play the recording of Alexis to get rid of the guard. One final obstacle remains before you can confront Morphius: an unstable bridge above a lake of lava, if you try to cross the bridge you will fall to your death, you need to lighten your load first. Throw all your inventory items into the lava until you are told the bridge is safe to cross, you may need to return to the forge to take any items you left behind if your current inventory is not sufficient. You now have your final confrontation with Morphius, he will challenge you to a game of survivor, only this time you play as wizard Trembyle. Remember that the Trembyle piece moves in a manner similar to how a knight moves in chess, and that Ms Peepers told you that the wizard may pass if he can’t make a move. Be careful, although you can pass it is still possible to trap yourself, and the objective of the game is to have all unoccupied squares turned into pits. When you finally beat Morphius at survivor the closing sequence will play. By following this walkthrough in all details you should obtain a maximum score of 225. |
Member
Affected by 'Laziness Syndrome'
Registered: 11-25-12
Location: Australia
Last Post: 3396 days
Last Active: 2939 days
Affected by 'Laziness Syndrome'
Registered: 11-25-12
Location: Australia
Last Post: 3396 days
Last Active: 2939 days
07-02-14 01:27 PM
 Eniitan is Offline
| ID: 1044016 | 132 Words
Eniitan is Offline
| ID: 1044016 | 132 Words
 Eniitan is Offline
| ID: 1044016 | 132 Words
Eniitan
Level: 174

POSTS: 2047/10522
POST EXP: 959649
LVL EXP: 70693284
CP: 55233.3
VIZ: 2614965

POSTS: 2047/10522
POST EXP: 959649
LVL EXP: 70693284
CP: 55233.3
VIZ: 2614965
Likes: 0 Dislikes: 0
Hello there I've read your walkthrough and I must say that it is amazing. Though it was 8000 words or more it got my interest going though I have never played the game before. Your grammar was outstanding as well as your spellings as well. Perfect work. But I have a few advice tips to give to you for next time you make another. You need to space out your work, or people will have trouble reading it. And also you might want to put headers, for each different section that you do a walkthrough on. So that people would know where they are, and what they should do next. That's all I have to say. I look forward to seeing more walkthroughs from you, if possible in the near future. ^-^ |
Vizzed Elite
Affected by 'Laziness Syndrome'
Registered: 08-16-12
Last Post: 591 days
Last Active: 79 days
  Number 1 Sailor Moon, Final Fantasy And Freedom Planet Fan On Vizzed! Number 1 Sailor Moon, Final Fantasy And Freedom Planet Fan On Vizzed! |
Affected by 'Laziness Syndrome'
Registered: 08-16-12
Last Post: 591 days
Last Active: 79 days
07-03-14 12:40 AM
Kradix is Offline
| ID: 1044395 | 146 Words
| ID: 1044395 | 146 Words
Kradix
Level: 13
POSTS: 14/28
POST EXP: 38779
LVL EXP: 9588
CP: 323.4
VIZ: 20942
POSTS: 14/28
POST EXP: 38779
LVL EXP: 9588
CP: 323.4
VIZ: 20942
Likes: 0 Dislikes: 0
Eniitan :
Thankyou for taking the time to read my walkthrough, your advice is duly noted, but I'd like to point out a few things. Firstly: Return to Zork is a continuous, non-linear game, with no distinct chapters or parts, and at times you need to go backwards to go forwards, so simply giving each location a sub-heading is not always practical for this game; secondly: the walkthrough was better spaced with paragraphs when I originally typed it up, but the cut and paste format has eliminated much of the space from the original article; thirdly: as I stated in my original request message for a walkthrough maker position "my style of writing is that of a story which may not always be as straightforward to follow as writing in point form would permit." In other words, I had given warning that this was what to expect. Thankyou for taking the time to read my walkthrough, your advice is duly noted, but I'd like to point out a few things. Firstly: Return to Zork is a continuous, non-linear game, with no distinct chapters or parts, and at times you need to go backwards to go forwards, so simply giving each location a sub-heading is not always practical for this game; secondly: the walkthrough was better spaced with paragraphs when I originally typed it up, but the cut and paste format has eliminated much of the space from the original article; thirdly: as I stated in my original request message for a walkthrough maker position "my style of writing is that of a story which may not always be as straightforward to follow as writing in point form would permit." In other words, I had given warning that this was what to expect. |
Member
Affected by 'Laziness Syndrome'
Registered: 11-25-12
Location: Australia
Last Post: 3396 days
Last Active: 2939 days
Affected by 'Laziness Syndrome'
Registered: 11-25-12
Location: Australia
Last Post: 3396 days
Last Active: 2939 days
07-07-14 07:24 AM
Eniitan is Offline
| ID: 1046544 | 105 Words
Eniitan is Offline
| ID: 1046544 | 105 Words
Eniitan
Level: 174
POSTS: 2078/10522
POST EXP: 959649
LVL EXP: 70693284
CP: 55233.3
VIZ: 2614965
POSTS: 2078/10522
POST EXP: 959649
LVL EXP: 70693284
CP: 55233.3
VIZ: 2614965
Likes: 0 Dislikes: 0
I have to say....I am sorry but what you have seem to have done is copy someone elses work in a way. Though you have typed it up as your own....even if you explained it. When you make a walkthrough it have to be created by you. Not how the people you have see doing it online wise.. If you keep doing things like this then your threads will get closed. I am just warning you. The best way to do a walkthrough, is by your own creation and not how people have done it. Because that's called plagiarising. And its against the rules sadly. |
Vizzed Elite
Affected by 'Laziness Syndrome'
Registered: 08-16-12
Last Post: 591 days
Last Active: 79 days
| Number 1 Sailor Moon, Final Fantasy And Freedom Planet Fan On Vizzed! |
Affected by 'Laziness Syndrome'
Registered: 08-16-12
Last Post: 591 days
Last Active: 79 days
