

 User Notice
 Forum Links
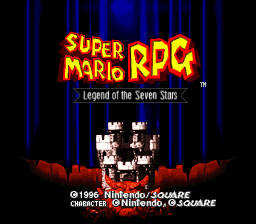
Play Super Mario RPG - Legend of the Seven Stars Online

Thread Information
Views
3,061
Replies
11
Rating
0
Status
OPEN
Thread
Creator
Creator
Fireproof
05-31-13 07:37 PM
05-31-13 07:37 PM
Last
Post
Post
pacman1755
07-05-13 11:22 PM
07-05-13 11:22 PM
System
9.3
Views: 1,122
Today: 0
Users: 1 unique
Today: 0
Users: 1 unique
Thread Actions


Order
Mario RPG Walkthrough
Game's Ratings
Overall
Graphics
Sound
Addictiveness
Depth
Story
Difficulty
Average User Score
9.3
8.9
8.7
9
8.7
9.3
5.6
05-31-13 07:37 PM
Fireproof is Offline
| ID: 807651 | 9531 Words
| ID: 807651 | 9531 Words
Fireproof
Level: 48


POSTS: 26/518
POST EXP: 219650
LVL EXP: 807447
CP: 11889.2
VIZ: 4005137

POSTS: 26/518
POST EXP: 219650
LVL EXP: 807447
CP: 11889.2
VIZ: 4005137
Likes: 0 Dislikes: 0
This guide became a little more than I had originally anticipated, by possibly 5000 words more than I had anticipated. So this is a detailed guide (of my own words) that includes several of the hidden treasure locations but not all. I also covered the armors that you should purchase and when certain armor and items become available as well as where to find them. I've titled each part with bold and on a separate line. I've also taken the liberty to color code specific parts and details. Orange simply highlights each boss. Light blue highlights which things you should purchase. Red will highlight main points in the long text. Green will highlight other details in the long text. Yellow will highlight side things. ~~~~~~~~~~~~~~~~~~~~~~~~~~~~~~~~~~~~~~~~~~~~~~~~~~~~~~~~~~~~~~~~~~ The Adventure Begins You begin your game in Bowser's Keep. Move Mario through the Keep and dodge the Terrapin because they do absolutely nothing for you. You are required to fight 4 of them as they guard the big red door. Beating these guys are easy so don't break a sweat. After the battle you will cross the bridge to the next door. The bridge collapses so forget about turning back. Move through the doors and run to the other end of the room. Mario will stop half way and a scene takes place. Epic boss music starts up as the battle begins! Now you're facing Bowser and Princess Toadstool is tied up on a rope dangling above a bottomless abyss. That's both kinky and scary. There's only 1 thing you need to do... that's "Aim for the Chain" as Toadstool will constantly state if you were to ignore her. She seems to know how she wants to be saved so you better listen. After you defeat Kinklink, the chandelier will fall. A scene will take place with Bowser falling really slow and you somehow catch up with him when he breaks your Kinklink. Mario jumps on Bowser and basically fly hundreds of feet to reach Toadstool. Before Mario can have his way with her... I mean... "save her" an unexpected thing comes bursting into Bowser's Keep. Mario is thrown from Bowser's Keep to Mario's Pad. Mario confronts the little pest "Toad" (which is ironically the same name for almost every Toad in existence). Toad tells Mario to save Toadstool so Mario must go back to Bowser's Keep. While there, Mario has a fruitful discussion with the giant sword "Exor" which turns into collapsing the bridge. So Mario returns to his pad and tells his story to Pest (that will be Toad's name for now). Pest wants to go to Mushroom Kingdom to inform the Chancellor that Bowser's Keep is under new management and the Princess is still missing.. so he leaves. Mario follows and Pest tries to engage Mario in a tutorial. Just skip it. Mushroom Way Now you can really start playing! So the first thing you want to do is put a little hurt on some Goomba and some Parakoopa. The idea is to get to level 3 before you face the Hammer Bros which is the first boss you encounter. I suggest you get the treasures and save Pest as often as possible because you get some cool items. If you move into the last room at Mushroom Way, you'll encounter the Spiny that Lakitu will toss out of his cloud spaceship. When you engage in fierce battle with the Spiny, do not use jump on them. It will do no harm to them. So assuming you're level 3 (which you probably aren't) you move to the Hammer Bros. Unfortunately for Hammer Bro he caught Pest and unfortunately for you, you have to save him. Boss Fight: Hammer Bros Cue the epic boss music! So now you're facing 2 Hammer Bro. What you want to do is use Fire Orb on 1 hammer bro and use the other Fire Orb on the other. Dodge the physical attacks and give em a few punches each and battle won. Pretty easy. Now Pest is saved and you find out you have a Hammer you can use. Take this time now to equip that Hammer otherwise Pest will try to give you a tutorial later... ***You can choose to leave Pest to the monsters but you won't get the items*** Mushroom Kingdom So you made your way to Mushroom Kingdom.. great. Now move into the Castle. When you arrive.. you see another Toad. Take this time now to jump on his head before he reaches the door at the end. Jump from his head to above that door and get the hidden treasure chest up there. This is the only time in the game to get it! So now Mario engages in a long discuss with transformations and jumping and etc. When Mario can finally leave, make sure you check out the vault room where you can get some free treasure. Now take a trip to Toadstool's chambers. Go to the right of the fireplace in that corner and press "A". I believe you find "Toadstool's ???" which means that Toadstool doesn't always need Mario to save her in her time of need... hint hint... You actually get a flower tab I think because the Elder Toad person sitting in there won't let you walk away with that.. So now you left the Castle and it is raining thanks to the Pillsbury Dough boy. You go to see why the kid is crying and find out that his frog coin was stolen from the dinosaur that ran by earlier. Since you're Mario, you decide to help him. Go to the shop, get your armor and items you want. Recommend you purchase: Pants, Shirt, Jump Shoes, Antidote Pin and Pick Me Ups After you stop buying stuff, the shop owner gives you a free Pick Me Up. In retaliation, jump onto his cabinets behind the counter and be rebellious! Also, run down the stairs and jump above the elder toad to get a free flower from a hidden treasure. There's 1 more hidden treasure at the bottom right space of that same room. (Using your fast forward on Vizzed) Wait until the elder toad moves into the bottom right corner and grab that chest. Once you got it, leave. Head over to the jumping toad. The dinosaur runs past you so you chase after him. Bandit's Way So now you made it to Bandit Way. The best thing to do is train Mario and Mallow another level or 2 on the easy enemies, You just basically fight off enemies and make your way to the end. In the room with the yellow floating panels you want to search for a hidden treasure that is above the pink spinning flower and jump from it to the purple, not moving, flower. In this chest is a KeroKeroCola (very valuable). Make your way to the second room with the floating yellow panels. In the chest that the dinosaur was trying to reach is the "Star". It's Amazing but you want to wait until all 4 of the K-9 are under you when you fall. This helps get more free experience. In the last room, there's a ton of monsters and of course, the dinosaur. He wants to play hide and seek. Your job is to sneak up behind him and spook him 3 times. On the 3rd time, you engage in battle. I normally have Mario level 5 and Mallow level 4 at this stage. Boss Fight: Croco So the best course of action is to utilize Fire Orb. Croco is weak versus fire so you will force him to lose a turn. Doing constant fire orb will quickly reduce his health. Mallow can just punch... After a couple fire orb, Croco should use his Wild Shroom which will recover some health. He'll miss a turn when he does this. Once your flowers are all used up, just hammer Croco until he returns the frog coin which violently smacks Mallow's head. Croco retreats. You earn yourself a Wallet, the frog coin and a trampoline. Take the trampoline to leave and return to Mushroom Kingdom. Dark Mushroom Kingdom So while Mario was away, Mushroom Kingdom fell victim to shy guys on pogo sticks (more or less). I'd recommend you purchase any items you think will help you in the next boss battle. I'd go around and kill off the Shyster chasing after the Blue Toad, he'll give you a coin I think and then you can give him the wallet. I'd also recommend you go into the back house (behind where the line of Shyster are bouncing out of the castle). Go into that house and engage the shyster on the 1st floor first. I'd recommend using Mallow's Thunderbolt and press Y right at the end to do enough damage to kill all shyster in 1 attack. Anyway... After killing the Shyster on the 1st floor, chase after the blue Toad as he runs upstairs. There's another Shyster harmlessly bouncing with that dude's son. That's sick... Kill it. Now you've earned yourself a Flower Tab. Move yourself to the castle. There's a toad in the first room being chased. Kill the Shyster chasing him. He moves into the room on the left. Kill the Shyster in that room too. He runs up stairs and there's 2 guarding the door to Toadstool's chambers. Kill them too. When you arrive into the room, be sure to say "You Betcha" so that you are given a Flower Tab. The Elder Toad will heal you free of charge. Moving on.. Return to the first room and make your way to the vault which you went in earlier. There's a fresh supply of treasure. If you move into that back room (The Guest Room) there's a Toad in the corner. Talk with him and he gives you a Wake Up Pin. Equip that to Mallow. Now make your way to the Throne Room where you'll engage in the next boss battle. Boss Fight: Mack It's you and Mallow vs Mack and 4 Shysters. Have Mario use Fire Orb on Mack and Mallow use Thunderbolt on all of them (be sure to press Y for extra power). If you play it like this and use Honey Syrup, you won't even need a Pick Me Up. Battle will be over before you know it. After the battle you get your first star. You end up talking to the Chancellor and introduce Mallow. Mallow suggests you visit his grandpa. KeroKero Sewers Before you leave for the sewers, stop in at the shop and pick up the Cricket Pie from the shop keeper. Once you get into the Sewers. you'll have to take pipes to get deeper into the sewers. I won't go into details on this section... just make your way through the pipes to the end. There is a treasure chest that when you hit it, you fight a monster. He's pretty easy to beat especially with using jump. After you beat him, he gives you a Trueform Pin which I would equip to Mario. If you leave that room and go back in, that treasure will have coins in the box. There's also a star in the sewers somewhere, which doesn't last very long but it gives free experience. Anyway, make it to the save point and attack the boss. ***I believe there to be a hidden treasure here, just can't remember where*** Boss Fight: Belome I usually have Mario at level 6 at this point in the game which gives me Super Jump. Use your strongest magic on Belome and just have Mallow attack. Mallow will be eaten most of the time anyway. At some point Belome will try to turn you into a scarecrow but with the Trueform Pin, that won't do any good. Eventually, he dies of starvation. When he vanishes, you are taken into Midas River where you undergo extensive swimming lessons and barrel hopping. At the end, you are given a NokNok Shell which you should equip to Mario. Tadpole Pond and Rose Way Now you should be up to Tadpole Pond. Move to the grey rock and follow the path and chat with the Frog. At the end of everything, make sure to speak to him 1 more time to get the Froggie Stick. Equip this to Mallow. If you want to go to the other room in Tadpole Pond where you jump on the tadpoles for specific notes for the Composition, have fun with that. Once you leave Tadpole Pond, you arrive at Rose Way. It's here where I just run through it. I grab all the treasure, the flowers, coins and mushrooms. At the end of the path, you see Bowser for the first time after the loss of the Keep. Now you make your way to Dark Rose Town. Dark Rose Town As soon as you enter, go to the house on the left (just to get this out of the way). After all is said and done in there, go to the house in the back left. Climb on the Toad's head and collect the treasure in there, then go upstairs, hit the switch and jump on the bed. You'll get a hidden treasure. Talk to the toad and admit that you were greedy and took his treasures and he'll tell you that there's a path in the woods that leads to even more treasure. Now take yourself to the shop but instead of going in through the front door, climb the boxes to the right. There is a pipe you can go down and get treasure. There is another treasure at the top of the building. After buying your items and armor, go to the Forest Maze. Recommend you purchase: Thick Shirt, Thick Pants, Pick Me Up, Honey Syrup Forest Maze As soon as you enter the first area, there is a hidden treasure to the left. I think there is Red Essence in there. In the area before the several tree stumps there should be a hidden block above the stump. In the room with all the stumps there is a chance that there is hidden blocks in one of the stumps (Second row left one?). In the room with the save block there is a hidden treasure at the end of the path on the right. When you go into the maze, you want to follow the mysterious blue puppet "Geno" until you reach the boss. You may also take this time to follow the path given to you by the Toad in Rose Town. Enter into the last room of the maze and engage the boss. Boss Fight: Bowyer This boss fight is a little different than the others. Bowyer will disable different buttons as you fight which depends entirely on what you do. If you do constant attacks then Bowyer will disable attacks. If you use constant special, Bowyer will disable that. What you want to do is use Mallow as healer, Mario run super jumps and Geno only attack. Of course you switch it up as needed. Geno's magic defense is weak at this stage of the game so any of Bowyer's magic attacks will put Geno near death. After the battle, you earn a star and must return to Rose town. At Rose town, you talk to Gaz in the house on the left and I think he gives you Geno's first weapon "Finger Shot". Equip to Geno. ***Now that you've defeated Bowyer, link is asleep at the Inn in Rose Town*** Yoshi's Island To get to Yoshi's Island, you must travel through the Pipe Vault. It's pretty straight forward. You can play the Moleville mines game which gives some great flower prizes if you win. There's some hidden treasures above the area where Mario must duck to get the frog coin. When you reach Yoshi's Island, there's a hidden block just above the pipe. In Yoshi's island you can race Yoshi against the other Yoshi and win Yoshi cookies which can then be used later to feed baby Yoshi. Baby Yoshi will provide cool prizes for feeding him. Moleville First thing you want to do is search for Bowser located on the right side of Moleville. Once that's out of the way... head on over to the shop to stock up on some fresh armor, items and weapons. After purchasing your items, you will want to head into the mine. Recommend you purchase: Work Pants, Punch Glove, Cymbals, Pick Me Up Moleville Mine So now you're in the mine.. You want to talk to the miners so that you can jump on their heads and climb to the room above. You'll come across a room with a random trampoline in the middle, once you jump on that you'll get knocked out. Croco and his Bandit buddies will appear and they'll steal your coins, so you need to chase him down. You can encounter 3 of the Bandit monsters and each will give you a flower tab upon beating them. Once you catch up with Croco, you'll engage in a boss fight. Boss Fight: Croco 2 The best thing to do in this situation is to hit Croco with mostly your physical attacks to conserve on your magic. Half way through the battle he'll take your items away from you so you want to heal up as often as possible. Once your items have been taken from you, you should begin using your specials or your strongest attacks. Have Mallow heal, Mario use Super Jump and Geno can attack or use Geno Beam. Moleville Mine Cont'd After the fight with Croco, you will have won a Bambino Bomb. This is necessary for destroying a wall in a few rooms further into the cave. Speak to the single miner and he'll place it for you. When you get to the room where you can jump on some boxes and take the top or bottom path, choose the bottom path and follow the tracks. Mario will start rolling uncontrollably and a Frog Coin will appear. Progress further in and you will encounter your next boss. Boss Fight: Punchinello This guy really isn't anything more than a regular monster with extra health. I'd suggest you use some of your more powerful stuff later into the battle and use Mallow to heal whenever. I'd recommend you focus your attacks specifically to Punchinello and NOT the bomb-ombs that he brings in. In the end, you'll earn your 3rd Star. Moleville Cont'd After you get the star, you'll notice a hole in the wall that wasn't there previous to the fight. Go to the next room and you'll find the missing girl. Take her on to the mine cart and ride into the mine. I suggest you take your time with it (I just fast forward without doing anything) because this will count towards a "record" and you can come back and beat your record. I believe you earn yourself rewards too but I never bothered. Once you land in the house, you can then move on to the next area. ***I would hold off on buying fireworks until later*** ***You may now return to Tadpole pond to complete part 2 of the music composition*** Booster's Pass Immediately to the right of the entrance is a green plant like thing that you should walk to and press "A" on. There's a Frog Coin inside. I'd suggest you go into the next room but not by climbing the rocks. There's a green ! switch that you should press to defeat the Green Spikey. There's also a flower sitting out that you should get. Climb the rocks in the first room and exit in the back. ***There may be a hidden block here, sorry I forget lol*** Booster's Tower Here's where things get interesting. First off, you finally encounter Bowser face to face and second, Princess Toadstool is being held captive way up top the tower and third, you join forces with Bowser. You are required to press "A" on the door to notice that it's locked. When you walk away from the door, Bowser returns and he breaks it down. At this point, I recommend you put Bowser in your party and take Mallow out. Be sure to equip Bowser with anything you can. You can fight any monsters you wish but in the second room.. they will endlessly spawn. There is a hidden treasure at the top of that second room over a blue square. In the following room, (where Booster rides his train) there is a Snifit 2 hiding at 1 end of underneath the track and at the other end, there is an item (I'd like to say flower). A couple rooms later, there's a treasure chest floating over the ledge. You should jump off the ledge (think approximately 2 squares out) and land on the thing below where it shoots you into the chest to get the Masher. ***The Masher has a high attack range, this means that the Masher can do a lot or very little damage during an attack*** You will have to work your way back up. In the next room there is a switch that you should press. Once you jump on this, it opens up a new area in Booster's Pass. This new area has a few cool items on it. Moving on... There's some curtains in the following room. If you go behind them, you will temporarily become 8-bit Mario. How cool is that? Anyway, the next room of importance has a series of pictures. The code for the pictures is as follows (Assume that the pictures are in ascending order of 1, 2, 3, 4, 5, 6 from left to right. The following numbers are the order in which you should view the pictures); Pictures: 6, 5, 3, 1, 2, 4 You are given a key to the room right next to the pictures. In this room you'll get "Chomp" which is Bowser's ally. Equip that. The next room of importance is the room after the Thwomp sends you up and you're on the next floor. In this room (room with the Snifits with parachutes), there is a hidden treasure to the left. There's also a Frog Coin hidden back on a thin path under the next room. The last room of importance has the save block and a few treasures in it. There's 1 hidden treasure above the treasure chest on the raised platform. Move onto the next room. ***This hidden treasure gives you a 1 time gift of "Goodie Bag". This item provides an infinite number of coins (as you use it in battle). It is worthless except for the selling price of 555 coins*** Boss Fight: Booster Before fighting Booster, you will engage in a little mini-game. The snifits are opening the curtains to find you so you have the option of hiding or be seen and engage in a fight with Booster. -If you hide until the end, you will be able to get the Mario doll from on top of the curtains. This will give you the Amulet ***Amulet only appears once in the entire game I think*** -If you engage in battle with Booster,I believe you will get a Flower Jar. To defeat Booster, you should hit him with everything you have, but recover your magic power as you lose it. (I personally, have never fought Booster more than once). Boss Fight: Knife Guy + Grate Guy This boss fight is unavoidable. I suggest you unleash your strongest attacks on these 2. Use Mario's Super Jump, Geno's attack and Bowser's attack. What I like to do is weaken both of them before they move on top of each other. Once they are on top of each other, I can easily and quickly kill them both. Booster Hill Immediately after the battle, the gang jumps from the balcony and runs to Toadstool's rescue. You find yourself chasing Booster while being chased by the Snifits and jumping on rolling barrels. The best course of action is to time every jump (by listening to the sounds the barrels make) and use the barrels and Snifits to get to Toadstool. Each time you do, you are rewarded with a Flower. (I've earned as many as 15). Marrymore What's cool about Marrymore is that if you have a stock of coins, you can go to the inn and get into the Suite. Mario can go into the shower and he will whistle. There's a little gray press bell you can press and the little pink toad will run to your every ring. I believe you can purchase KerokeroCola for a cheaper price as well. You should tip the little pink toad if you want a Flower Tab. Leave the room and head downstairs to the other room. There is a hidden block to the left. Head downstairs and make your purchases. Recommend you purchase: Hand Gun, Whomp Glove, Maple Syrup, Mid Mushroom, Pick Me Up After you've left the inn, head to the front doors of the Chapel. Talk with anyone to trigger the couple that is trying to get married. Afterwards, run around the right side of the building. There is a backdoor that you can get in through. Go into the chapel and you'll have to break the door down with the Snifit. In the second room, you'll have to break the door down with Bowser. Once in the chapel, you'll be tasked with taking back all of Toadstool's jewels. The faster you can grab all 4, the better of a reward Mario will get later. If you grab all four really fast, Toadstool will give Mario a kiss and Booster and Bowser will accidentally kiss each other thinking that it's Toadstool. If you're slow, Booster and/or Bowser may end up kissing Mario. Afterwards, zee cake arrives YOU FOOLS!! Boss Fight: Bundt There are 3 options in this battle but it is not necessary to defeat Chef Torte or the Apprentice. Target the cake. Once the cake takes enough damage, it will chase away the 2 chefs. Your objective is to blow out the candles. This can be done with normal attacks. Each turn, a candle will relight but you can do 3 attacks a turn. This should be quick unless you are attacked with a move that inflicts you with "Fear". Take down the base of the cake with everything you have and Booster will eat the cake in 1 bite. Marrymore Cont'd After you've left the chapel you can head immediately to the left where there is a green exit. If you move there, Toadstool will come out and talk. Afterwards, you can leave Marrymore through the entrance. This will automatically take you back to Mushroom Kingdom. Mushroom Kingdom Now you must take Toadstool back to the Chancellor, where the gang will come out of the party (including Bowser's ugly mug). Go through the whole conversation and you can eventually leave. If you head outside, you notice Toadstool floating down with an umbrella. Speak to her and she joins you. If you talk to the blue Toad guy that you gave the wallet to, he should give you a frog coin as "Thanks again". Now you must leave for tadpole pond. Tadpole Pond Speak to Frogfucious and he tells you to visit Star Hill. Leave Star Hill Pretty straight forward. Just find the star flowers. In the 3rd or 4th room, the Star is sitting at the top. There are some stars that you can visit and one includes a message about Luigi and 1 from Mallow and a couple other characters from the game. Afterwards you can advance to Seaside Town. Seaside Town Welcome to weird-toad-ville. The only things you need to do here, at this point, is to visit the leader in the back house. If you go up stairs and speak to the Frog Disciple, he can sell you some cool things. It's up to you what you want because See Ya? and Earliertimes? can both do a lot of good at this stage of the game. There is a shop here that sells bombs and could be useful later in a boss fight if you want to spend the extra coins. I don't. Afterwards, leave and head for the next area. Seaside When you come here, you can purchase new gear for your trip to the Sea floor. Make your way to the end and onto the sunken ship. Recommend you Purchase: Sailor Armor, Hurly Gloves, Pick Me Up, Maple Syrup Sunken Ship For the most part, it's pretty straight forward, however, there are some puzzles to solve. In one of the rooms, there is a hidden flower sitting back behind the blocks. You can sneak past the ghosts if you stay to the right of them. If you do encounter any ghosts, you can always give them some pure water and they will die instantly. Room 1: Parakoopa to the cannonball and land on the switch You just need to get the koopa behind the ball and you move under the switch.. easy Room 2: Bounce Cannonball on trampolines to the switch The trampolines should be positioned at about the same area where you hit the block. The middle trampoline would be better a little tiny bit further to the right and the last trampoline would be better positioned a little tiny bit to the left. The cannonball won't bounce as high by that point. Room 3: 3-D Maze Absolutely the most frustrating part of my childhood experience began with this maze. On the part that you can no longer progress into the maze, you must hold "Y" and jump to the left. This takes you up to the second part. Don't fall off and you'll get to the switch. ***You can purchase items from the shaman in the event that you never had enough coins from your previous visit in the Seaside area*** Room 4: Follow the Coin DO NOT GRAB THE COIN IN FRONT. It won't produce anymore coins for you to follow and you won't get the prize. You will have to leave and come back in. Room 5: Cannonball Run Hit the blocks with the shooting cannonballs. Easy Room 6: Double Switch There is a loose barrel on the right stack. Knock it down with a jump and jump on it to roll it over to the switch. Jump on the other switch and you earn your last reward. The Password is Pearls. Start with Key Letter1 and work your way around. It starts from the left and works down and to the right, then up to the second row and to the left. After you've entered the password, you will face your next opponent. Boss Fight: King Calimari If you have Toadstool in your party, her Group Hug magic will cure any inflicted fear caused by the Tentacles. If you have Fearless Pins, you may want to equip those if you don't use Toadstool. Anyway, the tentacles are pretty easy, just attack them one at a time and heal the party before you kill the last one. Defeat 2 sets of these and you will face King Calimari himself. He's weak to Fire and can be defeated quickly with 2 Fire bombs and another few attacks. Sunken Ship Cont'd Continue through the ship to the point where you see a second Mario copying your every move. There is a hidden treasure in this room around the area where you meet the other Mario face to face. You should hit a hidden block then try to jump on the other Mario's head to get to the other chest. In the following room, there is a dry bones that moves behind the blocks, there is a door back there where you can get another item. As you progress further into the ship, you'll actually go under water for a while. When you make it to where there are a string of blooper bouncing around, you would want to head to the top (while submerged). There are a bunch of barrels blocking a door and you should get the item in the chest. Afterwards, jump to the top of the water and head to the left, there's a frog coin here. Now you can engage in a few fights that leads to your next boss battle. Boss Fight: Johnny Johnny has 2 parts. He has his normal form and a powered up form. If you only defeat 2 of the minions when he goes to his second form, then you won't have to face him 1 on 1 with only Mario. If you want the extra challenge, like I do, go for the duel. Jump attacks don't work on Johnny and if you have Toadstool in your party, she can heal your gang easy and cheaply. After the battle, you should head back to Seaside Town. ***Samus should appear in Mushroom Kingdom's Guest Room in the Castle*** Seaside Town When you arrive, hand the star over to the gang (you can say no but you just waste time). Follow the toads to the back left area, where there was nothing in there before. The toads are then cornered by you and Johnny and merge into Yardovich. Boss Fight: Yardovich This will be your longest boss fight yet. This guy likes to use water blast which eats an unhealthy amount of health away from your gang. You have no choice but to have Toadstool in for this one. Every turn, you will want Toadstool to heal your party. When Yardovich creates a mirage, there will be 2 of him attacking each turn. The mirage is weak and takes more damage than the normal Yardovich. I recommend you keep attacking the main one with Mario and your 2nd partner. It won't be too long before you defeat this guy. After this battle, you'll be given the key to the storage room. Once you rescue the gang in there, you should be spoken to by everyone. Say the right thing to the elder and you'll get a Flower Box. It is required to speak to the elder before you can advance to the next area. Shopping in Seaside Town 1. You can buy yourself a beetle box by talking to the Snifit that works there. Purchasing a beetle box allows you to run the Booster Hill again to catch beetles. This will help you earn Frog Coins and other coins pretty easily if you're good at catching them. 2. You can now buy the weapons and armors from every shop you've encountered so far. The Troopa Shell and Parasol are the 2 main weapons you will need. The armors are just all the old armors. 3. Accessory Shop is also full of all the accessories you could buy in all the old shops you visited already. There's nothing exciting here, but I do think that the Zoom Shoes can be bought here. 4. Item Shop is also full of all items you could buy as well. 5. Mushroom boy. This guy is interesting because you can feed him an endless number of mushrooms. What's cool is that some of the mushrooms will earn you different rewards. I usually earn Rock Candy from every 8-15 mushrooms. I also see a lot of Maple Syrup and I believe I've earned a Flower Tab or 2 every now and then. Pretty easy to earn coins from selling merchandise from giving this guy mushrooms. Land's End Pretty Straight forward. In the first set of rooms, there are hidden platforms you must jump to make appear. There is also one hidden treasure at the very top near the highest platform. I'd recommend you jump onto the stone and hit the block on the left. ***I believe there is a second hidden block somewhere at the beginning of this room but I do not remember the exact location at this time*** Ok now moving onto the more colorful section. The 1 thing I will mention is the big mountain that you jump from block to block to cross. At the bottom of that left mountain, you should jump into that hole when a little blue cloud pops up. Travel through to the end and it'll take you into a pipe that leads to Kerokero Sewers. There's a treasure there that you want to get, it has Cricket Jam. You want to give this to Frogfucious whenever and he'll give you a bunch of frog coins. So.. go back where you came and get out of there. Make your way back to the top of the huge mountain. You can play different mini games to earn different rewards but I'll let you do that one. Cross the bridge and advance into the desert. Your objective here is to attack the Ant in the quicksand. Whenever he appears you want to walk into him and engage in battle. After you win, you want to go into that specific quicksand so that it will take you to the next set of rooms. Follow these all the way to the Cliffside. You'll notice you can't go up the cliff so head back into the last right and move through the quicksand that the last Ant is in. This will take you underground. Underground Grab your star touch as many monsters as you can! Then make your way to the temple. In the temple there are hidden treasure chests in one of the rooms. I think these blocks are in the lone chest room. Jump to the corner of the room by the gold wall and there's 1 there. There's also one other hidden block located on the lone chest. Jump on top and claim your prize. In the following room should be a series of heads on the wall. I believe you must pay to use them, so be careful of the order which you hit them because this changes the outcome of the reward you earn. There are 6 combinations in total. The only rewards I am aware of right now (and based on memory) are the Yoshi Cookies, the Mushroom and the monsters. I am not aware of the other 3 combinations at this time and I am not aware of whether they provide the same results as other combinations. Continuing deeper into the temple takes you to a head on the wall and a platform that goes further down. If the message reads, "Sorry no visitors" just leave and come back in. That message would take you to a room that you can't get in at this time. If the message reads "I'm very hungry etc." then you should move on down and fight your next boss. Boss Fight: Belome 2 What's cool about this boss battle is the fact that Belome will eat everyone, but what's weird is that Belome will rarely eat Mallow (at least while I've played it over a billion times). In this battle, you will want to have sleep prevention accessories because Belome is big on this. You will want to take care of the clones asap because if left unchecked and your party is asleep, 2 Geno Clones could seriously damage 1 or 2 of your party with Flame Stone. If attacked by magic, you won't wake up. If you heal with Group Hug, everyone wakes up. Monstro Town After the battle with Belome, you can move onto Monstro Town. Travelling from left to right, in order of doors, you can visit the elder in the first room. She will ask the Paratroopa patrol to aid you in climbing the Cliff to the Valley. If you speak to the treasure chest guy, upstairs, he'll inform you of how many hidden treasures you have left to find. In the next room over, there's 2 monsters. The Chow gives you an exact number on how many times in a row you've jumped using the Ultra and Super Jumps. Both are possible to get 100 jumps out of. There's a special and powerful reward for earning 30 jumps. This gives you the Attack Scarf which gives you 30 to all stats. If you work for all 100 jumps (which seems like it gets easier after 30 straight jumps), you'll earn the Super Suit, which gives you 50 to all stats. If you speak to the Thwomp, he will angrily work to knocking the key down (located outside). Once the key is dropped, you can take it to the temple and when it says "Sorry no visitors" you ride the platform down and talk to the Golden Belome and feed it the key. There's cool prizes in there. The next room over is locked. If you obtained the fireworks from Moleville and traded that for a pretty stone, you can use the pretty stone on the door here in Monstro Town. This will take you into a cross Dimension between the RPG World of Mario and the RPG World of Final Fantasy. You can then fight Culex. ***Without the Attack Scarf, Super Suit and Jynx Belt, you won't stand even close to a chance to defeating Culex at this point.*** If you do engage Culex, the Final Fantasy battle theme will begin. I recommend you have your absolute best armors, red essence, kerokerocolas, the best Elixir available (found from Tadpole Pond) and Rock Candy found from feeding the mushroom guy in Seaside town. Rock Candy will do 200 damage to each Crystal and Culex. This is your best bet at having a chance to defeat Culex at this level. If you skip Culex and move to the next room, you'll find the shop. Here, you want to buy Bowser some better gear. Skip the little Goombettes because they sell a mushroom that turns you into a mushroom. In the last room on ground floor is an empty bedroom. If you turn the lights out and sleep, there will be 3 ghosts that appear. They hide 3 flags and they want you to find them. The first flag is hidden under your bed in Mario's Pad. The second flag is hidden on the wooden Flower in front of the Rose Town entrance. The 3rd flag is hidden between the O and A on Yoshi's Island. Bring these back to the bedroom and sleep and the ghosts will reward you with the Ghost Medal. The Ghost Medal will increase your magic defense and defense while in battle. There's a room above the ghost's room where the Sensei Jynx can be fought. Unless you are packed with Rock Candy, you will most likely not be able to defeat Jynx without using all your best stuff. Having Super Suit and Attack Scarf helps. I will skip this as well, because this is not apart of the main game. If you leave through the last door on the right, there is a hidden block in the entrance to Monstro Town by the bush. At this point, make your way back into Land's end where the cliff is. Land's End Once you arrive at the cliff, you are tasked with scaling the cliff in record timing. If you jump fast enough, you can earn yourself a Troopa Pin. This grants you with boosted Attack and Magic Attack. Once up top, you will then reach Bean Valley. Bean Valley You will need to venture through pipes to reach a set of 5 pipes. In these pipes are rewards. A few of the pipes have treasure boxes with a mushroom, flower and star on them. You want to get 3 of the same picture so that you don't face an enemy. In one of the pipes there is a hidden treasure chest, but I don't know which one and I don't remember where. It may not be possible at this point to unlock the secret entrance so take note of the pipe with no treasures in it, you'll need that for later. If you continue onto the next room, you can engage your next boss. Boss Fight: Smilax An accessory that prevents you from turning into a mushroom will help you here (Trueform pin etc.). Use your strongest magic and kill off Smilax when you've killed off the other piranhas. Heal using Toadstool etc. Rock Candy helps too. After the battle, you should read the note. This will give you the "Seed" which you will want to keep. Afterwards, you can hit the block and climb into the skies. I'll let you figure this part out. Nimbus Land First thing's first... New shop = New Weapons. In the weapon shop there is a hidden block above the cloud counter. Climb the boxes to get to it. You may notice you can't get into the Palace, so you will need to talk to the gold statue maker. He will turn you into a statue. Once inside the Palace, you are placed in the statue room. Now, you have a decision to make. Do you want to fight Dodo the big Black Bird? Or earn the Feather? If you want the Feather, you will need to dodge his "polishing" of the statues. Feather will give you +20 speed. I will skip the fight with Dodo, it's an easy monster fight anyway. There are a few hidden blocks spread throughout the Palace. The first one is located in the doors to the left of the Heavy Troopa guarding the middle door. Move through to where Jawful is sitting, there's a hidden passage that you can take to reach a hidden chest. In the next room, you'll see some of the locals in a room. Talk to some of them, you can get yourself a Flower Jar and a Castle Key. Take that key to the middle door and travel on through to your next Boss. ***I know I am forgetting a treasure chest somewhere*** Boss Fight: Birdo Pretty straight forward. Based on memory, I believe Birdo to only attack 1 ally at a time, so Toadstool is not necessary for this battle. Hit Birdo with everything you have and you'll finish it in no time. Continue on through to Valentina after stopping at the door that is currently locked. You will have to chase her through the back which will eventually bring you back around to the front. You can evade the fight with Dodo if you have the star on you still. Eventually, you'll engage your next opponent. Boss Fight: Valentina and Dodo The first part of this fight takes your middle character out of the equation. Most of the time I put Bowser in the middle because it's a 1 on 1 duel with Dodo and Bowser is pretty good on defense and attack which means he should win sooner. All you can really do is attack Dodo, it's all you need to do. The battle with Valentina helps having anti-sleep accessories equipped. Just do some damage to her and Bowser and Dodo will return to the battle. Put everything into taking these 2 down and they'll fly off. I usually use any magic that hits multiple targets and once Dodo freezes, it'll be too easy from that point forward. Nimbus Land After the battle with Valentina, you can then go rescue the King and Queen. Mallow departs while Mario sits waiting. Then you talk with the King and Queen. I recommend you go back to the room they were in, I believe you are given another Flower Jar in that room. You should make your way to the Volcano now by visiting the hot springs and jumping off the ledge. You can then leave and go back to Nimbus land to get the Fertilizer, which is found by going along the right wall and talking to the Shy Away. You can also find Croco trying to steal stuff in the house on the right as well. You'll be given a Signal Ring (used to locate treasure). ~~Lazy Shell~~ Now you have the fertilizer (found after the battle with Valentina along the right wall outside of the palace) and the seed (found after battle with Smilax. If you take these 2 items to Rose Town, you'll notice a new area you can now go to. Go to the house in the new area and give the guy the Seed and Fertilizer. A bean stalk will grow and you can climb. Up top the clouds is the Lazy Shell Armor and weapon. The Lazy Shell is Mario's most powerful weapon in the game. The Lazy Shell Armor, reduces the damage you take, tremendously but also destroys your attack and magic attack. It also keeps you safe from a variety of ailments and safe from magic that deal mortal blows. You should now be able to handle Jynx easily and take on Culex or head to Barrel Volcano. Barrel Volcano Ok so this area is pretty straight forward. There's 1 hidden treasure I know of in here, but I just usually jump around until I find it. I think it's in a room where there is lava but I am not sure. I usually just run my way through here until the end. Eventually you'll meet up with Hinopio who runs an INN, Item Shop and Armor shop. I recommend you buy the new armor and stock up on items for the next battle. After you leave, cross the lava and begin your next fight. Boss Fight: Czar Dragon Like all other bosses, you will want to attack with everything you have. Having Toadstool in your party helps keep you alive so I suggest you use her to heal and Mario and your 3rd partner to use their attacks to beat the Czar Dragon. Toadstool should have Come Back at this point which is useful in keeping your party in the battle. After you defeat the Czar Dragon, he turns to Zombone. I think I was told that if you use Pure Water, you can defeat him instantly, otherwise, attack him like you would Czar. Soon enough, he'll be defeated too. After the battle, you must then chase the Axem Rangers through the end of the Volcano, which takes you back to the top where you engage the Axem Rangers in battle. Boss fight: Axem Rangers My recommendation is to take out the Pink and Black Axem rangers first. Pink is really easy to take down with a few attacks. I say take Black down because he attacks twice and some of his moves might kill off your allies if you can't dodge them. Afterwards, hit whoever you want and knock them out asap. Of course, Toadstool should be the group medic and your other 2 should do as much damage as they can. After you've beat all 5 Axem Rangers, they will use their secret weapon. The secert weapon does 1 attack every 2 turns. Have Toadstool heal. Eventually you'll win and Blade will be destroyed. Nimbus Land You have 6 total stars but there's still 1 place you haven't been to. You now have to talk to the King of Nimbus Land for the last time. He'll grant you the right to take the cloud taxi to Bowser's Keep. You can do so whenever you're ready. ~~~~~~~~~~~~~~~~~~~~~~~~~~~~~~~~~~~~~~~~~~~~~~~~~~~~~~~~~~~~ At this stage of the game, you can go back through the levels and grab anything you missed. Booster's Tower now shows Booster and Valentina at the top of the tower. You should also stop in to play Knife Guy's game for a Bright Card. You can take this bright card to Bean Valley and to the pipe that had no treasures in it. Jump 3 times at the top left and a platform will appear. Jump on it and leave the room and you'll have access to Grate Guy's Legendary Casino. Booster's Pass has the 3 extra treasures sitting in the back of the room you didn't see when you went through the first time. Yoshi's Island's baby Yoshi has been growing for awhile. You can head back to fight Jynx and Culex in Monstro Town. You can also buy the game boy off of the kid in Mushroom Kingdom. There may still be missing hidden treasures I forgot about anywhere. You should also be able to purchase Toadstool's Iron Pan in Moleville from the Secret Item shop. I suggest you explore some and then head into the Keep ~~~~~~~~~~~~~~~~~~~~~~~~~~~~~~~~~~~~~~~~~~~~~~~~~~~~~~~~~~~~ Bowser's Keep With bowser at your side, small monsters are scared and run away. Move yourself through to the back of the Castle (beyond where you first encountered Bowser). You'll eventually come across a series of 6 Red Doors. These are sets of 3 rooms that run trials. You have to complete 4 trials and at the end, you earn yourself a reward. Bowser's Drill Claw, Geno's Star Gun, Mallow's Sonic Cymbals, Rock Candy and other stuff I can't remember lol. *I will share details on the puzzle specific rooms at a later time...* After you've completed 4 of the trials, you'll be taken to the next area. Outside the room is your next boss. Boss Fight: Magikoopa Really easy guy. Kill off the enemy he calls into battle (more than likely a weak and pathetic looking Bahamut) and then smash Magikoopa with constant attacks. He'll lose pretty fast. Back in the Castle, he'll summon up an infinite coin block. (Now if only he can summon some real cash right?). Anyway, you can move to the top right room and talk to Croco where you can buy the strongest purchasable armor in the game. After you leave Croco, you will then need to make your way through to the castle further and eventually onto the next boss. Boss Fight: Boomer Sticking to the same strategy as Toadstool as the constant healer, you should have little to no problem fighting Boomer. When Boomer is Blue, I believe his physical attack and defense is weaker but magic stronger. After the battle, you finally fight Exor. Boss Fight: Exor Like Boomer, stick to the same strategy. Use your better items as needed, but they aren't too necessary. Just be sure to make the mouth and eyes stop working temporarily, so that Exor itself becomes vulnerable. You may also use Geno Whirl and deal 9,999 damage which would instantly win the battle. If you want to play right, I suggest you play without it. Factory Welcome to the final stages of the game. Your objective here is to follow through to the next several bosses and meet up with Smithy. make sure you are stocked on Maple Syrups. Boss Fight: Countdown Fighting countdown is pretty easy. Use a bunch of multiple hit spells or rock candies and with using Toadstool as healer, this is a no issue battle. There is a hidden block in the save room after Countdown. I believe it to be a mushroom. After you've moved further, you notice there's a grey block with Grey Yardovichs that fall. Attack Yardiovich while he is on it. Boss Fight: Grey Yardovich Use same strategy as before and he'll die quick. After the fight, save and heal then jump down to your next boss. Boss Fight: Domino and Cloaker Using same strategy as all other bosses, pick 1 of the 2 targets to attack and defeat first. Afterwards, the other will retreat to the Earthlink located further back on this battle. When fighting the Earthlink, be sure to defeat the monster on top first. He will freeze when he has been defeated and will vanish when the Earthlink has been destroyed. Boss Fight: Clerk + Manager + Director This is 3 bosses spread out. They all fight pretty similarly. Using the same defined strategy previous bosses. I also recommend using multiple target attacks to clear out the pesky hammers. When you defeat the first boss, Toad will appear in the factory with reduced prices on items. Boss Fight: Factory Chief + Gunyolk The only enemy you should concern yourself with is the Factory Chief. Kill him first and take on Gunyolk last. The chief is easy to beat so you won't have to worry about him for too much. Using Toadstool as healer, take down your last boss before you reach the final boss. Save your game too. Final Boss: Smithy Your immediate concern should be to defeat Smelter asap. You do not want Smelter creating more monsters for you to face. Those monsters will use multiple target attacks sometimes that will make it difficult to catch up. Once Smelter has been finished, unleash havoc on Smithy. Smithy will eventually go into a rage and it will cause the floor to break apart. Smithy will then reveal his true form. Now, you have 1 pest you must take care of constantly. The bottom part of Smithy's body likes to come back to life and causes a great deal of damage. The Smithy head changes all the time. He has several forms.. Tank: Strong defense and attack. I assume it is weak to magic. Magician Head: Strong Magic defense and attack but weak to physical attacks Treasure Head: Balanced stats. It will cause different ailments to your group. Metal Head: Strong defense and Magic defense. It will remove any boosts used on your group (shredder). Plan your attacks accordingly, replenish magic and use Toadstool as your medic. If all goes well, you should win without too much trouble. A great end to a wonderful game! Enjoy the ending! ~~~~~~~~~~~~~~~~~~~~~~~~~~~~~~~~~~~~~~~~~~~~~~~~~~~~~~~~~~~~~~~~~~ The Adventure Begins You begin your game in Bowser's Keep. Move Mario through the Keep and dodge the Terrapin because they do absolutely nothing for you. You are required to fight 4 of them as they guard the big red door. Beating these guys are easy so don't break a sweat. After the battle you will cross the bridge to the next door. The bridge collapses so forget about turning back. Move through the doors and run to the other end of the room. Mario will stop half way and a scene takes place. Epic boss music starts up as the battle begins! Now you're facing Bowser and Princess Toadstool is tied up on a rope dangling above a bottomless abyss. That's both kinky and scary. There's only 1 thing you need to do... that's "Aim for the Chain" as Toadstool will constantly state if you were to ignore her. She seems to know how she wants to be saved so you better listen. After you defeat Kinklink, the chandelier will fall. A scene will take place with Bowser falling really slow and you somehow catch up with him when he breaks your Kinklink. Mario jumps on Bowser and basically fly hundreds of feet to reach Toadstool. Before Mario can have his way with her... I mean... "save her" an unexpected thing comes bursting into Bowser's Keep. Mario is thrown from Bowser's Keep to Mario's Pad. Mario confronts the little pest "Toad" (which is ironically the same name for almost every Toad in existence). Toad tells Mario to save Toadstool so Mario must go back to Bowser's Keep. While there, Mario has a fruitful discussion with the giant sword "Exor" which turns into collapsing the bridge. So Mario returns to his pad and tells his story to Pest (that will be Toad's name for now). Pest wants to go to Mushroom Kingdom to inform the Chancellor that Bowser's Keep is under new management and the Princess is still missing.. so he leaves. Mario follows and Pest tries to engage Mario in a tutorial. Just skip it. Mushroom Way Now you can really start playing! So the first thing you want to do is put a little hurt on some Goomba and some Parakoopa. The idea is to get to level 3 before you face the Hammer Bros which is the first boss you encounter. I suggest you get the treasures and save Pest as often as possible because you get some cool items. If you move into the last room at Mushroom Way, you'll encounter the Spiny that Lakitu will toss out of his cloud spaceship. When you engage in fierce battle with the Spiny, do not use jump on them. It will do no harm to them. So assuming you're level 3 (which you probably aren't) you move to the Hammer Bros. Unfortunately for Hammer Bro he caught Pest and unfortunately for you, you have to save him. Boss Fight: Hammer Bros Cue the epic boss music! So now you're facing 2 Hammer Bro. What you want to do is use Fire Orb on 1 hammer bro and use the other Fire Orb on the other. Dodge the physical attacks and give em a few punches each and battle won. Pretty easy. Now Pest is saved and you find out you have a Hammer you can use. Take this time now to equip that Hammer otherwise Pest will try to give you a tutorial later... ***You can choose to leave Pest to the monsters but you won't get the items*** Mushroom Kingdom So you made your way to Mushroom Kingdom.. great. Now move into the Castle. When you arrive.. you see another Toad. Take this time now to jump on his head before he reaches the door at the end. Jump from his head to above that door and get the hidden treasure chest up there. This is the only time in the game to get it! So now Mario engages in a long discuss with transformations and jumping and etc. When Mario can finally leave, make sure you check out the vault room where you can get some free treasure. Now take a trip to Toadstool's chambers. Go to the right of the fireplace in that corner and press "A". I believe you find "Toadstool's ???" which means that Toadstool doesn't always need Mario to save her in her time of need... hint hint... You actually get a flower tab I think because the Elder Toad person sitting in there won't let you walk away with that.. So now you left the Castle and it is raining thanks to the Pillsbury Dough boy. You go to see why the kid is crying and find out that his frog coin was stolen from the dinosaur that ran by earlier. Since you're Mario, you decide to help him. Go to the shop, get your armor and items you want. Recommend you purchase: Pants, Shirt, Jump Shoes, Antidote Pin and Pick Me Ups After you stop buying stuff, the shop owner gives you a free Pick Me Up. In retaliation, jump onto his cabinets behind the counter and be rebellious! Also, run down the stairs and jump above the elder toad to get a free flower from a hidden treasure. There's 1 more hidden treasure at the bottom right space of that same room. (Using your fast forward on Vizzed) Wait until the elder toad moves into the bottom right corner and grab that chest. Once you got it, leave. Head over to the jumping toad. The dinosaur runs past you so you chase after him. Bandit's Way So now you made it to Bandit Way. The best thing to do is train Mario and Mallow another level or 2 on the easy enemies, You just basically fight off enemies and make your way to the end. In the room with the yellow floating panels you want to search for a hidden treasure that is above the pink spinning flower and jump from it to the purple, not moving, flower. In this chest is a KeroKeroCola (very valuable). Make your way to the second room with the floating yellow panels. In the chest that the dinosaur was trying to reach is the "Star". It's Amazing but you want to wait until all 4 of the K-9 are under you when you fall. This helps get more free experience. In the last room, there's a ton of monsters and of course, the dinosaur. He wants to play hide and seek. Your job is to sneak up behind him and spook him 3 times. On the 3rd time, you engage in battle. I normally have Mario level 5 and Mallow level 4 at this stage. Boss Fight: Croco So the best course of action is to utilize Fire Orb. Croco is weak versus fire so you will force him to lose a turn. Doing constant fire orb will quickly reduce his health. Mallow can just punch... After a couple fire orb, Croco should use his Wild Shroom which will recover some health. He'll miss a turn when he does this. Once your flowers are all used up, just hammer Croco until he returns the frog coin which violently smacks Mallow's head. Croco retreats. You earn yourself a Wallet, the frog coin and a trampoline. Take the trampoline to leave and return to Mushroom Kingdom. Dark Mushroom Kingdom So while Mario was away, Mushroom Kingdom fell victim to shy guys on pogo sticks (more or less). I'd recommend you purchase any items you think will help you in the next boss battle. I'd go around and kill off the Shyster chasing after the Blue Toad, he'll give you a coin I think and then you can give him the wallet. I'd also recommend you go into the back house (behind where the line of Shyster are bouncing out of the castle). Go into that house and engage the shyster on the 1st floor first. I'd recommend using Mallow's Thunderbolt and press Y right at the end to do enough damage to kill all shyster in 1 attack. Anyway... After killing the Shyster on the 1st floor, chase after the blue Toad as he runs upstairs. There's another Shyster harmlessly bouncing with that dude's son. That's sick... Kill it. Now you've earned yourself a Flower Tab. Move yourself to the castle. There's a toad in the first room being chased. Kill the Shyster chasing him. He moves into the room on the left. Kill the Shyster in that room too. He runs up stairs and there's 2 guarding the door to Toadstool's chambers. Kill them too. When you arrive into the room, be sure to say "You Betcha" so that you are given a Flower Tab. The Elder Toad will heal you free of charge. Moving on.. Return to the first room and make your way to the vault which you went in earlier. There's a fresh supply of treasure. If you move into that back room (The Guest Room) there's a Toad in the corner. Talk with him and he gives you a Wake Up Pin. Equip that to Mallow. Now make your way to the Throne Room where you'll engage in the next boss battle. Boss Fight: Mack It's you and Mallow vs Mack and 4 Shysters. Have Mario use Fire Orb on Mack and Mallow use Thunderbolt on all of them (be sure to press Y for extra power). If you play it like this and use Honey Syrup, you won't even need a Pick Me Up. Battle will be over before you know it. After the battle you get your first star. You end up talking to the Chancellor and introduce Mallow. Mallow suggests you visit his grandpa. KeroKero Sewers Before you leave for the sewers, stop in at the shop and pick up the Cricket Pie from the shop keeper. Once you get into the Sewers. you'll have to take pipes to get deeper into the sewers. I won't go into details on this section... just make your way through the pipes to the end. There is a treasure chest that when you hit it, you fight a monster. He's pretty easy to beat especially with using jump. After you beat him, he gives you a Trueform Pin which I would equip to Mario. If you leave that room and go back in, that treasure will have coins in the box. There's also a star in the sewers somewhere, which doesn't last very long but it gives free experience. Anyway, make it to the save point and attack the boss. ***I believe there to be a hidden treasure here, just can't remember where*** Boss Fight: Belome I usually have Mario at level 6 at this point in the game which gives me Super Jump. Use your strongest magic on Belome and just have Mallow attack. Mallow will be eaten most of the time anyway. At some point Belome will try to turn you into a scarecrow but with the Trueform Pin, that won't do any good. Eventually, he dies of starvation. When he vanishes, you are taken into Midas River where you undergo extensive swimming lessons and barrel hopping. At the end, you are given a NokNok Shell which you should equip to Mario. Tadpole Pond and Rose Way Now you should be up to Tadpole Pond. Move to the grey rock and follow the path and chat with the Frog. At the end of everything, make sure to speak to him 1 more time to get the Froggie Stick. Equip this to Mallow. If you want to go to the other room in Tadpole Pond where you jump on the tadpoles for specific notes for the Composition, have fun with that. Once you leave Tadpole Pond, you arrive at Rose Way. It's here where I just run through it. I grab all the treasure, the flowers, coins and mushrooms. At the end of the path, you see Bowser for the first time after the loss of the Keep. Now you make your way to Dark Rose Town. Dark Rose Town As soon as you enter, go to the house on the left (just to get this out of the way). After all is said and done in there, go to the house in the back left. Climb on the Toad's head and collect the treasure in there, then go upstairs, hit the switch and jump on the bed. You'll get a hidden treasure. Talk to the toad and admit that you were greedy and took his treasures and he'll tell you that there's a path in the woods that leads to even more treasure. Now take yourself to the shop but instead of going in through the front door, climb the boxes to the right. There is a pipe you can go down and get treasure. There is another treasure at the top of the building. After buying your items and armor, go to the Forest Maze. Recommend you purchase: Thick Shirt, Thick Pants, Pick Me Up, Honey Syrup Forest Maze As soon as you enter the first area, there is a hidden treasure to the left. I think there is Red Essence in there. In the area before the several tree stumps there should be a hidden block above the stump. In the room with all the stumps there is a chance that there is hidden blocks in one of the stumps (Second row left one?). In the room with the save block there is a hidden treasure at the end of the path on the right. When you go into the maze, you want to follow the mysterious blue puppet "Geno" until you reach the boss. You may also take this time to follow the path given to you by the Toad in Rose Town. Enter into the last room of the maze and engage the boss. Boss Fight: Bowyer This boss fight is a little different than the others. Bowyer will disable different buttons as you fight which depends entirely on what you do. If you do constant attacks then Bowyer will disable attacks. If you use constant special, Bowyer will disable that. What you want to do is use Mallow as healer, Mario run super jumps and Geno only attack. Of course you switch it up as needed. Geno's magic defense is weak at this stage of the game so any of Bowyer's magic attacks will put Geno near death. After the battle, you earn a star and must return to Rose town. At Rose town, you talk to Gaz in the house on the left and I think he gives you Geno's first weapon "Finger Shot". Equip to Geno. ***Now that you've defeated Bowyer, link is asleep at the Inn in Rose Town*** Yoshi's Island To get to Yoshi's Island, you must travel through the Pipe Vault. It's pretty straight forward. You can play the Moleville mines game which gives some great flower prizes if you win. There's some hidden treasures above the area where Mario must duck to get the frog coin. When you reach Yoshi's Island, there's a hidden block just above the pipe. In Yoshi's island you can race Yoshi against the other Yoshi and win Yoshi cookies which can then be used later to feed baby Yoshi. Baby Yoshi will provide cool prizes for feeding him. Moleville First thing you want to do is search for Bowser located on the right side of Moleville. Once that's out of the way... head on over to the shop to stock up on some fresh armor, items and weapons. After purchasing your items, you will want to head into the mine. Recommend you purchase: Work Pants, Punch Glove, Cymbals, Pick Me Up Moleville Mine So now you're in the mine.. You want to talk to the miners so that you can jump on their heads and climb to the room above. You'll come across a room with a random trampoline in the middle, once you jump on that you'll get knocked out. Croco and his Bandit buddies will appear and they'll steal your coins, so you need to chase him down. You can encounter 3 of the Bandit monsters and each will give you a flower tab upon beating them. Once you catch up with Croco, you'll engage in a boss fight. Boss Fight: Croco 2 The best thing to do in this situation is to hit Croco with mostly your physical attacks to conserve on your magic. Half way through the battle he'll take your items away from you so you want to heal up as often as possible. Once your items have been taken from you, you should begin using your specials or your strongest attacks. Have Mallow heal, Mario use Super Jump and Geno can attack or use Geno Beam. Moleville Mine Cont'd After the fight with Croco, you will have won a Bambino Bomb. This is necessary for destroying a wall in a few rooms further into the cave. Speak to the single miner and he'll place it for you. When you get to the room where you can jump on some boxes and take the top or bottom path, choose the bottom path and follow the tracks. Mario will start rolling uncontrollably and a Frog Coin will appear. Progress further in and you will encounter your next boss. Boss Fight: Punchinello This guy really isn't anything more than a regular monster with extra health. I'd suggest you use some of your more powerful stuff later into the battle and use Mallow to heal whenever. I'd recommend you focus your attacks specifically to Punchinello and NOT the bomb-ombs that he brings in. In the end, you'll earn your 3rd Star. Moleville Cont'd After you get the star, you'll notice a hole in the wall that wasn't there previous to the fight. Go to the next room and you'll find the missing girl. Take her on to the mine cart and ride into the mine. I suggest you take your time with it (I just fast forward without doing anything) because this will count towards a "record" and you can come back and beat your record. I believe you earn yourself rewards too but I never bothered. Once you land in the house, you can then move on to the next area. ***I would hold off on buying fireworks until later*** ***You may now return to Tadpole pond to complete part 2 of the music composition*** Booster's Pass Immediately to the right of the entrance is a green plant like thing that you should walk to and press "A" on. There's a Frog Coin inside. I'd suggest you go into the next room but not by climbing the rocks. There's a green ! switch that you should press to defeat the Green Spikey. There's also a flower sitting out that you should get. Climb the rocks in the first room and exit in the back. ***There may be a hidden block here, sorry I forget lol*** Booster's Tower Here's where things get interesting. First off, you finally encounter Bowser face to face and second, Princess Toadstool is being held captive way up top the tower and third, you join forces with Bowser. You are required to press "A" on the door to notice that it's locked. When you walk away from the door, Bowser returns and he breaks it down. At this point, I recommend you put Bowser in your party and take Mallow out. Be sure to equip Bowser with anything you can. You can fight any monsters you wish but in the second room.. they will endlessly spawn. There is a hidden treasure at the top of that second room over a blue square. In the following room, (where Booster rides his train) there is a Snifit 2 hiding at 1 end of underneath the track and at the other end, there is an item (I'd like to say flower). A couple rooms later, there's a treasure chest floating over the ledge. You should jump off the ledge (think approximately 2 squares out) and land on the thing below where it shoots you into the chest to get the Masher. ***The Masher has a high attack range, this means that the Masher can do a lot or very little damage during an attack*** You will have to work your way back up. In the next room there is a switch that you should press. Once you jump on this, it opens up a new area in Booster's Pass. This new area has a few cool items on it. Moving on... There's some curtains in the following room. If you go behind them, you will temporarily become 8-bit Mario. How cool is that? Anyway, the next room of importance has a series of pictures. The code for the pictures is as follows (Assume that the pictures are in ascending order of 1, 2, 3, 4, 5, 6 from left to right. The following numbers are the order in which you should view the pictures); Pictures: 6, 5, 3, 1, 2, 4 You are given a key to the room right next to the pictures. In this room you'll get "Chomp" which is Bowser's ally. Equip that. The next room of importance is the room after the Thwomp sends you up and you're on the next floor. In this room (room with the Snifits with parachutes), there is a hidden treasure to the left. There's also a Frog Coin hidden back on a thin path under the next room. The last room of importance has the save block and a few treasures in it. There's 1 hidden treasure above the treasure chest on the raised platform. Move onto the next room. ***This hidden treasure gives you a 1 time gift of "Goodie Bag". This item provides an infinite number of coins (as you use it in battle). It is worthless except for the selling price of 555 coins*** Boss Fight: Booster Before fighting Booster, you will engage in a little mini-game. The snifits are opening the curtains to find you so you have the option of hiding or be seen and engage in a fight with Booster. -If you hide until the end, you will be able to get the Mario doll from on top of the curtains. This will give you the Amulet ***Amulet only appears once in the entire game I think*** -If you engage in battle with Booster,I believe you will get a Flower Jar. To defeat Booster, you should hit him with everything you have, but recover your magic power as you lose it. (I personally, have never fought Booster more than once). Boss Fight: Knife Guy + Grate Guy This boss fight is unavoidable. I suggest you unleash your strongest attacks on these 2. Use Mario's Super Jump, Geno's attack and Bowser's attack. What I like to do is weaken both of them before they move on top of each other. Once they are on top of each other, I can easily and quickly kill them both. Booster Hill Immediately after the battle, the gang jumps from the balcony and runs to Toadstool's rescue. You find yourself chasing Booster while being chased by the Snifits and jumping on rolling barrels. The best course of action is to time every jump (by listening to the sounds the barrels make) and use the barrels and Snifits to get to Toadstool. Each time you do, you are rewarded with a Flower. (I've earned as many as 15). Marrymore What's cool about Marrymore is that if you have a stock of coins, you can go to the inn and get into the Suite. Mario can go into the shower and he will whistle. There's a little gray press bell you can press and the little pink toad will run to your every ring. I believe you can purchase KerokeroCola for a cheaper price as well. You should tip the little pink toad if you want a Flower Tab. Leave the room and head downstairs to the other room. There is a hidden block to the left. Head downstairs and make your purchases. Recommend you purchase: Hand Gun, Whomp Glove, Maple Syrup, Mid Mushroom, Pick Me Up After you've left the inn, head to the front doors of the Chapel. Talk with anyone to trigger the couple that is trying to get married. Afterwards, run around the right side of the building. There is a backdoor that you can get in through. Go into the chapel and you'll have to break the door down with the Snifit. In the second room, you'll have to break the door down with Bowser. Once in the chapel, you'll be tasked with taking back all of Toadstool's jewels. The faster you can grab all 4, the better of a reward Mario will get later. If you grab all four really fast, Toadstool will give Mario a kiss and Booster and Bowser will accidentally kiss each other thinking that it's Toadstool. If you're slow, Booster and/or Bowser may end up kissing Mario. Afterwards, zee cake arrives YOU FOOLS!! Boss Fight: Bundt There are 3 options in this battle but it is not necessary to defeat Chef Torte or the Apprentice. Target the cake. Once the cake takes enough damage, it will chase away the 2 chefs. Your objective is to blow out the candles. This can be done with normal attacks. Each turn, a candle will relight but you can do 3 attacks a turn. This should be quick unless you are attacked with a move that inflicts you with "Fear". Take down the base of the cake with everything you have and Booster will eat the cake in 1 bite. Marrymore Cont'd After you've left the chapel you can head immediately to the left where there is a green exit. If you move there, Toadstool will come out and talk. Afterwards, you can leave Marrymore through the entrance. This will automatically take you back to Mushroom Kingdom. Mushroom Kingdom Now you must take Toadstool back to the Chancellor, where the gang will come out of the party (including Bowser's ugly mug). Go through the whole conversation and you can eventually leave. If you head outside, you notice Toadstool floating down with an umbrella. Speak to her and she joins you. If you talk to the blue Toad guy that you gave the wallet to, he should give you a frog coin as "Thanks again". Now you must leave for tadpole pond. Tadpole Pond Speak to Frogfucious and he tells you to visit Star Hill. Leave Star Hill Pretty straight forward. Just find the star flowers. In the 3rd or 4th room, the Star is sitting at the top. There are some stars that you can visit and one includes a message about Luigi and 1 from Mallow and a couple other characters from the game. Afterwards you can advance to Seaside Town. Seaside Town Welcome to weird-toad-ville. The only things you need to do here, at this point, is to visit the leader in the back house. If you go up stairs and speak to the Frog Disciple, he can sell you some cool things. It's up to you what you want because See Ya? and Earliertimes? can both do a lot of good at this stage of the game. There is a shop here that sells bombs and could be useful later in a boss fight if you want to spend the extra coins. I don't. Afterwards, leave and head for the next area. Seaside When you come here, you can purchase new gear for your trip to the Sea floor. Make your way to the end and onto the sunken ship. Recommend you Purchase: Sailor Armor, Hurly Gloves, Pick Me Up, Maple Syrup Sunken Ship For the most part, it's pretty straight forward, however, there are some puzzles to solve. In one of the rooms, there is a hidden flower sitting back behind the blocks. You can sneak past the ghosts if you stay to the right of them. If you do encounter any ghosts, you can always give them some pure water and they will die instantly. Room 1: Parakoopa to the cannonball and land on the switch You just need to get the koopa behind the ball and you move under the switch.. easy Room 2: Bounce Cannonball on trampolines to the switch The trampolines should be positioned at about the same area where you hit the block. The middle trampoline would be better a little tiny bit further to the right and the last trampoline would be better positioned a little tiny bit to the left. The cannonball won't bounce as high by that point. Room 3: 3-D Maze Absolutely the most frustrating part of my childhood experience began with this maze. On the part that you can no longer progress into the maze, you must hold "Y" and jump to the left. This takes you up to the second part. Don't fall off and you'll get to the switch. ***You can purchase items from the shaman in the event that you never had enough coins from your previous visit in the Seaside area*** Room 4: Follow the Coin DO NOT GRAB THE COIN IN FRONT. It won't produce anymore coins for you to follow and you won't get the prize. You will have to leave and come back in. Room 5: Cannonball Run Hit the blocks with the shooting cannonballs. Easy Room 6: Double Switch There is a loose barrel on the right stack. Knock it down with a jump and jump on it to roll it over to the switch. Jump on the other switch and you earn your last reward. The Password is Pearls. Start with Key Letter1 and work your way around. It starts from the left and works down and to the right, then up to the second row and to the left. After you've entered the password, you will face your next opponent. Boss Fight: King Calimari If you have Toadstool in your party, her Group Hug magic will cure any inflicted fear caused by the Tentacles. If you have Fearless Pins, you may want to equip those if you don't use Toadstool. Anyway, the tentacles are pretty easy, just attack them one at a time and heal the party before you kill the last one. Defeat 2 sets of these and you will face King Calimari himself. He's weak to Fire and can be defeated quickly with 2 Fire bombs and another few attacks. Sunken Ship Cont'd Continue through the ship to the point where you see a second Mario copying your every move. There is a hidden treasure in this room around the area where you meet the other Mario face to face. You should hit a hidden block then try to jump on the other Mario's head to get to the other chest. In the following room, there is a dry bones that moves behind the blocks, there is a door back there where you can get another item. As you progress further into the ship, you'll actually go under water for a while. When you make it to where there are a string of blooper bouncing around, you would want to head to the top (while submerged). There are a bunch of barrels blocking a door and you should get the item in the chest. Afterwards, jump to the top of the water and head to the left, there's a frog coin here. Now you can engage in a few fights that leads to your next boss battle. Boss Fight: Johnny Johnny has 2 parts. He has his normal form and a powered up form. If you only defeat 2 of the minions when he goes to his second form, then you won't have to face him 1 on 1 with only Mario. If you want the extra challenge, like I do, go for the duel. Jump attacks don't work on Johnny and if you have Toadstool in your party, she can heal your gang easy and cheaply. After the battle, you should head back to Seaside Town. ***Samus should appear in Mushroom Kingdom's Guest Room in the Castle*** Seaside Town When you arrive, hand the star over to the gang (you can say no but you just waste time). Follow the toads to the back left area, where there was nothing in there before. The toads are then cornered by you and Johnny and merge into Yardovich. Boss Fight: Yardovich This will be your longest boss fight yet. This guy likes to use water blast which eats an unhealthy amount of health away from your gang. You have no choice but to have Toadstool in for this one. Every turn, you will want Toadstool to heal your party. When Yardovich creates a mirage, there will be 2 of him attacking each turn. The mirage is weak and takes more damage than the normal Yardovich. I recommend you keep attacking the main one with Mario and your 2nd partner. It won't be too long before you defeat this guy. After this battle, you'll be given the key to the storage room. Once you rescue the gang in there, you should be spoken to by everyone. Say the right thing to the elder and you'll get a Flower Box. It is required to speak to the elder before you can advance to the next area. Shopping in Seaside Town 1. You can buy yourself a beetle box by talking to the Snifit that works there. Purchasing a beetle box allows you to run the Booster Hill again to catch beetles. This will help you earn Frog Coins and other coins pretty easily if you're good at catching them. 2. You can now buy the weapons and armors from every shop you've encountered so far. The Troopa Shell and Parasol are the 2 main weapons you will need. The armors are just all the old armors. 3. Accessory Shop is also full of all the accessories you could buy in all the old shops you visited already. There's nothing exciting here, but I do think that the Zoom Shoes can be bought here. 4. Item Shop is also full of all items you could buy as well. 5. Mushroom boy. This guy is interesting because you can feed him an endless number of mushrooms. What's cool is that some of the mushrooms will earn you different rewards. I usually earn Rock Candy from every 8-15 mushrooms. I also see a lot of Maple Syrup and I believe I've earned a Flower Tab or 2 every now and then. Pretty easy to earn coins from selling merchandise from giving this guy mushrooms. Land's End Pretty Straight forward. In the first set of rooms, there are hidden platforms you must jump to make appear. There is also one hidden treasure at the very top near the highest platform. I'd recommend you jump onto the stone and hit the block on the left. ***I believe there is a second hidden block somewhere at the beginning of this room but I do not remember the exact location at this time*** Ok now moving onto the more colorful section. The 1 thing I will mention is the big mountain that you jump from block to block to cross. At the bottom of that left mountain, you should jump into that hole when a little blue cloud pops up. Travel through to the end and it'll take you into a pipe that leads to Kerokero Sewers. There's a treasure there that you want to get, it has Cricket Jam. You want to give this to Frogfucious whenever and he'll give you a bunch of frog coins. So.. go back where you came and get out of there. Make your way back to the top of the huge mountain. You can play different mini games to earn different rewards but I'll let you do that one. Cross the bridge and advance into the desert. Your objective here is to attack the Ant in the quicksand. Whenever he appears you want to walk into him and engage in battle. After you win, you want to go into that specific quicksand so that it will take you to the next set of rooms. Follow these all the way to the Cliffside. You'll notice you can't go up the cliff so head back into the last right and move through the quicksand that the last Ant is in. This will take you underground. Underground Grab your star touch as many monsters as you can! Then make your way to the temple. In the temple there are hidden treasure chests in one of the rooms. I think these blocks are in the lone chest room. Jump to the corner of the room by the gold wall and there's 1 there. There's also one other hidden block located on the lone chest. Jump on top and claim your prize. In the following room should be a series of heads on the wall. I believe you must pay to use them, so be careful of the order which you hit them because this changes the outcome of the reward you earn. There are 6 combinations in total. The only rewards I am aware of right now (and based on memory) are the Yoshi Cookies, the Mushroom and the monsters. I am not aware of the other 3 combinations at this time and I am not aware of whether they provide the same results as other combinations. Continuing deeper into the temple takes you to a head on the wall and a platform that goes further down. If the message reads, "Sorry no visitors" just leave and come back in. That message would take you to a room that you can't get in at this time. If the message reads "I'm very hungry etc." then you should move on down and fight your next boss. Boss Fight: Belome 2 What's cool about this boss battle is the fact that Belome will eat everyone, but what's weird is that Belome will rarely eat Mallow (at least while I've played it over a billion times). In this battle, you will want to have sleep prevention accessories because Belome is big on this. You will want to take care of the clones asap because if left unchecked and your party is asleep, 2 Geno Clones could seriously damage 1 or 2 of your party with Flame Stone. If attacked by magic, you won't wake up. If you heal with Group Hug, everyone wakes up. Monstro Town After the battle with Belome, you can move onto Monstro Town. Travelling from left to right, in order of doors, you can visit the elder in the first room. She will ask the Paratroopa patrol to aid you in climbing the Cliff to the Valley. If you speak to the treasure chest guy, upstairs, he'll inform you of how many hidden treasures you have left to find. In the next room over, there's 2 monsters. The Chow gives you an exact number on how many times in a row you've jumped using the Ultra and Super Jumps. Both are possible to get 100 jumps out of. There's a special and powerful reward for earning 30 jumps. This gives you the Attack Scarf which gives you 30 to all stats. If you work for all 100 jumps (which seems like it gets easier after 30 straight jumps), you'll earn the Super Suit, which gives you 50 to all stats. If you speak to the Thwomp, he will angrily work to knocking the key down (located outside). Once the key is dropped, you can take it to the temple and when it says "Sorry no visitors" you ride the platform down and talk to the Golden Belome and feed it the key. There's cool prizes in there. The next room over is locked. If you obtained the fireworks from Moleville and traded that for a pretty stone, you can use the pretty stone on the door here in Monstro Town. This will take you into a cross Dimension between the RPG World of Mario and the RPG World of Final Fantasy. You can then fight Culex. ***Without the Attack Scarf, Super Suit and Jynx Belt, you won't stand even close to a chance to defeating Culex at this point.*** If you do engage Culex, the Final Fantasy battle theme will begin. I recommend you have your absolute best armors, red essence, kerokerocolas, the best Elixir available (found from Tadpole Pond) and Rock Candy found from feeding the mushroom guy in Seaside town. Rock Candy will do 200 damage to each Crystal and Culex. This is your best bet at having a chance to defeat Culex at this level. If you skip Culex and move to the next room, you'll find the shop. Here, you want to buy Bowser some better gear. Skip the little Goombettes because they sell a mushroom that turns you into a mushroom. In the last room on ground floor is an empty bedroom. If you turn the lights out and sleep, there will be 3 ghosts that appear. They hide 3 flags and they want you to find them. The first flag is hidden under your bed in Mario's Pad. The second flag is hidden on the wooden Flower in front of the Rose Town entrance. The 3rd flag is hidden between the O and A on Yoshi's Island. Bring these back to the bedroom and sleep and the ghosts will reward you with the Ghost Medal. The Ghost Medal will increase your magic defense and defense while in battle. There's a room above the ghost's room where the Sensei Jynx can be fought. Unless you are packed with Rock Candy, you will most likely not be able to defeat Jynx without using all your best stuff. Having Super Suit and Attack Scarf helps. I will skip this as well, because this is not apart of the main game. If you leave through the last door on the right, there is a hidden block in the entrance to Monstro Town by the bush. At this point, make your way back into Land's end where the cliff is. Land's End Once you arrive at the cliff, you are tasked with scaling the cliff in record timing. If you jump fast enough, you can earn yourself a Troopa Pin. This grants you with boosted Attack and Magic Attack. Once up top, you will then reach Bean Valley. Bean Valley You will need to venture through pipes to reach a set of 5 pipes. In these pipes are rewards. A few of the pipes have treasure boxes with a mushroom, flower and star on them. You want to get 3 of the same picture so that you don't face an enemy. In one of the pipes there is a hidden treasure chest, but I don't know which one and I don't remember where. It may not be possible at this point to unlock the secret entrance so take note of the pipe with no treasures in it, you'll need that for later. If you continue onto the next room, you can engage your next boss. Boss Fight: Smilax An accessory that prevents you from turning into a mushroom will help you here (Trueform pin etc.). Use your strongest magic and kill off Smilax when you've killed off the other piranhas. Heal using Toadstool etc. Rock Candy helps too. After the battle, you should read the note. This will give you the "Seed" which you will want to keep. Afterwards, you can hit the block and climb into the skies. I'll let you figure this part out. Nimbus Land First thing's first... New shop = New Weapons. In the weapon shop there is a hidden block above the cloud counter. Climb the boxes to get to it. You may notice you can't get into the Palace, so you will need to talk to the gold statue maker. He will turn you into a statue. Once inside the Palace, you are placed in the statue room. Now, you have a decision to make. Do you want to fight Dodo the big Black Bird? Or earn the Feather? If you want the Feather, you will need to dodge his "polishing" of the statues. Feather will give you +20 speed. I will skip the fight with Dodo, it's an easy monster fight anyway. There are a few hidden blocks spread throughout the Palace. The first one is located in the doors to the left of the Heavy Troopa guarding the middle door. Move through to where Jawful is sitting, there's a hidden passage that you can take to reach a hidden chest. In the next room, you'll see some of the locals in a room. Talk to some of them, you can get yourself a Flower Jar and a Castle Key. Take that key to the middle door and travel on through to your next Boss. ***I know I am forgetting a treasure chest somewhere*** Boss Fight: Birdo Pretty straight forward. Based on memory, I believe Birdo to only attack 1 ally at a time, so Toadstool is not necessary for this battle. Hit Birdo with everything you have and you'll finish it in no time. Continue on through to Valentina after stopping at the door that is currently locked. You will have to chase her through the back which will eventually bring you back around to the front. You can evade the fight with Dodo if you have the star on you still. Eventually, you'll engage your next opponent. Boss Fight: Valentina and Dodo The first part of this fight takes your middle character out of the equation. Most of the time I put Bowser in the middle because it's a 1 on 1 duel with Dodo and Bowser is pretty good on defense and attack which means he should win sooner. All you can really do is attack Dodo, it's all you need to do. The battle with Valentina helps having anti-sleep accessories equipped. Just do some damage to her and Bowser and Dodo will return to the battle. Put everything into taking these 2 down and they'll fly off. I usually use any magic that hits multiple targets and once Dodo freezes, it'll be too easy from that point forward. Nimbus Land After the battle with Valentina, you can then go rescue the King and Queen. Mallow departs while Mario sits waiting. Then you talk with the King and Queen. I recommend you go back to the room they were in, I believe you are given another Flower Jar in that room. You should make your way to the Volcano now by visiting the hot springs and jumping off the ledge. You can then leave and go back to Nimbus land to get the Fertilizer, which is found by going along the right wall and talking to the Shy Away. You can also find Croco trying to steal stuff in the house on the right as well. You'll be given a Signal Ring (used to locate treasure). ~~Lazy Shell~~ Now you have the fertilizer (found after the battle with Valentina along the right wall outside of the palace) and the seed (found after battle with Smilax. If you take these 2 items to Rose Town, you'll notice a new area you can now go to. Go to the house in the new area and give the guy the Seed and Fertilizer. A bean stalk will grow and you can climb. Up top the clouds is the Lazy Shell Armor and weapon. The Lazy Shell is Mario's most powerful weapon in the game. The Lazy Shell Armor, reduces the damage you take, tremendously but also destroys your attack and magic attack. It also keeps you safe from a variety of ailments and safe from magic that deal mortal blows. You should now be able to handle Jynx easily and take on Culex or head to Barrel Volcano. Barrel Volcano Ok so this area is pretty straight forward. There's 1 hidden treasure I know of in here, but I just usually jump around until I find it. I think it's in a room where there is lava but I am not sure. I usually just run my way through here until the end. Eventually you'll meet up with Hinopio who runs an INN, Item Shop and Armor shop. I recommend you buy the new armor and stock up on items for the next battle. After you leave, cross the lava and begin your next fight. Boss Fight: Czar Dragon Like all other bosses, you will want to attack with everything you have. Having Toadstool in your party helps keep you alive so I suggest you use her to heal and Mario and your 3rd partner to use their attacks to beat the Czar Dragon. Toadstool should have Come Back at this point which is useful in keeping your party in the battle. After you defeat the Czar Dragon, he turns to Zombone. I think I was told that if you use Pure Water, you can defeat him instantly, otherwise, attack him like you would Czar. Soon enough, he'll be defeated too. After the battle, you must then chase the Axem Rangers through the end of the Volcano, which takes you back to the top where you engage the Axem Rangers in battle. Boss fight: Axem Rangers My recommendation is to take out the Pink and Black Axem rangers first. Pink is really easy to take down with a few attacks. I say take Black down because he attacks twice and some of his moves might kill off your allies if you can't dodge them. Afterwards, hit whoever you want and knock them out asap. Of course, Toadstool should be the group medic and your other 2 should do as much damage as they can. After you've beat all 5 Axem Rangers, they will use their secret weapon. The secert weapon does 1 attack every 2 turns. Have Toadstool heal. Eventually you'll win and Blade will be destroyed. Nimbus Land You have 6 total stars but there's still 1 place you haven't been to. You now have to talk to the King of Nimbus Land for the last time. He'll grant you the right to take the cloud taxi to Bowser's Keep. You can do so whenever you're ready. ~~~~~~~~~~~~~~~~~~~~~~~~~~~~~~~~~~~~~~~~~~~~~~~~~~~~~~~~~~~~ At this stage of the game, you can go back through the levels and grab anything you missed. Booster's Tower now shows Booster and Valentina at the top of the tower. You should also stop in to play Knife Guy's game for a Bright Card. You can take this bright card to Bean Valley and to the pipe that had no treasures in it. Jump 3 times at the top left and a platform will appear. Jump on it and leave the room and you'll have access to Grate Guy's Legendary Casino. Booster's Pass has the 3 extra treasures sitting in the back of the room you didn't see when you went through the first time. Yoshi's Island's baby Yoshi has been growing for awhile. You can head back to fight Jynx and Culex in Monstro Town. You can also buy the game boy off of the kid in Mushroom Kingdom. There may still be missing hidden treasures I forgot about anywhere. You should also be able to purchase Toadstool's Iron Pan in Moleville from the Secret Item shop. I suggest you explore some and then head into the Keep ~~~~~~~~~~~~~~~~~~~~~~~~~~~~~~~~~~~~~~~~~~~~~~~~~~~~~~~~~~~~ Bowser's Keep With bowser at your side, small monsters are scared and run away. Move yourself through to the back of the Castle (beyond where you first encountered Bowser). You'll eventually come across a series of 6 Red Doors. These are sets of 3 rooms that run trials. You have to complete 4 trials and at the end, you earn yourself a reward. Bowser's Drill Claw, Geno's Star Gun, Mallow's Sonic Cymbals, Rock Candy and other stuff I can't remember lol. *I will share details on the puzzle specific rooms at a later time...* After you've completed 4 of the trials, you'll be taken to the next area. Outside the room is your next boss. Boss Fight: Magikoopa Really easy guy. Kill off the enemy he calls into battle (more than likely a weak and pathetic looking Bahamut) and then smash Magikoopa with constant attacks. He'll lose pretty fast. Back in the Castle, he'll summon up an infinite coin block. (Now if only he can summon some real cash right?). Anyway, you can move to the top right room and talk to Croco where you can buy the strongest purchasable armor in the game. After you leave Croco, you will then need to make your way through to the castle further and eventually onto the next boss. Boss Fight: Boomer Sticking to the same strategy as Toadstool as the constant healer, you should have little to no problem fighting Boomer. When Boomer is Blue, I believe his physical attack and defense is weaker but magic stronger. After the battle, you finally fight Exor. Boss Fight: Exor Like Boomer, stick to the same strategy. Use your better items as needed, but they aren't too necessary. Just be sure to make the mouth and eyes stop working temporarily, so that Exor itself becomes vulnerable. You may also use Geno Whirl and deal 9,999 damage which would instantly win the battle. If you want to play right, I suggest you play without it. Factory Welcome to the final stages of the game. Your objective here is to follow through to the next several bosses and meet up with Smithy. make sure you are stocked on Maple Syrups. Boss Fight: Countdown Fighting countdown is pretty easy. Use a bunch of multiple hit spells or rock candies and with using Toadstool as healer, this is a no issue battle. There is a hidden block in the save room after Countdown. I believe it to be a mushroom. After you've moved further, you notice there's a grey block with Grey Yardovichs that fall. Attack Yardiovich while he is on it. Boss Fight: Grey Yardovich Use same strategy as before and he'll die quick. After the fight, save and heal then jump down to your next boss. Boss Fight: Domino and Cloaker Using same strategy as all other bosses, pick 1 of the 2 targets to attack and defeat first. Afterwards, the other will retreat to the Earthlink located further back on this battle. When fighting the Earthlink, be sure to defeat the monster on top first. He will freeze when he has been defeated and will vanish when the Earthlink has been destroyed. Boss Fight: Clerk + Manager + Director This is 3 bosses spread out. They all fight pretty similarly. Using the same defined strategy previous bosses. I also recommend using multiple target attacks to clear out the pesky hammers. When you defeat the first boss, Toad will appear in the factory with reduced prices on items. Boss Fight: Factory Chief + Gunyolk The only enemy you should concern yourself with is the Factory Chief. Kill him first and take on Gunyolk last. The chief is easy to beat so you won't have to worry about him for too much. Using Toadstool as healer, take down your last boss before you reach the final boss. Save your game too. Final Boss: Smithy Your immediate concern should be to defeat Smelter asap. You do not want Smelter creating more monsters for you to face. Those monsters will use multiple target attacks sometimes that will make it difficult to catch up. Once Smelter has been finished, unleash havoc on Smithy. Smithy will eventually go into a rage and it will cause the floor to break apart. Smithy will then reveal his true form. Now, you have 1 pest you must take care of constantly. The bottom part of Smithy's body likes to come back to life and causes a great deal of damage. The Smithy head changes all the time. He has several forms.. Tank: Strong defense and attack. I assume it is weak to magic. Magician Head: Strong Magic defense and attack but weak to physical attacks Treasure Head: Balanced stats. It will cause different ailments to your group. Metal Head: Strong defense and Magic defense. It will remove any boosts used on your group (shredder). Plan your attacks accordingly, replenish magic and use Toadstool as your medic. If all goes well, you should win without too much trouble. A great end to a wonderful game! Enjoy the ending! |
Perma Banned
Affected by 'Laziness Syndrome'
Registered: 07-22-11
Location: Ohio, USA
Last Post: 3202 days
Last Active: 3202 days
| Tactician |
Affected by 'Laziness Syndrome'
Registered: 07-22-11
Location: Ohio, USA
Last Post: 3202 days
Last Active: 3202 days
(edited by Fireproof on 06-23-13 11:47 AM)
06-14-13 03:11 PM
 Pacman+Mariofan is Offline
| ID: 817187 | 18 Words
Pacman+Mariofan is Offline
| ID: 817187 | 18 Words
 Pacman+Mariofan is Offline
| ID: 817187 | 18 Words
PacmanandMariofan
Level: 165

POSTS: 445/9337
POST EXP: 662200
LVL EXP: 58697467
CP: 38398.8
VIZ: 1566370

POSTS: 445/9337
POST EXP: 662200
LVL EXP: 58697467
CP: 38398.8
VIZ: 1566370
Likes: 0 Dislikes: 0
This is the longest game guide I've ever seen! Very detailed and very helpful! Good job, man! |
Vizzed Elite
2-Time VCS Winner
Affected by 'Laziness Syndrome'
Registered: 10-22-12
Location: The Milky Way (not the candy)
Last Post: 985 days
Last Active: 985 days
2-Time VCS Winner
| Philippians 4:6-7 |
Affected by 'Laziness Syndrome'
Registered: 10-22-12
Location: The Milky Way (not the candy)
Last Post: 985 days
Last Active: 985 days
06-14-13 03:46 PM
 GenesisJunkie is Offline
| ID: 817217 | 29 Words
GenesisJunkie is Offline
| ID: 817217 | 29 Words
 GenesisJunkie is Offline
| ID: 817217 | 29 Words
GenesisJunkie
Level: 84

POSTS: 719/1975
POST EXP: 136547
LVL EXP: 5620389
CP: 11436.7
VIZ: 91175

POSTS: 719/1975
POST EXP: 136547
LVL EXP: 5620389
CP: 11436.7
VIZ: 91175
Likes: 0 Dislikes: 0
I'm not gonna lie I didn't read it all but what I did read was awesome. You did one heck of a job. Keep on killing it my man. I'm not gonna lie I didn't read it all but what I did read was awesome. You did one heck of a job. Keep on killing it my man. |
Vizzed Elite
Affected by 'Laziness Syndrome'
Registered: 03-03-13
Location: U.S.
Last Post: 3174 days
Last Active: 2965 days
| Vizzeds official Sega addict |
Affected by 'Laziness Syndrome'
Registered: 03-03-13
Location: U.S.
Last Post: 3174 days
Last Active: 2965 days
06-14-13 10:54 PM
 Mohammedroxx3 is Offline
| ID: 817455 | 54 Words
Mohammedroxx3 is Offline
| ID: 817455 | 54 Words
 Mohammedroxx3 is Offline
| ID: 817455 | 54 Words
Mohammedroxx3
mohammedroxx3
mohammedroxx3
Level: 123

POSTS: 431/4716
POST EXP: 427341
LVL EXP: 20739337
CP: 37422.8
VIZ: 1465554

POSTS: 431/4716
POST EXP: 427341
LVL EXP: 20739337
CP: 37422.8
VIZ: 1465554
Likes: 0 Dislikes: 0
Fireproof : Whoa. . . That is one heck of a long and awesome walkthrough man. This time I'm being really serious. I have never seen such a long walkthrough before. That is one heck of an awesome job man! There is nothing else I can say except. . . Keep up the great work!  That is one heck of an awesome job man! There is nothing else I can say except. . . Keep up the great work! |
Vizzed Elite
Affected by 'Laziness Syndrome'
Registered: 03-03-13
Location: Earth?
Last Post: 1150 days
Last Active: 1038 days
Affected by 'Laziness Syndrome'
Registered: 03-03-13
Location: Earth?
Last Post: 1150 days
Last Active: 1038 days
06-19-13 11:17 PM
 GuardianZack is Offline
| ID: 820982 | 83 Words
GuardianZack is Offline
| ID: 820982 | 83 Words
 GuardianZack is Offline
| ID: 820982 | 83 Words
GuardianZack
Level: 65

POSTS: 763/1059
POST EXP: 115694
LVL EXP: 2265113
CP: 20266.3
VIZ: 445887

POSTS: 763/1059
POST EXP: 115694
LVL EXP: 2265113
CP: 20266.3
VIZ: 445887
Likes: 0 Dislikes: 0
Fireproof : This made my mouth fall open. I have to say, this is one of the greatest (if not the greatest) walkthroughs I have ever seen on this site. The amount of dedication and patience it would take to write something like this goes way past anything I would have. I would tip my hat to you, if I had one. Davideo7 : Normally, I wouldn't call your attention to something like this, but I feel that this is something even you should see. Fireproof : This made my mouth fall open. I have to say, this is one of the greatest (if not the greatest) walkthroughs I have ever seen on this site. The amount of dedication and patience it would take to write something like this goes way past anything I would have. I would tip my hat to you, if I had one. Davideo7 : Normally, I wouldn't call your attention to something like this, but I feel that this is something even you should see. |
Vizzed Elite
Affected by 'Laziness Syndrome'
Registered: 07-27-12
Location: Knoxville, TN
Last Post: 3856 days
Last Active: 3852 days
 |
Affected by 'Laziness Syndrome'
Registered: 07-27-12
Location: Knoxville, TN
Last Post: 3856 days
Last Active: 3852 days
06-20-13 09:18 AM
Fireproof is Offline
| ID: 821157 | 121 Words
| ID: 821157 | 121 Words
Fireproof
Level: 48
POSTS: 41/518
POST EXP: 219650
LVL EXP: 807447
CP: 11889.2
VIZ: 4005137
POSTS: 41/518
POST EXP: 219650
LVL EXP: 807447
CP: 11889.2
VIZ: 4005137
Likes: 0 Dislikes: 0
Thanks guys. I just really love the game and I felt since there wasn't a walk through that I would create a good one. There was a lot of different information to provide for this game and I didn't realize just how detailed it could be. Playing the game and reading or typing up a walk through take up 2 totally different amounts of time lmao. Plus, the colors to help organize different sets of information was key. It probably took me about 3-4 hours to build it and it still isn't fully completed yet. I missed out some main information on the hidden treasure locations and the 6 doors in Bowser's Keep. Anyway, thank you for the very encouraging feedback. I missed out some main information on the hidden treasure locations and the 6 doors in Bowser's Keep. Anyway, thank you for the very encouraging feedback. |
Perma Banned
Affected by 'Laziness Syndrome'
Registered: 07-22-11
Location: Ohio, USA
Last Post: 3202 days
Last Active: 3202 days
| Tactician |
Affected by 'Laziness Syndrome'
Registered: 07-22-11
Location: Ohio, USA
Last Post: 3202 days
Last Active: 3202 days
06-20-13 12:17 PM
 Davideo7 is Offline
| ID: 821307 | 38 Words
Davideo7 is Offline
| ID: 821307 | 38 Words
 Davideo7 is Offline
| ID: 821307 | 38 Words
Davideo7
Level: 351
POSTS: 28059/45323
POST EXP: 3473262
LVL EXP: 813572016
CP: 191392.6
VIZ: 121648649

POSTS: 28059/45323
POST EXP: 3473262
LVL EXP: 813572016
CP: 191392.6
VIZ: 121648649
Likes: 0 Dislikes: 0
Yeah, this is an incredible walkthrough and I would definitely love to see you make more for the site. If you're ever interested in joining the staff as a walkthrough maker, I would gladly let you join |
The Owner
Owner, Developer, Advertiser, etc
Affected by 'Laziness Syndrome'
Registered: 12-06-04
Location: Wisconsin
Last Post: 33 days
Last Active: 7 days
Owner, Developer, Advertiser, etc
| Founder, Mod, Investor |
Affected by 'Laziness Syndrome'
Registered: 12-06-04
Location: Wisconsin
Last Post: 33 days
Last Active: 7 days
07-01-13 07:45 AM
 TornadoMudkip is Offline
| ID: 829791 | 31 Words
TornadoMudkip is Offline
| ID: 829791 | 31 Words
 TornadoMudkip is Offline
| ID: 829791 | 31 Words
TornadoMudkip
Level: 76

POSTS: 458/1544
POST EXP: 167056
LVL EXP: 3869161
CP: 17242.6
VIZ: 591185

POSTS: 458/1544
POST EXP: 167056
LVL EXP: 3869161
CP: 17242.6
VIZ: 591185
Likes: 0 Dislikes: 0
Wow, incredible like David said! (Mouth falls open) Through the Colours you can see it good and it's easy to read. This Walktrough is just Super! Keep it up making them! Wow, incredible like David said! (Mouth falls open) Through the Colours you can see it good and it's easy to read. This Walktrough is just Super! Keep it up making them! |
Vizzed Elite
Affected by 'Laziness Syndrome'
Registered: 04-06-13
Last Post: 2677 days
Last Active: 2636 days
| The Pringles Addict! |
Affected by 'Laziness Syndrome'
Registered: 04-06-13
Last Post: 2677 days
Last Active: 2636 days
07-05-13 01:57 AM
thekenny99 is Offline
| ID: 836247 | 25 Words
| ID: 836247 | 25 Words
thekenny99
Level: 11
POSTS: 5/19
POST EXP: 1160
LVL EXP: 5699
CP: 63.9
VIZ: 6144
POSTS: 5/19
POST EXP: 1160
LVL EXP: 5699
CP: 63.9
VIZ: 6144
Likes: 0 Dislikes: 0
Great Job on the walkthrough. I love this game too and I'm happy you took the time to make it. You make my childhood happy. |
Member
Affected by 'Laziness Syndrome'
Registered: 06-07-11
Location: Spartanburg, Sc
Last Post: 3931 days
Last Active: 2949 days
Affected by 'Laziness Syndrome'
Registered: 06-07-11
Location: Spartanburg, Sc
Last Post: 3931 days
Last Active: 2949 days
07-05-13 07:42 AM
 Barathemos is Offline
| ID: 836339 | 23 Words
Barathemos is Offline
| ID: 836339 | 23 Words
 Barathemos is Offline
| ID: 836339 | 23 Words
Barathemos
Level: 205

POSTS: 3145/15635
POST EXP: 668938
LVL EXP: 125401495
CP: 46565.7
VIZ: 893933

POSTS: 3145/15635
POST EXP: 668938
LVL EXP: 125401495
CP: 46565.7
VIZ: 893933
Likes: 0 Dislikes: 0
Wow, this was incredible! You did a great job with this! I can't believe even David liked it, that means is was AMAZING. Wow, this was incredible! You did a great job with this! I can't believe even David liked it, that means is was AMAZING. |
Site Staff
Minecraft Admin
Affected by 'Laziness Syndrome'
Registered: 02-17-13
Location: Atlanta, Georgia
Last Post: 55 days
Last Active: 1 day
Minecraft Admin
Affected by 'Laziness Syndrome'
Registered: 02-17-13
Location: Atlanta, Georgia
Last Post: 55 days
Last Active: 1 day
07-05-13 09:59 PM
 IgorBird122 is Offline
| ID: 837276 | 33 Words
IgorBird122 is Offline
| ID: 837276 | 33 Words
 IgorBird122 is Offline
| ID: 837276 | 33 Words
IgorBird122
The_IB122
The_IB122
Level: 140

POSTS: 1008/6414
POST EXP: 526201
LVL EXP: 33112969
CP: 40905.1
VIZ: 779500

POSTS: 1008/6414
POST EXP: 526201
LVL EXP: 33112969
CP: 40905.1
VIZ: 779500
Likes: 0 Dislikes: 0
Fireproof : Wow, here's a walkthough done by the impressive Fireproof, you sure but a whole lot of time into this, I wonder how you post some of those reviews and walkthroughs, it's amazing. |
Vizzed Elite
Affected by 'Laziness Syndrome'
Registered: 01-07-13
Location: The Big Easy
Last Post: 1508 days
Last Active: 1493 days
| The Shadow King |
Affected by 'Laziness Syndrome'
Registered: 01-07-13
Location: The Big Easy
Last Post: 1508 days
Last Active: 1493 days
07-05-13 11:22 PM
 pacman1755 is Offline
| ID: 837486 | 35 Words
pacman1755 is Offline
| ID: 837486 | 35 Words
 pacman1755 is Offline
| ID: 837486 | 35 Words
pacman1755
Level: 195

POSTS: 9913/13170
POST EXP: 454212
LVL EXP: 104183757
CP: 30600.2
VIZ: 341152

POSTS: 9913/13170
POST EXP: 454212
LVL EXP: 104183757
CP: 30600.2
VIZ: 341152
Likes: 0 Dislikes: 0
Wow. That is a pretty detailed review, if I say so myself. And mario RPG is a really REALLY long game. At least to me, that is. You, sir, have a future in game reviewing/writing. |
Vizzed Elite
Affected by 'Laziness Syndrome'
Registered: 05-22-11
Location: Wisconsin
Last Post: 1611 days
Last Active: 90 days
| Winner of The August VCS 2011, December VCS 2013, and Summer 2014 TDV |
Affected by 'Laziness Syndrome'
Registered: 05-22-11
Location: Wisconsin
Last Post: 1611 days
Last Active: 90 days
