

 User Notice
 Forum Links
Thread Information
Creator
07-30-12 04:36 PM
Post
07-30-12 05:07 PM
8.6
Today: 4
Users: 0 unique
Thread Actions


Kingsley's Adventure - Walkthrough
07-30-12 04:36 PM
Laian is Offline
| ID: 626332 | 6674 Words

POSTS: 1431/2232
POST EXP: 457173
LVL EXP: 7143861
CP: 23726.2
VIZ: 3569925

Hello everyone and welcome to another walkthrough. This time, we are back to the Playstation era. It's the system I played a lot during my childhood. I don't know if I mentioned that in my walkthrough of Galerians but if there's a system so memorable for me, it's the Playstation. Among all the games I played on this system, there are many games that a few people know. Some games are quite forgotten and they are quite good at that time. Ok, there were awful, bad games that we want to forget or eradicate from the history of the videogame but some games are probably unknown for you but not for the others. And, one of them is the game I chose for this walkthrough. Ladies and gentlemen, allow me to introduce you a game that I found after watching a TV show at that time dealing with videogames: Kingsley's Adventure. Talk to Adeline in order to get the shield, check the room to the north, open the chest to get two bronze coins and go downstairs. Talk to Old Wrinkle and go through the door behind him to start the training. The first part will test your jumping skills. It’s not really hard though. Jump on the moving platform then jump over the gap, avoiding the kind of pendulum. The guard will give you a dagger and a crossbow for the next part of the training. Go to the next part, talk with the sergeant and beat him. Use your shield by pressing the “circle” button to guard his attacks and strike back with your dagger by pressing the “square” button. It’s useless to use the crossbow on him because you don’t have any arrows. Now, equip your crossbow, take the arrows to the left and shoot the two moving targets (1). Proceed to the next part to the right, shoot another moving target but this time, there’s some obstacles (use the first person view to get rid of this target easily by pressing “R1” button). Your reward will be the cherry key. Go back to the lock, use the key and go to the next part of the training. Toggle the lever to the left, in the next room move the block to the blue tile to the left (where you can see the shape of a lock), step on the green tile and go through the passageway as soon as possible. You completed your training but you can’t keep the weapons. Use the portal to carry on. 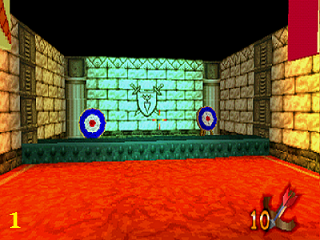   Open the chest to the left to get three bronze coins, talk to Old Wrinkle, he will give you a dagger. Go to the throne room where the king and the queen are waiting for you, talk to them to get your first mission: find a certain Briny Jim in Sea Town. You’ll get the key of the library (or the grapes key). Take the two silver coins in the fountain (a silver coin has the value of five bronze coins if you want to know) and go to the right. Go the left to enter the kitchen, open the chest to the right for two bronze coins, toggle the lever behind the butler and open the secret chest to get three bronze coins (2). Now go back and follow the books on the floor to reach the library. Open the chest to get a heart (not really useful unless you took some damages during the fight against the sergeant), use the grapes key to open the door and go to the castle basement. The first room to the right has the fox hole you need to use in order to travel to Sea Town. Go in the first room to the left, kill the spider and open the chest to get two silver coins. Go the third room to the right, kill the spiders and grab the apple key (3). Use it on the lock to open the door of the room to the left, kill some spiders and flip the switch. You unlocked the room with the fox hole. Use it to save your progress if you wish and go to Sea Town.
CHAPTER 2: THE TROUBLESOME CAPTAIN GALLANGHER Welcome to Sea Town. As the Queen asked you in the castle, you need to find Briny Jim. If you ask the townfolks about him, some of them will answer you that you can find him in the pub of the town. The others will tell you about Captain Gallagher, a pirate who came to town and give some troubles to the townfolks. Plus, you’ll probably learn something about another threat: Rex the Ruthless. This bad guy is in the boat that you can see if you check the shore, where the rusted winch is located (4). Unfortunately, Kingsley can’t move this stuff yet. Don’t expect any jokes here, Kingsley is young and cute. Let’s take care of this Captain Gallagher. Before going to the pub and meet Briny Jim, I suggest you to check all the buildings in order to get some goodies. Now, go to the pub and talk with Briny Jim. He will unlock a secret passageway to the Cutlass Island where your next destination is. Go in, climb up the mountain and enter the lighthouse.    This is the first dungeon of the game. You can’t go back to town, the door behind you is closed. You are greeting by your first enemy at the beginning. Kill him, then avoid the cannonballs on your way, killing all the enemies. At the end of this section, you’ll see a chest with three bronze coins inside and another bronze coin. Proceed to the next section of the dungeon now. The second section is really short. There are three bronze coins to collect, some enemies to kill, some obstacles to avoid and some gaps to jump. Nothing really hard, just take your time and it should be fine. In the next section, the door behind you is closed. The enemies in this section are smarter than before, they are hidden and will ambush you if you are careless. Move cautiously and slowly, kill them and get the silver key from one of them. The gate is closed, you need to find not one switch but the three switches which will raise it. There’s a lever to the left when you start. Run away, hide either to the left or to the right in order to avoid the barrel, get the bronze coin and flip the switch (5). Go to the next intersection, go down, take the bronze coin, flip the switch, go back quickly and avoid the barrel. You’ll find a locked chest where the barrel came from. Use the silver key to open it and get a silver coin. Go to the next intersection, go to the left, avoid the rolling barrel, take the bronze coin and flip the last switch to open the gate and carry on. Are you sick of rolling barrels? There’s more in the new section, woohoo! But this time, they roll AND they swing to the left and to the right. Isn’t that lovely, hmm? However, it’s not really hard if you have a good timing and if you know their pattern. Just use the safe spots between the barrels and the walls to wait, to kill the enemies (because there’s some enemies, yes) and to breathe. There’s a fox footstep to activate, handy if you die (you’ll restart from the last footprint you activated… Yes? It’s a checkpoint? Of course!) and some chests to open with some bronze coins inside. The next section of the dungeon will test your agility and your jumping skills, I’m not kidding. First, collect both of the bronze coins to the left and to the right then jump from platform to platform, avoiding all the cannonballs. There’s a bronze coin to collect and some hearts if you are hurt. No time to breathe, kill the enemy with his Morningstar and go through the green portal. After the rolling barrels, allow me to introduce you the boulders! You remember this scene in this Indiana Jones’ movie? It’s time to see if you could be a perfect adventurer like him. First, open the chest behind you in order to take a bronze coin and RUN! Don’t pay attention to the seagulls, it’s just some distraction. Collect the bronze coins and kill the enemies while you are climbing down the mountain and jump on the inflatable boat to proceed to the next section. Oh, what’s that noise? No, I don’t mean the seagulls, I mean the OTHER noise! Any ideas? Rolling barrels, the return! You have to reach the portal at the top of the mountain. At the beginning, there’s a chest with a heart inside, kept by a crab. Now make your progress, activate the checkpoint and through the portal. More rolling barrels, no no it’s not over, my fellow and brave adventurers. Now, it’s time go down, chased by the rolling barrels of fury. Collect the hearts if you are hurt and the coins, kill the enemy and jump on the inflatable boat to reach Captain Gallagher’s lair. Yes, this fat and bad guy in the center of the isle is the troublesome Captain Gallagher. Don’t open the chests yet, let’s fight him. His pattern is easy: first, he will attack you with his saber, then he will run away like a coward and shoot some bullets, then, seeing it’s useless, he will jump and try to crush you. The number of shots is randomly generated, that’s why I suggest you to move constantly in order to avoid all his attacks and strike back when he lands on the isle to crush you. You’ll find some hearts here and there if you are hurt. Repeat this method until he is defeated. Open all the chests now for some silver coins, get all the bronze coins and remaining hearts if you need them and jump on the galleon. Briny Jim is happy to see you back with his boat and gives you an ancient armor and a new weapon: the ancient axe (which is obviously better than the dagger) to prove his gratitude (6). One threat is eradicated but not Rex the Ruthless. Don’t worry, we’ll kick his butt once we will be able to move this winch. Enter the fox hole and make your report to the King and the Queen of Carrot Castle.
CHAPTER 3: A GREEDY DRAGON Just a note: when you are back to the castle, you’ll notice that the chests are closed and the silver coins in the fountain have reappeared. It’s not a bug, don’t worry. I think the developers planned to do that in order to farm some gold and some extra lives. The Queen is happy to see you with your new stuff. The King, less enthusiastic, gives you your new quest: the people of Poorluck village are terrorized by a dragon. The main door of the castle is now opened. Go without wasting any more time in the fox hole which leads to Poorluck willage. As you can see, the village is destroyed. A swordfish greets you and tells you about this dragon. Snuff the Dragon is the threat, he has to pay for what he did and what he’s still doing. In order to find his lair, follow his footsteps. But, like in Sea Town, check all the buildings, talk with all the characters and collect all the stuff you’ll find in the chests. A certain Dr. Crane in the bar has a friend, an orange mouse, who went in Snuff’s lair but he has never come back. It’s another quest to accomplish. Now, follow the footsteps until you find the entrance of the dungeon (7).   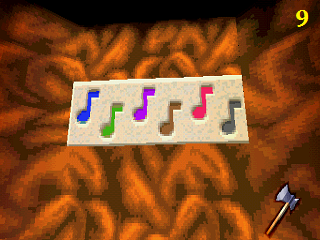 WOW! There’s a lot of fire! The passageway to the next section is barricaded by two fire breathes. See those two buttons with a sword to the left and to the right? They stop the fire breathes. The chest is a trap. If you open it, two spiders will come at you. Take the three bronze coins to your right and go push the buttons, avoiding the fire breathes and collecting the bronze coins. Go to the next section, step on the tile to the left and do a long jump to reach the cherry key to the right. Use it to open the door, open the chests to the left and to the right for some coins, step on both of the tiles in the center of the room, take the grapes key, kill the spiders and go to the left. Collect the coins, activate the switches on the floor and go in the passageway. Here is a puzzle: you have to follow a path. If you make one mistake you have to restart from the beginning. Here is the path to follow from the beginning (those are the directions to go as if you have a compass): north, east, north three times, west twice, south, east, south, west and south. Take all the goodies and the pineapple key (8), go back, use the portal to leave the passageway, open the door to the right with the pineapple key you just got, kill the enemies, grab the silver key, open the locked chest, take the heart, open the next door with the grapes key and use the portal to reach the next section. Here is a tough part. You’ll need lot of focus and agility to make this jumping part otherwise you’ll fall down over and over again. The green goo on the platform is like the ice, which means you’re going to slide like hell in this section. Down, there’s some goodies and some enemies. Well, if that can cheer you up, at some points, some stairs and a cloud will appear. That will allow to restart from another spot instead of the beginning of this jumping part. Once you made this tough section, use the portal to carry on. Go to the right, take the bronze coin and check cautiously the code on the wall (9), then go to the left, kill the spider and reproduce the code with the buttons to the right. If you have some troubles with the colors, here is the code with numbers, each number representing a note from the left to the right: 1, 3, 2, 4, 5 and 6. Go up the stairs now, then to the right, cross the bridge made by the small platforms (watch out the fire breathes!) and activate the checkpoint. The chest has two spiders inside. Cross the other bridge of platforms, go to the left, avoid the guillotines, take the apple key, go back, kill the guard and use the key to open the door. Open the chests to get a heart and five bronze coins, take two other bronze coins next to the stairs, activate the checkpoint, jump on the moving cloud to get the banana key then jump on the other platform, go back where the organ is and open the door with the banana key. Kill the new enemy, grab his silver key, use it on the chest to the right, take the coins, flip the switch and carry on.
CHAPTER 4: A DISEASE IN THE BEER The King is proud of your progress and the Queen gives you a new task: you must go and investigate the case of Rosary Village. First step: the discussion with the Mayor. Go in the fox hole leading to Rosary Village that you will find outside the castle, after the second gate opened (the fox hole looks like a barrel). Oh god! All the people are ill, well those who drank some beer. The only survivors seem to be, according to the person, in the Hera’s Coffee Shop. You’ll find it to your right (there’s a coffee pot outside). Talk to the cow to the right, she will give you a coffee cup (11). Check all the buildings before going to the town hall behind the coffee shop. Give the coffee cup to the seagull and enter the town hall. Talk to the mayor in order to get the password, go out, and go to the abbey behind the town hall. After saying the password to the monk, you can go in the abbey. You have to talk to Abbot Harry who is in the chapel to the right. You’ll meet halfway a curious monk who looks a bit shaky. There’s a chest with five bronze coins to the right in the chapel and Abbot Harry is to the left. In order to make the antidote, you’ll need three herbs that you can only find in the cataombs of the abbey. You’ll get the grapes key after the discussion. Go back to the entrance and use the key with the lock located in front of the stuff. The gate is opened and you can enter the the catacombs now. Kill the bugs, get the coins and go to the next room. The treasure chest in this room has three hearts. Notice the three paths to the west, to the north and to the east? There’s a puzzle in each room with one of the herbs you need to collect. Take the coins and go to the left first. Clean the room up, move the coffins to the specific tile on the floor (look at the size of the coffins and the tile). Once all the coffins are on their respective spots, the cage rises up and you can get the herb (12). Go back and choose the northern path. There’s an extra life in the treasure chest to the north, some bugs which will respawn until you get the herb and some coins. Step on the pillar with the bug, then jump on the next pillar with another bug and repeat the same thing over and over again until you reach the switch. It’s a bit tough, I admit but there’s a checkpoint on a pillar haflway. The gate will rise up and you will be able to get the second herb if you jump from barrel to barrel. Now go back and go to the last room. Another puzzle yeah! Clean the room up, take the coins, you’ll find a heart in the chest to the right (the other is trapped). Now, go down, move the barrels in order to reveal a code made of colors and roman numbers. In fact, it’s simple you have to press the button up here from the first to the last. Begin with the color assigned to the “I”, then the one assigned to the “II” and etc etc. In other words, you press in this order: purple, red, blue and yellow. Grab the last herb, go back and… oh the shaky monk is here. Thanks for greeting us… oh wait it’s a bat called Clarence Darklord Jr. So he was the traitor and the one who poisoned the beer?! Not cool, bad Clarence! How to beat him if he flies (well, it’s a bat, a giant bat exactly)? Use your shield to guard his claw attacks and strike back, do some side steps to avoid the sonar and use your shield when he tackles. That will stun him and let you some time to strike back with your sword. Hit him a few times and repeat the same method until he dies. Go back to the beginning, kill the bugs and the minion and climb up the stairs to go back to the abbey. You will get the crossbow and the boots, two other True Knights items. Go back to the castle and do your report to the Queen and the King.
CHAPTER 5: THE ROBE ROBBERS You have to go to Aphasia and meet Cornflour there. His magical robe has been stolen. Hurry up, go outside the castle and jump in the next fox hole. Find Cornflour who is somewhere around the fox hole. It will unlock the ruins after the discussion. His house looks like a magic book and you’ll find a treasure chest containing a heart inside the building. Now go in the ruins. This dungeon is long and tough. It’s a real challenge, you’ll see why. The first part of this dungeon is a bit tough. You have to get rid of the enemies, avoid the spikes and go down. Don’t fall off to the left otherwise you’ll die (Kingsley is not a cat sadly). The first enemy can be pushed by the spikes and die instantly if you hit him with your sword, even if he guards your attacks. The second guard drops a heart when he dies. Downstairs, there’s a locked chest. The last guard has the silver key. Don’t push him in the green goo or else bye bye the key. Once you have the key, open the chest to get some bronze coins. Go to the next part of the dungeon, go down, jump over the green goo, kill the scorpions, avoid the trap, flip the switch and go to the right. Kill the archers with your crossbow, take the arrows if you need them and shoot the targets to open the trapdoors. You’ll get an extra life, a heart and the banana key (13). Oh and each hole has a scorpion keeping the treasure. Now go back, go up, jump from platform to platform, avoid the deadly saws and use the key to open the door to the next part. Do you enjoy the traps? There’s more in this dungeon. The next part has some spikes yeah! Collect the silver coins, open the chest to the right (the other is trapped) and go to the right to get some hearts, some silver coins and some arrows. Go to the left now, shoot the targets to open the trapdoor, step on the button to rise the gate up and go to the next section. 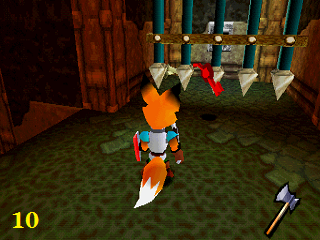 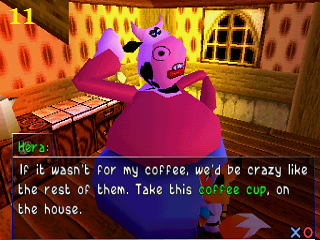  More deadly saws! But those ones have a target behind so you can shoot them with the crossbow in order to destroy them and make this part easier. At the end of the course, you’ll find some arrows and an ambush if you have destroyed all the saws (yes, that’s the way in order to activate this ambush). Kill the enemies, push the buttons to rise some gates up (hurry up the gates will fall after a short period of time), collect the goodies, step on the switch and go to the next part. Flip the switch to the right, then go to the left, jump from platform to platform, flip another switch and jump quickly from switch to switch. Flip the switch, carry on, flip another switch, collect the coins behind the columns and inside the chest to the left (the one to the right is trapped) and set your crossbow to kill the bat flying around with the apple key (14). Use it to open the wall with the lock, shoot the target behind the saw, then kill a guard, collect the gold coin, flip both of the switches, go to the right, shoot the target behind the wooden gate, take the pineapple key and open the wall to the left to carry on. Don’t fall down, take the cherry key, go down, kill the scorpions and the guard (who has the silver key for the locked chest), step on the switch, go back to the upper platform with the elevator (use the switch to activate it), step on the switch to the left and go back to the right to open the chest (if you have the silver key) and the wall. Jump over the green goo, flip the switch to move the statue, kill the enemy behind you, then shoot the target to move the statue one more time and go to the new path. Jump from platform to platform (watch out, the fans will blow you up), step on the switch, open the chest for some bronze coins and go back. Kill the guard and collect the banana key and the coins. Kill the statue, open the wall with the key and carry on. Take the silver coins in the room, set your crossbow and shoot the bat when the arrow is above the center of the target drawn on the floor. Reach the platform with the pyramid and go to the next room. Shoot some arrows to the archer in front of you, jump on the platform, shoot the target to the left, jump on the next platform, shoot the target once again and carry on. Kill the guard in the bunker, collect the silver key and the gold coin then open the locked chest you passed by in order to get three hearts. Go on the next platform, shoot the target in front of you, jump on the other platform, activate the checkpoint and kill the archers in the bunker. Take the arrows if you need them, shoot the target, jump from platform to platform, kill the guard, jump on the platform, shoot the target in front of you and go through the passageway you opened. Hurry up to go to the next room while the wall is fallen otherwise you will have to shoot the target once again to lower the wall. In the next room, the chest is trapped. Push the block to the left, go up the stairs, then go on the block, collect the gold coin, go back on the block and jump from platform to platform. Activate the checkpoint to the left, go up the stairs, push the block, kill the guard to the left and jump from platform to platform. Activate the checkpoint, go up the stairs, push the block, open the chest to get two bronze coins, kill the archer to the left and jump from platform to platform. Push the block, kill the guard, jump on the platform then to the left. Go up the stairs, push the block, kill the guard, push another block and pull the last block to go to the next room. Kill the archer to the right, hidden by the wall and the one in front of you, then jump on the platform. There’s an extra life halfway on a platform. Kill the archer, then go on the platform he was and shoot the targets to lower the bridge. Go to the next room. You’ll need to find four keys and use them on the locks in the center of the room. The keys are in the corners of the room. Watch out the steam rollers while you are looking for the keys and use the environment to avoid them and to not be crushed like a pancake. Once you have collected all the keys, go to the center of the room, use them on the locks to make some stairs appear and go to the next room. Kill the guard, grab his silver key, jump on the platform, shoot the target, kill the archer to the right and go to the left. Kill the archer to the left, open the chest to collect three bronze coins and go back. Shoot the target, jump as soon as possible on the platform, kill the guard to the left and shoot another target (15). Once again, go as soon as possible on the platform, kill the guard to the left, pick up the silver key, open the locked chest to get three silver coins, push the button where the last guard was and go to the next area.   You will see some prisoners in the cages. One is named Sylvester and was supposed to be one of the bosses of the game but he has been finally rejected and he became a prisoner. What a sad fate… Anyway, go up the stairs and go through the portal to face Reggie. Compared to the dungeon itself, Reggie is not a pain when you know the method. Just move constantly, jump over the shockwaves, avoid the lightning bolts and guard with your shield his wand attacks. And obviously strike back when you can seize an opportunity. The only difficulty could be the fact that he will teleport himself after a few hits. Locate him, avoid his attacks and attack him with your sword. After this fight, you will get Cornflour’s magic robe, a gate will lower and Bad Custard will be here. Oh fine, let’s kick his butt then. But, like the coward he is, he will run away, using the portal. Oh well, his time will come. Open all the chests, take the goodies here and there and go through the portal. You are outside the dungeon. Go to Cornflour’s house (which is the magic book looking house), give the magic robe and he will give you the final True Knight item: the magic gemstone. Go back to the castle to make your report to the Queen and the King.
CHAPTER 6: BREAKING THE SPELL You are now a True Knight. Well Kingsley is a True Knight, but as you control Kingsley since the beginning of this quest, you are a True Knight too. Ok, enough ramble. Now, you must go back in each world and defeat the last threat. It’s in fact all the True Knights possessed by Bad Custard’s curse (or spell). They are called the Dark Knights. Well, let’s go back to Sea Town and beat Rex the Ruthless. If you don’t remember how to go to Sea Town, the fox hole is in the castle basement. Now, you will be able to turn the winch on the shore. Go in the boat and get ready to face Rex the Ruthless. Kill the enemy to the left, take the heart and step on the switch. Kill another enemy, take the heart and step on another switch. Kill the last enemy, take the extra life and step on the last switch. The platform is now lowered. Go through the portal and face the first Dark Knight. Rex is not really tough to beat. First of all, guard his hits and strike back. He will teleport himself on a pillar, summon a dark cloud which will chase you for a short period of time and will throw some green balls at you. Move constantly until he goes back on the floor, guard his hits and strike back. Repeat the same method until he dies. You saved the first True Knight possessed by Bad Custard. Three more to go and you will be able to go to Skull Island for the last battle. Now, let’s go to Poorluck and face Judas (and no, I will not write the lyrics of Lady Gaga’s song ha ha ha XD ). 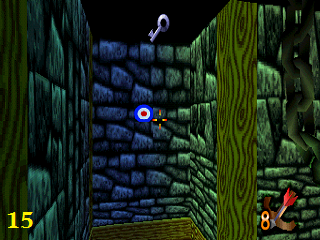  In order to find Judas’ lair, find a creepy gate (16). Step on the tile to reach the other side of the gap. Go in the lair and face Judas. How to beat him? Well, like in a bullfight. Go in front of a wall, let him dash and avoid his tackle. He will be stunned and you will be able to give him a few hits. Sometimes, he will punch the ground to make some rocks fall off. Nothing really frightening, stay focused on him and strike him until he dies. You saved the second True Knight. Now, it’s time to go to Rosary Village and beat the third Dark Knight. Find a specific tile in front of the pub (not the coffee shop), use the gemstone and jump from emerald to emerald in order to reach the lair of the third Dark Knight. Now, it’s time to face Oscar the eagle. Set your crossbow and shoot him with your arrows. Watch out his eggs, they are explosive and may have some spiders inside. If you shoot correctly, he shouldn’t hit you with the egg he carries. After each shot, he will go to another nest and pick up another egg. Repeat this method until he dies. You saved the third True Knight. One more to go. Now, go to Aphasia Village and save the last True Knight. Cornflour will summon a bridge in order to reach the lair of the last Dark Knight. Go on the towers, use the special arrows to shoot the eyes of the totem and unlock the door of the dungeon. Go in the lair now. Avoid the bees, check all the hives to get some goodies and push some buttons to make the apple key appear. Use the block made of honey to reach those hives and activate the stairs if you put it on the specific tile. Use the key on the lock to open the door and jump in the hole to face the last Dark Knight. Nothing really hard with this boss: just avoid his magic missiles, guard his close attacks and strike back. If he goes up here, follow him and repeat the same method until he dies. You saved the last True Knight. Now, you can face Bad Custard and put an end to his reign of terror.
FINAL CHAPTER: THE FINAL SHOWDOWN This is it. You against Bad Custard, the evil wizard. The one who stole the magic book and turned the True Knights you saved into dark minions. The one who is the bad guy of the story. The one who is a rat with big eyebrows. Well, you have to beat it once and for all. You will find nothing on the island so climb up the mountain using the black road and go in Bad Custard’s lair. Don’t fall in the lava, it’s not time for a roasted fox. Bad Custard is really happy to see Kingsley as you can see that he will offer you during this epic fight a few tricks he knows. You will have to avoid all the spells he will cast and strike back when you are close to him. Guard his close attacks and give some hits to this rat until he goes up. Follow him, repeat the same method until he goes to the highest platform. You will find some hearts on the others wooden platforms if you are hurt. Just one advice: don’t fall off! Avoid all the spells Bad Custard will throw at you when you are on the wooden platform and do the final blow. Bad Custard will fall in the cauldron and you will bring the magic book back to the Queen and peace to the Fruit Kingdom. Watch the credits and the final FMV. Congratulations, you beat Kingsley’s Adventure and you become a True Knight of the Fruit Kingdom. 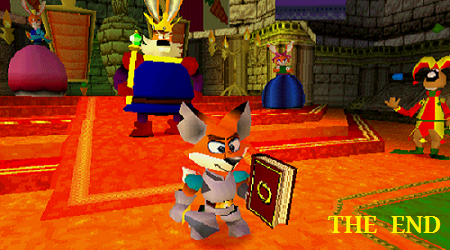
Hello everyone and welcome to another walkthrough. This time, we are back to the Playstation era. It's the system I played a lot during my childhood. I don't know if I mentioned that in my walkthrough of Galerians but if there's a system so memorable for me, it's the Playstation. Among all the games I played on this system, there are many games that a few people know. Some games are quite forgotten and they are quite good at that time. Ok, there were awful, bad games that we want to forget or eradicate from the history of the videogame but some games are probably unknown for you but not for the others. And, one of them is the game I chose for this walkthrough. Ladies and gentlemen, allow me to introduce you a game that I found after watching a TV show at that time dealing with videogames: Kingsley's Adventure. Talk to Adeline in order to get the shield, check the room to the north, open the chest to get two bronze coins and go downstairs. Talk to Old Wrinkle and go through the door behind him to start the training. The first part will test your jumping skills. It’s not really hard though. Jump on the moving platform then jump over the gap, avoiding the kind of pendulum. The guard will give you a dagger and a crossbow for the next part of the training. Go to the next part, talk with the sergeant and beat him. Use your shield by pressing the “circle” button to guard his attacks and strike back with your dagger by pressing the “square” button. It’s useless to use the crossbow on him because you don’t have any arrows. Now, equip your crossbow, take the arrows to the left and shoot the two moving targets (1). Proceed to the next part to the right, shoot another moving target but this time, there’s some obstacles (use the first person view to get rid of this target easily by pressing “R1” button). Your reward will be the cherry key. Go back to the lock, use the key and go to the next part of the training. Toggle the lever to the left, in the next room move the block to the blue tile to the left (where you can see the shape of a lock), step on the green tile and go through the passageway as soon as possible. You completed your training but you can’t keep the weapons. Use the portal to carry on. Open the chest to the left to get three bronze coins, talk to Old Wrinkle, he will give you a dagger. Go to the throne room where the king and the queen are waiting for you, talk to them to get your first mission: find a certain Briny Jim in Sea Town. You’ll get the key of the library (or the grapes key). Take the two silver coins in the fountain (a silver coin has the value of five bronze coins if you want to know) and go to the right. Go the left to enter the kitchen, open the chest to the right for two bronze coins, toggle the lever behind the butler and open the secret chest to get three bronze coins (2). Now go back and follow the books on the floor to reach the library. Open the chest to get a heart (not really useful unless you took some damages during the fight against the sergeant), use the grapes key to open the door and go to the castle basement. The first room to the right has the fox hole you need to use in order to travel to Sea Town. Go in the first room to the left, kill the spider and open the chest to get two silver coins. Go the third room to the right, kill the spiders and grab the apple key (3). Use it on the lock to open the door of the room to the left, kill some spiders and flip the switch. You unlocked the room with the fox hole. Use it to save your progress if you wish and go to Sea Town.
CHAPTER 2: THE TROUBLESOME CAPTAIN GALLANGHER Welcome to Sea Town. As the Queen asked you in the castle, you need to find Briny Jim. If you ask the townfolks about him, some of them will answer you that you can find him in the pub of the town. The others will tell you about Captain Gallagher, a pirate who came to town and give some troubles to the townfolks. Plus, you’ll probably learn something about another threat: Rex the Ruthless. This bad guy is in the boat that you can see if you check the shore, where the rusted winch is located (4). Unfortunately, Kingsley can’t move this stuff yet. Don’t expect any jokes here, Kingsley is young and cute. Let’s take care of this Captain Gallagher. Before going to the pub and meet Briny Jim, I suggest you to check all the buildings in order to get some goodies. Now, go to the pub and talk with Briny Jim. He will unlock a secret passageway to the Cutlass Island where your next destination is. Go in, climb up the mountain and enter the lighthouse. This is the first dungeon of the game. You can’t go back to town, the door behind you is closed. You are greeting by your first enemy at the beginning. Kill him, then avoid the cannonballs on your way, killing all the enemies. At the end of this section, you’ll see a chest with three bronze coins inside and another bronze coin. Proceed to the next section of the dungeon now. The second section is really short. There are three bronze coins to collect, some enemies to kill, some obstacles to avoid and some gaps to jump. Nothing really hard, just take your time and it should be fine. In the next section, the door behind you is closed. The enemies in this section are smarter than before, they are hidden and will ambush you if you are careless. Move cautiously and slowly, kill them and get the silver key from one of them. The gate is closed, you need to find not one switch but the three switches which will raise it. There’s a lever to the left when you start. Run away, hide either to the left or to the right in order to avoid the barrel, get the bronze coin and flip the switch (5). Go to the next intersection, go down, take the bronze coin, flip the switch, go back quickly and avoid the barrel. You’ll find a locked chest where the barrel came from. Use the silver key to open it and get a silver coin. Go to the next intersection, go to the left, avoid the rolling barrel, take the bronze coin and flip the last switch to open the gate and carry on. Are you sick of rolling barrels? There’s more in the new section, woohoo! But this time, they roll AND they swing to the left and to the right. Isn’t that lovely, hmm? However, it’s not really hard if you have a good timing and if you know their pattern. Just use the safe spots between the barrels and the walls to wait, to kill the enemies (because there’s some enemies, yes) and to breathe. There’s a fox footstep to activate, handy if you die (you’ll restart from the last footprint you activated… Yes? It’s a checkpoint? Of course!) and some chests to open with some bronze coins inside. The next section of the dungeon will test your agility and your jumping skills, I’m not kidding. First, collect both of the bronze coins to the left and to the right then jump from platform to platform, avoiding all the cannonballs. There’s a bronze coin to collect and some hearts if you are hurt. No time to breathe, kill the enemy with his Morningstar and go through the green portal. After the rolling barrels, allow me to introduce you the boulders! You remember this scene in this Indiana Jones’ movie? It’s time to see if you could be a perfect adventurer like him. First, open the chest behind you in order to take a bronze coin and RUN! Don’t pay attention to the seagulls, it’s just some distraction. Collect the bronze coins and kill the enemies while you are climbing down the mountain and jump on the inflatable boat to proceed to the next section. Oh, what’s that noise? No, I don’t mean the seagulls, I mean the OTHER noise! Any ideas? Rolling barrels, the return! You have to reach the portal at the top of the mountain. At the beginning, there’s a chest with a heart inside, kept by a crab. Now make your progress, activate the checkpoint and through the portal. More rolling barrels, no no it’s not over, my fellow and brave adventurers. Now, it’s time go down, chased by the rolling barrels of fury. Collect the hearts if you are hurt and the coins, kill the enemy and jump on the inflatable boat to reach Captain Gallagher’s lair. Yes, this fat and bad guy in the center of the isle is the troublesome Captain Gallagher. Don’t open the chests yet, let’s fight him. His pattern is easy: first, he will attack you with his saber, then he will run away like a coward and shoot some bullets, then, seeing it’s useless, he will jump and try to crush you. The number of shots is randomly generated, that’s why I suggest you to move constantly in order to avoid all his attacks and strike back when he lands on the isle to crush you. You’ll find some hearts here and there if you are hurt. Repeat this method until he is defeated. Open all the chests now for some silver coins, get all the bronze coins and remaining hearts if you need them and jump on the galleon. Briny Jim is happy to see you back with his boat and gives you an ancient armor and a new weapon: the ancient axe (which is obviously better than the dagger) to prove his gratitude (6). One threat is eradicated but not Rex the Ruthless. Don’t worry, we’ll kick his butt once we will be able to move this winch. Enter the fox hole and make your report to the King and the Queen of Carrot Castle.
CHAPTER 3: A GREEDY DRAGON Just a note: when you are back to the castle, you’ll notice that the chests are closed and the silver coins in the fountain have reappeared. It’s not a bug, don’t worry. I think the developers planned to do that in order to farm some gold and some extra lives. The Queen is happy to see you with your new stuff. The King, less enthusiastic, gives you your new quest: the people of Poorluck village are terrorized by a dragon. The main door of the castle is now opened. Go without wasting any more time in the fox hole which leads to Poorluck willage. As you can see, the village is destroyed. A swordfish greets you and tells you about this dragon. Snuff the Dragon is the threat, he has to pay for what he did and what he’s still doing. In order to find his lair, follow his footsteps. But, like in Sea Town, check all the buildings, talk with all the characters and collect all the stuff you’ll find in the chests. A certain Dr. Crane in the bar has a friend, an orange mouse, who went in Snuff’s lair but he has never come back. It’s another quest to accomplish. Now, follow the footsteps until you find the entrance of the dungeon (7). WOW! There’s a lot of fire! The passageway to the next section is barricaded by two fire breathes. See those two buttons with a sword to the left and to the right? They stop the fire breathes. The chest is a trap. If you open it, two spiders will come at you. Take the three bronze coins to your right and go push the buttons, avoiding the fire breathes and collecting the bronze coins. Go to the next section, step on the tile to the left and do a long jump to reach the cherry key to the right. Use it to open the door, open the chests to the left and to the right for some coins, step on both of the tiles in the center of the room, take the grapes key, kill the spiders and go to the left. Collect the coins, activate the switches on the floor and go in the passageway. Here is a puzzle: you have to follow a path. If you make one mistake you have to restart from the beginning. Here is the path to follow from the beginning (those are the directions to go as if you have a compass): north, east, north three times, west twice, south, east, south, west and south. Take all the goodies and the pineapple key (8), go back, use the portal to leave the passageway, open the door to the right with the pineapple key you just got, kill the enemies, grab the silver key, open the locked chest, take the heart, open the next door with the grapes key and use the portal to reach the next section. Here is a tough part. You’ll need lot of focus and agility to make this jumping part otherwise you’ll fall down over and over again. The green goo on the platform is like the ice, which means you’re going to slide like hell in this section. Down, there’s some goodies and some enemies. Well, if that can cheer you up, at some points, some stairs and a cloud will appear. That will allow to restart from another spot instead of the beginning of this jumping part. Once you made this tough section, use the portal to carry on. Go to the right, take the bronze coin and check cautiously the code on the wall (9), then go to the left, kill the spider and reproduce the code with the buttons to the right. If you have some troubles with the colors, here is the code with numbers, each number representing a note from the left to the right: 1, 3, 2, 4, 5 and 6. Go up the stairs now, then to the right, cross the bridge made by the small platforms (watch out the fire breathes!) and activate the checkpoint. The chest has two spiders inside. Cross the other bridge of platforms, go to the left, avoid the guillotines, take the apple key, go back, kill the guard and use the key to open the door. Open the chests to get a heart and five bronze coins, take two other bronze coins next to the stairs, activate the checkpoint, jump on the moving cloud to get the banana key then jump on the other platform, go back where the organ is and open the door with the banana key. Kill the new enemy, grab his silver key, use it on the chest to the right, take the coins, flip the switch and carry on.
CHAPTER 4: A DISEASE IN THE BEER The King is proud of your progress and the Queen gives you a new task: you must go and investigate the case of Rosary Village. First step: the discussion with the Mayor. Go in the fox hole leading to Rosary Village that you will find outside the castle, after the second gate opened (the fox hole looks like a barrel). Oh god! All the people are ill, well those who drank some beer. The only survivors seem to be, according to the person, in the Hera’s Coffee Shop. You’ll find it to your right (there’s a coffee pot outside). Talk to the cow to the right, she will give you a coffee cup (11). Check all the buildings before going to the town hall behind the coffee shop. Give the coffee cup to the seagull and enter the town hall. Talk to the mayor in order to get the password, go out, and go to the abbey behind the town hall. After saying the password to the monk, you can go in the abbey. You have to talk to Abbot Harry who is in the chapel to the right. You’ll meet halfway a curious monk who looks a bit shaky. There’s a chest with five bronze coins to the right in the chapel and Abbot Harry is to the left. In order to make the antidote, you’ll need three herbs that you can only find in the cataombs of the abbey. You’ll get the grapes key after the discussion. Go back to the entrance and use the key with the lock located in front of the stuff. The gate is opened and you can enter the the catacombs now. Kill the bugs, get the coins and go to the next room. The treasure chest in this room has three hearts. Notice the three paths to the west, to the north and to the east? There’s a puzzle in each room with one of the herbs you need to collect. Take the coins and go to the left first. Clean the room up, move the coffins to the specific tile on the floor (look at the size of the coffins and the tile). Once all the coffins are on their respective spots, the cage rises up and you can get the herb (12). Go back and choose the northern path. There’s an extra life in the treasure chest to the north, some bugs which will respawn until you get the herb and some coins. Step on the pillar with the bug, then jump on the next pillar with another bug and repeat the same thing over and over again until you reach the switch. It’s a bit tough, I admit but there’s a checkpoint on a pillar haflway. The gate will rise up and you will be able to get the second herb if you jump from barrel to barrel. Now go back and go to the last room. Another puzzle yeah! Clean the room up, take the coins, you’ll find a heart in the chest to the right (the other is trapped). Now, go down, move the barrels in order to reveal a code made of colors and roman numbers. In fact, it’s simple you have to press the button up here from the first to the last. Begin with the color assigned to the “I”, then the one assigned to the “II” and etc etc. In other words, you press in this order: purple, red, blue and yellow. Grab the last herb, go back and… oh the shaky monk is here. Thanks for greeting us… oh wait it’s a bat called Clarence Darklord Jr. So he was the traitor and the one who poisoned the beer?! Not cool, bad Clarence! How to beat him if he flies (well, it’s a bat, a giant bat exactly)? Use your shield to guard his claw attacks and strike back, do some side steps to avoid the sonar and use your shield when he tackles. That will stun him and let you some time to strike back with your sword. Hit him a few times and repeat the same method until he dies. Go back to the beginning, kill the bugs and the minion and climb up the stairs to go back to the abbey. You will get the crossbow and the boots, two other True Knights items. Go back to the castle and do your report to the Queen and the King.
CHAPTER 5: THE ROBE ROBBERS You have to go to Aphasia and meet Cornflour there. His magical robe has been stolen. Hurry up, go outside the castle and jump in the next fox hole. Find Cornflour who is somewhere around the fox hole. It will unlock the ruins after the discussion. His house looks like a magic book and you’ll find a treasure chest containing a heart inside the building. Now go in the ruins. This dungeon is long and tough. It’s a real challenge, you’ll see why. The first part of this dungeon is a bit tough. You have to get rid of the enemies, avoid the spikes and go down. Don’t fall off to the left otherwise you’ll die (Kingsley is not a cat sadly). The first enemy can be pushed by the spikes and die instantly if you hit him with your sword, even if he guards your attacks. The second guard drops a heart when he dies. Downstairs, there’s a locked chest. The last guard has the silver key. Don’t push him in the green goo or else bye bye the key. Once you have the key, open the chest to get some bronze coins. Go to the next part of the dungeon, go down, jump over the green goo, kill the scorpions, avoid the trap, flip the switch and go to the right. Kill the archers with your crossbow, take the arrows if you need them and shoot the targets to open the trapdoors. You’ll get an extra life, a heart and the banana key (13). Oh and each hole has a scorpion keeping the treasure. Now go back, go up, jump from platform to platform, avoid the deadly saws and use the key to open the door to the next part. Do you enjoy the traps? There’s more in this dungeon. The next part has some spikes yeah! Collect the silver coins, open the chest to the right (the other is trapped) and go to the right to get some hearts, some silver coins and some arrows. Go to the left now, shoot the targets to open the trapdoor, step on the button to rise the gate up and go to the next section. More deadly saws! But those ones have a target behind so you can shoot them with the crossbow in order to destroy them and make this part easier. At the end of the course, you’ll find some arrows and an ambush if you have destroyed all the saws (yes, that’s the way in order to activate this ambush). Kill the enemies, push the buttons to rise some gates up (hurry up the gates will fall after a short period of time), collect the goodies, step on the switch and go to the next part. Flip the switch to the right, then go to the left, jump from platform to platform, flip another switch and jump quickly from switch to switch. Flip the switch, carry on, flip another switch, collect the coins behind the columns and inside the chest to the left (the one to the right is trapped) and set your crossbow to kill the bat flying around with the apple key (14). Use it to open the wall with the lock, shoot the target behind the saw, then kill a guard, collect the gold coin, flip both of the switches, go to the right, shoot the target behind the wooden gate, take the pineapple key and open the wall to the left to carry on. Don’t fall down, take the cherry key, go down, kill the scorpions and the guard (who has the silver key for the locked chest), step on the switch, go back to the upper platform with the elevator (use the switch to activate it), step on the switch to the left and go back to the right to open the chest (if you have the silver key) and the wall. Jump over the green goo, flip the switch to move the statue, kill the enemy behind you, then shoot the target to move the statue one more time and go to the new path. Jump from platform to platform (watch out, the fans will blow you up), step on the switch, open the chest for some bronze coins and go back. Kill the guard and collect the banana key and the coins. Kill the statue, open the wall with the key and carry on. Take the silver coins in the room, set your crossbow and shoot the bat when the arrow is above the center of the target drawn on the floor. Reach the platform with the pyramid and go to the next room. Shoot some arrows to the archer in front of you, jump on the platform, shoot the target to the left, jump on the next platform, shoot the target once again and carry on. Kill the guard in the bunker, collect the silver key and the gold coin then open the locked chest you passed by in order to get three hearts. Go on the next platform, shoot the target in front of you, jump on the other platform, activate the checkpoint and kill the archers in the bunker. Take the arrows if you need them, shoot the target, jump from platform to platform, kill the guard, jump on the platform, shoot the target in front of you and go through the passageway you opened. Hurry up to go to the next room while the wall is fallen otherwise you will have to shoot the target once again to lower the wall. In the next room, the chest is trapped. Push the block to the left, go up the stairs, then go on the block, collect the gold coin, go back on the block and jump from platform to platform. Activate the checkpoint to the left, go up the stairs, push the block, kill the guard to the left and jump from platform to platform. Activate the checkpoint, go up the stairs, push the block, open the chest to get two bronze coins, kill the archer to the left and jump from platform to platform. Push the block, kill the guard, jump on the platform then to the left. Go up the stairs, push the block, kill the guard, push another block and pull the last block to go to the next room. Kill the archer to the right, hidden by the wall and the one in front of you, then jump on the platform. There’s an extra life halfway on a platform. Kill the archer, then go on the platform he was and shoot the targets to lower the bridge. Go to the next room. You’ll need to find four keys and use them on the locks in the center of the room. The keys are in the corners of the room. Watch out the steam rollers while you are looking for the keys and use the environment to avoid them and to not be crushed like a pancake. Once you have collected all the keys, go to the center of the room, use them on the locks to make some stairs appear and go to the next room. Kill the guard, grab his silver key, jump on the platform, shoot the target, kill the archer to the right and go to the left. Kill the archer to the left, open the chest to collect three bronze coins and go back. Shoot the target, jump as soon as possible on the platform, kill the guard to the left and shoot another target (15). Once again, go as soon as possible on the platform, kill the guard to the left, pick up the silver key, open the locked chest to get three silver coins, push the button where the last guard was and go to the next area. You will see some prisoners in the cages. One is named Sylvester and was supposed to be one of the bosses of the game but he has been finally rejected and he became a prisoner. What a sad fate… Anyway, go up the stairs and go through the portal to face Reggie. Compared to the dungeon itself, Reggie is not a pain when you know the method. Just move constantly, jump over the shockwaves, avoid the lightning bolts and guard with your shield his wand attacks. And obviously strike back when you can seize an opportunity. The only difficulty could be the fact that he will teleport himself after a few hits. Locate him, avoid his attacks and attack him with your sword. After this fight, you will get Cornflour’s magic robe, a gate will lower and Bad Custard will be here. Oh fine, let’s kick his butt then. But, like the coward he is, he will run away, using the portal. Oh well, his time will come. Open all the chests, take the goodies here and there and go through the portal. You are outside the dungeon. Go to Cornflour’s house (which is the magic book looking house), give the magic robe and he will give you the final True Knight item: the magic gemstone. Go back to the castle to make your report to the Queen and the King.
CHAPTER 6: BREAKING THE SPELL You are now a True Knight. Well Kingsley is a True Knight, but as you control Kingsley since the beginning of this quest, you are a True Knight too. Ok, enough ramble. Now, you must go back in each world and defeat the last threat. It’s in fact all the True Knights possessed by Bad Custard’s curse (or spell). They are called the Dark Knights. Well, let’s go back to Sea Town and beat Rex the Ruthless. If you don’t remember how to go to Sea Town, the fox hole is in the castle basement. Now, you will be able to turn the winch on the shore. Go in the boat and get ready to face Rex the Ruthless. Kill the enemy to the left, take the heart and step on the switch. Kill another enemy, take the heart and step on another switch. Kill the last enemy, take the extra life and step on the last switch. The platform is now lowered. Go through the portal and face the first Dark Knight. Rex is not really tough to beat. First of all, guard his hits and strike back. He will teleport himself on a pillar, summon a dark cloud which will chase you for a short period of time and will throw some green balls at you. Move constantly until he goes back on the floor, guard his hits and strike back. Repeat the same method until he dies. You saved the first True Knight possessed by Bad Custard. Three more to go and you will be able to go to Skull Island for the last battle. Now, let’s go to Poorluck and face Judas (and no, I will not write the lyrics of Lady Gaga’s song ha ha ha XD ). In order to find Judas’ lair, find a creepy gate (16). Step on the tile to reach the other side of the gap. Go in the lair and face Judas. How to beat him? Well, like in a bullfight. Go in front of a wall, let him dash and avoid his tackle. He will be stunned and you will be able to give him a few hits. Sometimes, he will punch the ground to make some rocks fall off. Nothing really frightening, stay focused on him and strike him until he dies. You saved the second True Knight. Now, it’s time to go to Rosary Village and beat the third Dark Knight. Find a specific tile in front of the pub (not the coffee shop), use the gemstone and jump from emerald to emerald in order to reach the lair of the third Dark Knight. Now, it’s time to face Oscar the eagle. Set your crossbow and shoot him with your arrows. Watch out his eggs, they are explosive and may have some spiders inside. If you shoot correctly, he shouldn’t hit you with the egg he carries. After each shot, he will go to another nest and pick up another egg. Repeat this method until he dies. You saved the third True Knight. One more to go. Now, go to Aphasia Village and save the last True Knight. Cornflour will summon a bridge in order to reach the lair of the last Dark Knight. Go on the towers, use the special arrows to shoot the eyes of the totem and unlock the door of the dungeon. Go in the lair now. Avoid the bees, check all the hives to get some goodies and push some buttons to make the apple key appear. Use the block made of honey to reach those hives and activate the stairs if you put it on the specific tile. Use the key on the lock to open the door and jump in the hole to face the last Dark Knight. Nothing really hard with this boss: just avoid his magic missiles, guard his close attacks and strike back. If he goes up here, follow him and repeat the same method until he dies. You saved the last True Knight. Now, you can face Bad Custard and put an end to his reign of terror.
FINAL CHAPTER: THE FINAL SHOWDOWN This is it. You against Bad Custard, the evil wizard. The one who stole the magic book and turned the True Knights you saved into dark minions. The one who is the bad guy of the story. The one who is a rat with big eyebrows. Well, you have to beat it once and for all. You will find nothing on the island so climb up the mountain using the black road and go in Bad Custard’s lair. Don’t fall in the lava, it’s not time for a roasted fox. Bad Custard is really happy to see Kingsley as you can see that he will offer you during this epic fight a few tricks he knows. You will have to avoid all the spells he will cast and strike back when you are close to him. Guard his close attacks and give some hits to this rat until he goes up. Follow him, repeat the same method until he goes to the highest platform. You will find some hearts on the others wooden platforms if you are hurt. Just one advice: don’t fall off! Avoid all the spells Bad Custard will throw at you when you are on the wooden platform and do the final blow. Bad Custard will fall in the cauldron and you will bring the magic book back to the Queen and peace to the Fruit Kingdom. Watch the credits and the final FMV. Congratulations, you beat Kingsley’s Adventure and you become a True Knight of the Fruit Kingdom.
|
| Games have secrets, I have my eagle gaze. |
Affected by 'Laziness Syndrome'
Registered: 10-21-11
Location: France
Last Post: 1861 days
Last Active: 1035 days
07-30-12 05:07 PM
 megamanmaniac is Offline
| ID: 626354 | 7 Words
megamanmaniac is Offline
| ID: 626354 | 7 Words
 megamanmaniac is Offline

POSTS: 393/4966
POST EXP: 452698
LVL EXP: 23253513
CP: 17207.9
VIZ: 151142
So this is that game...looks very interesting. |
| Triple M |
Affected by 'Laziness Syndrome'
Registered: 04-12-12
Location: Access withheld from you
Last Post: 2544 days
Last Active: 2540 days
